Please follow the steps mentioned on the left side bar for easy setup
Introduction
Welcome to eMart, the all-in-one solution for your everyday needs. Our platform seamlessly integrates multiple services into one convenient app, providing you with everything from delicious meals to reliable transportation, all with the click of a button. With eMart, convenience is just a tap away.
eMart is a comprehensive solution for multi-vendor delivery systems, created with Flutter, Firebase, and the Laravel Framework, known for its expressive and elegant syntax. This product includes three apps: Customer, Store, and Driver. This documentation provides guidance for setting up the eMart website and applications. It’s recommended to use Laravel Homestead, a virtual machine that satisfies all system requirements, as your local development environment. Ensure your server meets the following requirements.
Key Features:
1.1 : Multi Vendor Items Delivery:
Craving your favorite dish? Explore a wide range of cuisines from local restaurants and food vendors. Order in with ease and have your meal delivered straight to your doorstep. With eMart’s multivendor food delivery service, you’re spoiled for choice.
1.2 : eCommerce Marketplace:
Experience non-stop shopping excitement with our extensive eCommerce marketplace. Browse through a diverse selection of products from various vendors, ranging from electronics and clothing to home goods and accessories. Find exactly what you need, all in one place.
1.3 : Parcel Delivery:
Need to send a package? No problem. Our parcel delivery service connects you with reliable couriers who can deliver your parcels safely and on time. Whether it’s a small envelope or a large package, we’ve got you covered.
1.4 : Taxi Booking:
Getting around town has never been easier. Book a taxi with just a few taps and enjoy hassle-free transportation to your destination. Our network of drivers ensures prompt service and comfortable rides wherever you need to go.
1.5 : Car Rental:
Planning a road trip? Rent a car through eMart and hit the road with confidence. Choose from a variety of vehicles to suit your needs, whether it’s a compact car for city driving or an SUV for a family adventure. Our seamless booking process makes renting a car a breeze.
1.6 : Admin Panel:
For vendors, our user-friendly admin panel provides all the tools you need to manage your products, orders, and deliveries efficiently. Monitor sales, update inventory, and communicate with customers—all from one centralized dashboard.
1.7 : Website Integration:
Our website complements our app, offering users another convenient way to access our services. Whether you prefer browsing on your desktop or mobile device, our website provides the same seamless experience as our app.
1.8 : Secure Payments:
Shop and pay with confidence thanks to our secure payment system. We support various payment methods, including credit/debit cards, mobile wallets, and cash on delivery, ensuring a smooth and secure transaction every time.
1.9 : Customer Support:
Have questions or need assistance? Our dedicated customer support team is here to help. Whether it’s tracking an order, resolving an issue, or providing general assistance, we’re just a message away.
1.10 : Promotions and Deals:
Take advantage of special promotions and deals offered by our vendors. From discounts on food orders to exclusive offers on car rentals, there’s always a way to save with eMart.
Experience the Convenience of eMart Today:
Whether you’re craving a meal, shopping for essentials, sending a package, booking a ride, or renting a car, eMart has you covered. Download the app or visit our website to discover the ultimate convenience of eMart. Welcome to a world where everything you need is just a tap away. Welcome to eMart.
Setting up Flutter#
2. Setup Setting up Flutter involves several steps. Here’s a basic guide to get you started:
2.1. System Requirements:
Ensure your system meets the minimum requirements for Flutter development. Flutter supports development on Windows, macOS, and Linux. Make sure your system has the necessary hardware and software requirements as specified by Flutter documentation.
Extract the downloaded file to a location on your system. For example, on macOS or Linux, you can extract it to /usr/local and on Windows to C:\.
Add the Flutter bin directory to your system PATH to run Flutter commands from the command line. This step is important for executing Flutter commands globally in your system.
2.3. Install Development Tools:
For Android: Install Android Studio and configure the Flutter plugin. Android Studio provides the Android SDK, which Flutter uses to develop for Android. Ensure you have the Android SDK and the necessary tools installed through Android Studio.
For iOS: You need a macOS system with Xcode installed to develop and deploy Flutter apps for iOS.
2.4. Set up Android Emulator or iOS Simulator:
For Android development, set up an Android Virtual Device (AVD) using Android Studio’s AVD Manager.
For iOS development, use the iOS Simulator provided by Xcode.
Run flutter doctor:
Open a terminal and run flutter doctor. This command checks your system for any dependencies needed for Flutter development.
It will provide feedback on any missing or outdated components and instructions on how to resolve them.
2.5. Install Flutter and Dart plugins for your preferred IDE:
If you’re using VS Code, install the Flutter and Dart plugins to enhance your development experience.
Android Studio also has built-in support for Flutter, but make sure to install the Flutter plugin if it’s not already installed.
2.6. Create your first Flutter project:
Use the flutter create command to create a new Flutter project.
Navigate to the project directory and explore the file structure. You’ll find the main Dart file (main.dart) in the lib directory, where you’ll write your Flutter code.
2.7. Run your Flutter app:
Connect a device or start an emulator/simulator.
Navigate to your Flutter project directory in the terminal and run flutter run.
This will compile your Flutter app and launch it on the connected device or emulator.
2.8. Start Developing:
Once your app is running, you can start developing your Flutter UI and logic. Flutter’s hot reload feature allows you to see your changes instantly without restarting the app.
2.9. Learn and Explore:
Flutter has an extensive set of widgets and libraries. Explore the official Flutter documentation and community resources to learn more about Flutter development.
Flutter Android Setup#
3. Flutter Android Setup
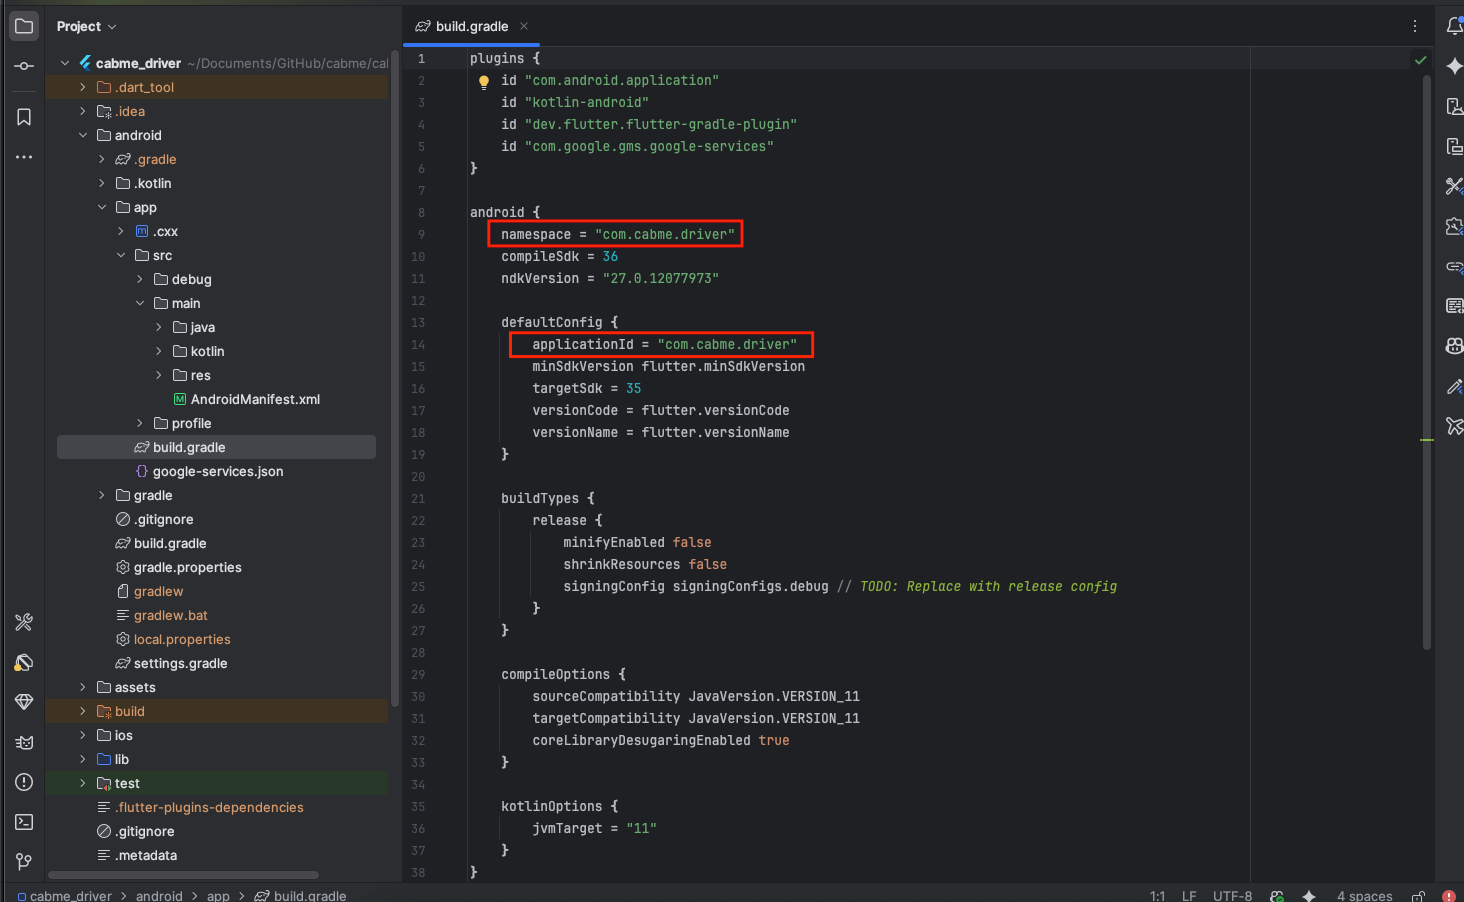
3.1 Changing the package name:
Navigate to the android directory within your Flutter project.
Open the AndroidManifest.xml file located in the app/src/main directory.
Find the package attribute in the tag and change its value to your desired package name.
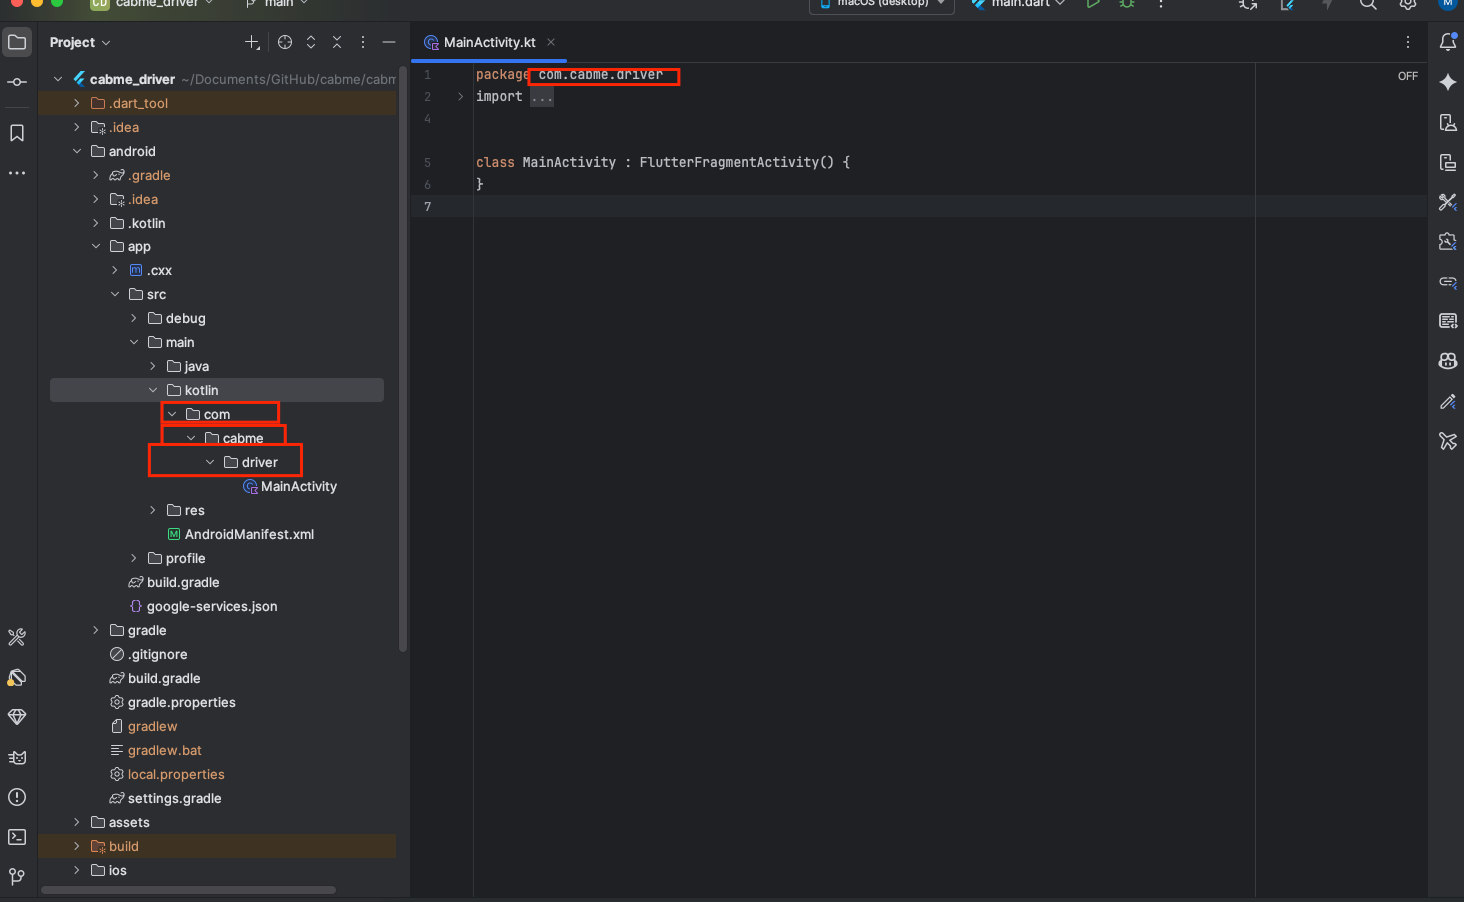
3.2 Update Android source code references:
Open the MainActivity.java file located in android/app/src/main/java/com/your_old_package_name.
Replace occurrences of the old package name with the new package name.
3.3 Change the launcher icon :
3.3.1. Prepare Your New Icons:
First, prepare the new launcher icon images in the required sizes. Android and iOS have different size requirements. You typically need icons in various sizes to support different screen densities.
For Android, you need to replace the existing launcher icon files with your new ones. The launcher icons for Android are stored in the mipmap folders inside the android/app/src/main/res directory.
Replace the existing icon files (ic_launcher.png) in the mipmap folders with your new icon files. Make sure to maintain the same file names and sizes.
You may need to replace icons in various drawable folders for different screen densities (e.g., mipmap-hdpi, mipmap-mdpi, mipmap-xhdpi, mipmap-xxhdpi, mipmap-xxxhdpi).
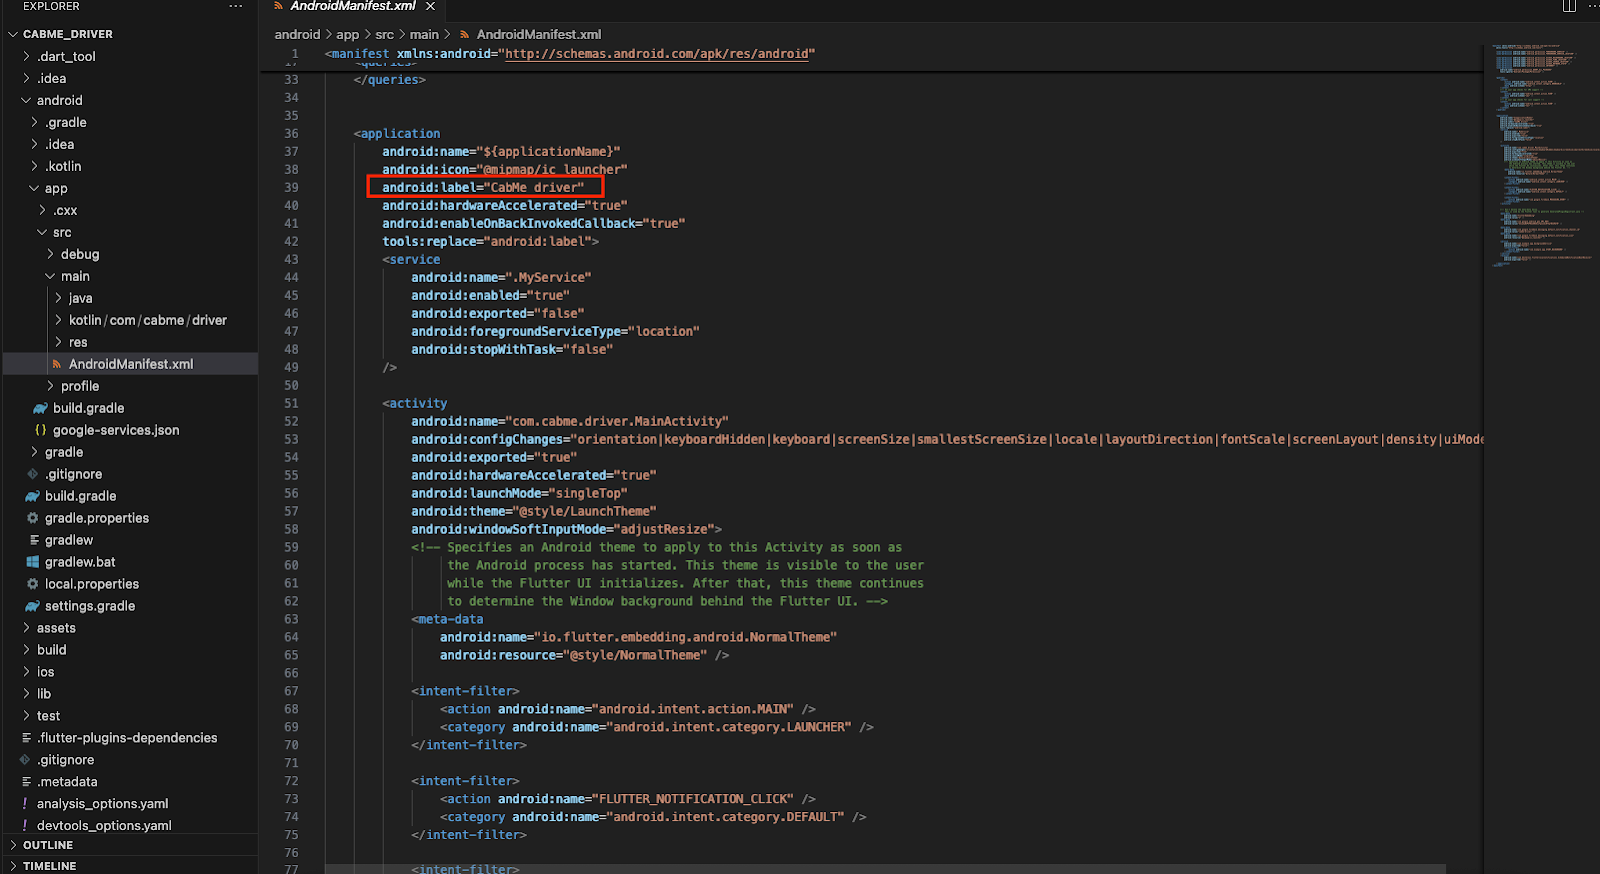
3.4. Change the app name
3.4.1. For Open the android/app/src/main/AndroidManifest.xml file.
3.4.2. Locate the tag.
3.4.3. Change the value of the android:label attribute to your desired app name.
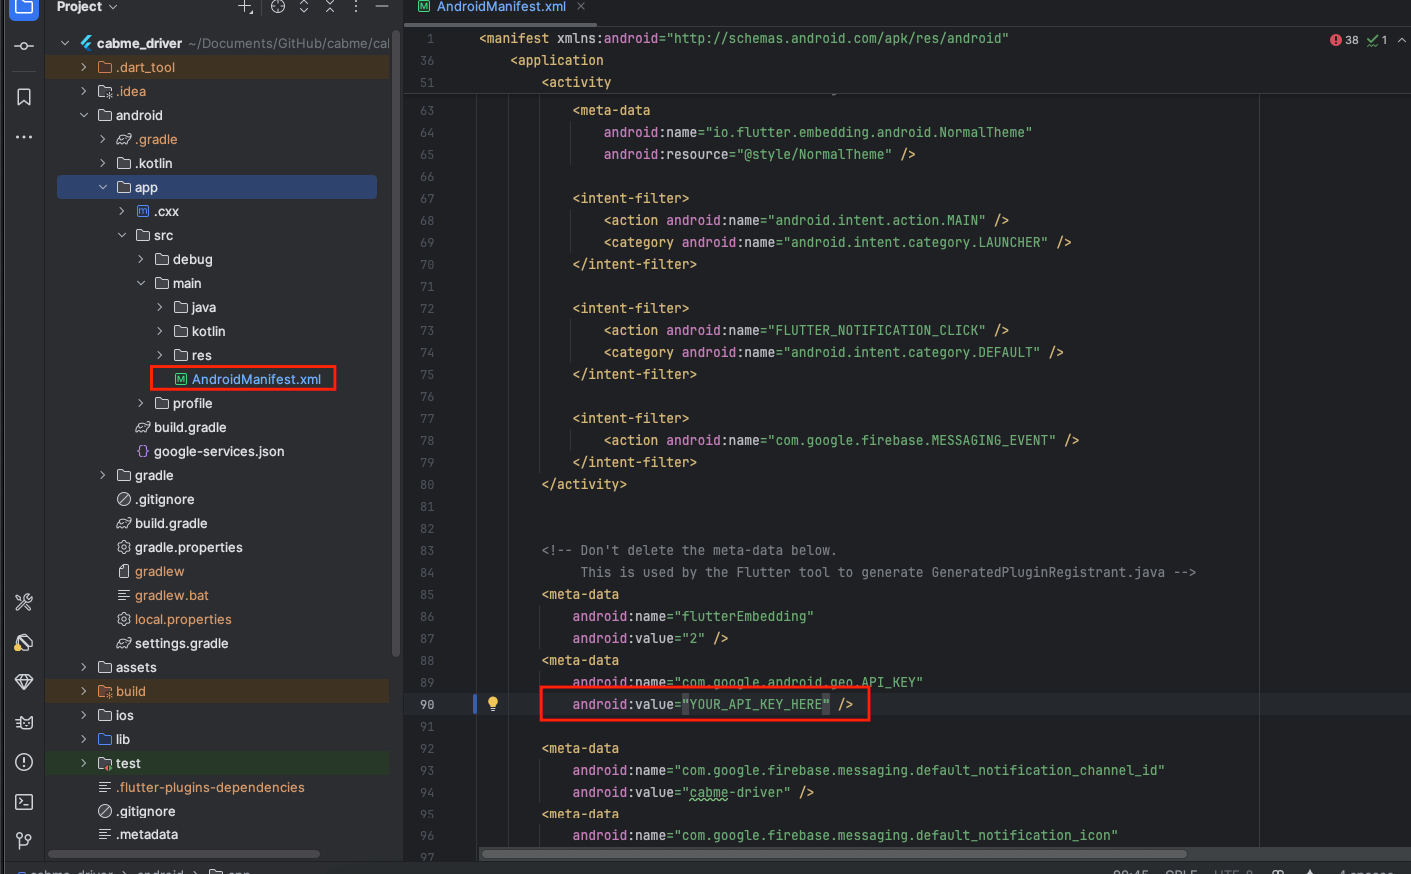
3.5. Change the Google Maps API key :
3.5.1. Navigate to your Flutter project’s android/app/src/main/AndroidManifest.xml file.
3.5.2. Inside the element, locate the tag with the name com.google.android.geo.API_KEY.
3.5.3. Replace the android:value attribute with your new Google Maps API key.
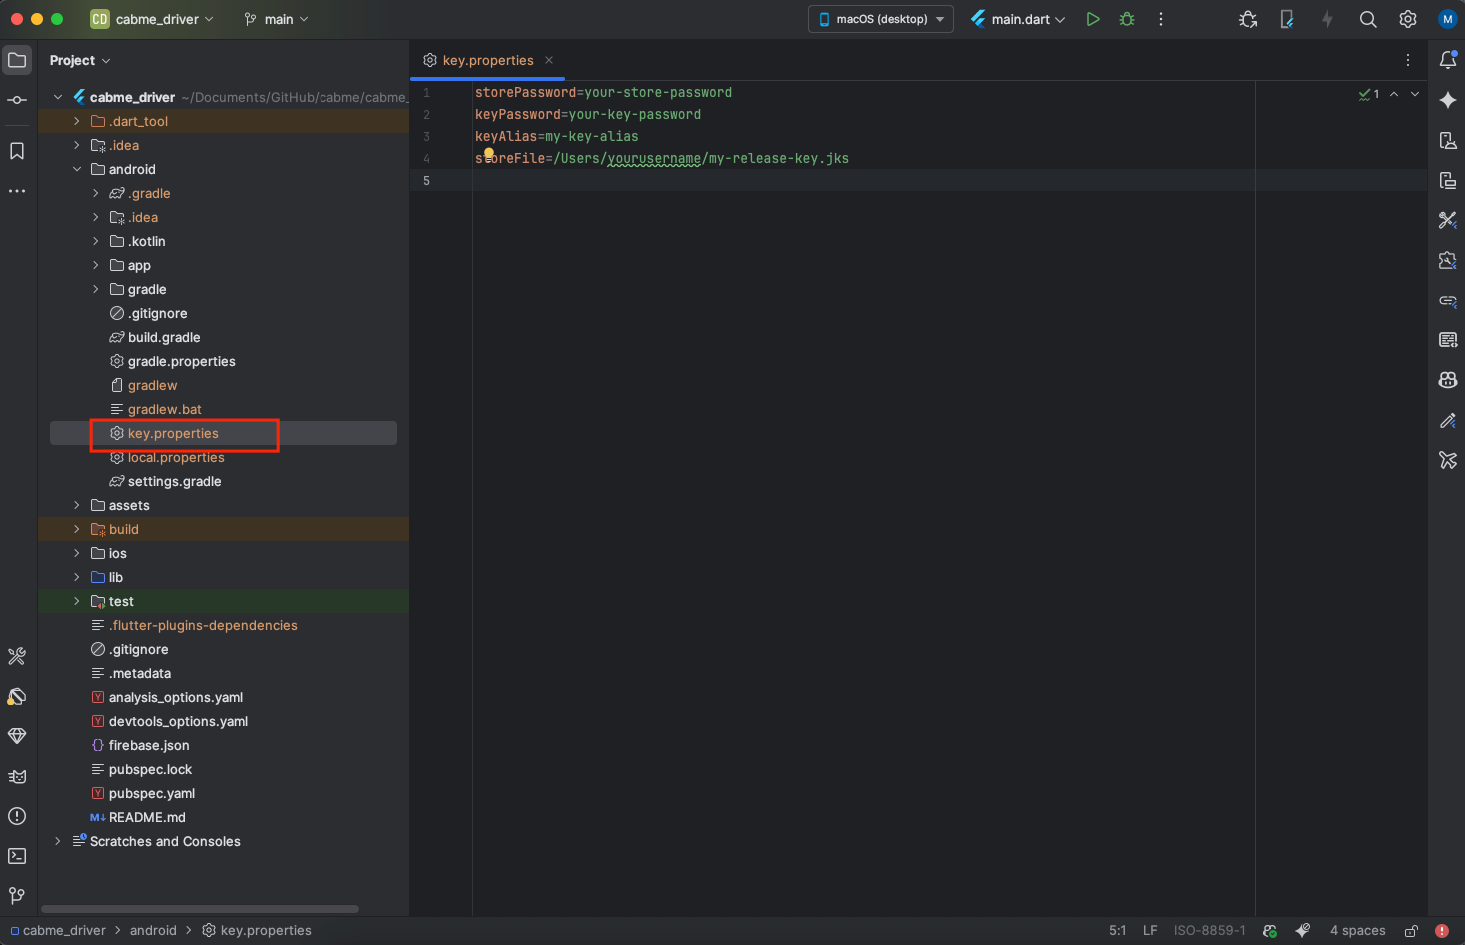
3.6.2.1.-keystore: The path where the .jks file will be created (~/my-release-key.jks for Unix/macOS, C:\Users\YourName\my-release-key.jks for Windows).
3.6.2.2. -keyalg RSA: Algorithm used.
3.6.2.3. -keysize 2048: Key length.
3.6.2.4. -validity 10000: Validity in days (~27 years).
3.6.2.5. -alias my-key-alias: Name of the key within the keystore.
3.6.3. Enter Required Info
3.6.3.1. Keystore password
3.6.3.2. Key password
3.6.3.3 Your name, organization, city, state, and country code
3.6.4. Configure key.properties in Flutter Project
3.7.1.3. Replace path-to-your-keystore-file with the path to your keystore file (usually debug.keystore for debug builds and a custom keystore for release builds) and your-alias-name with the alias name used to generate the keystore.
3.7.1.4. Similarly, execute the following command to generate the SHA-256 key:
3.7.2.1. Open your Flutter project in Android Studio.
3.7.2.2. In the Android view, navigate to app -> Gradle Scripts -> build.gradle (Module: app).
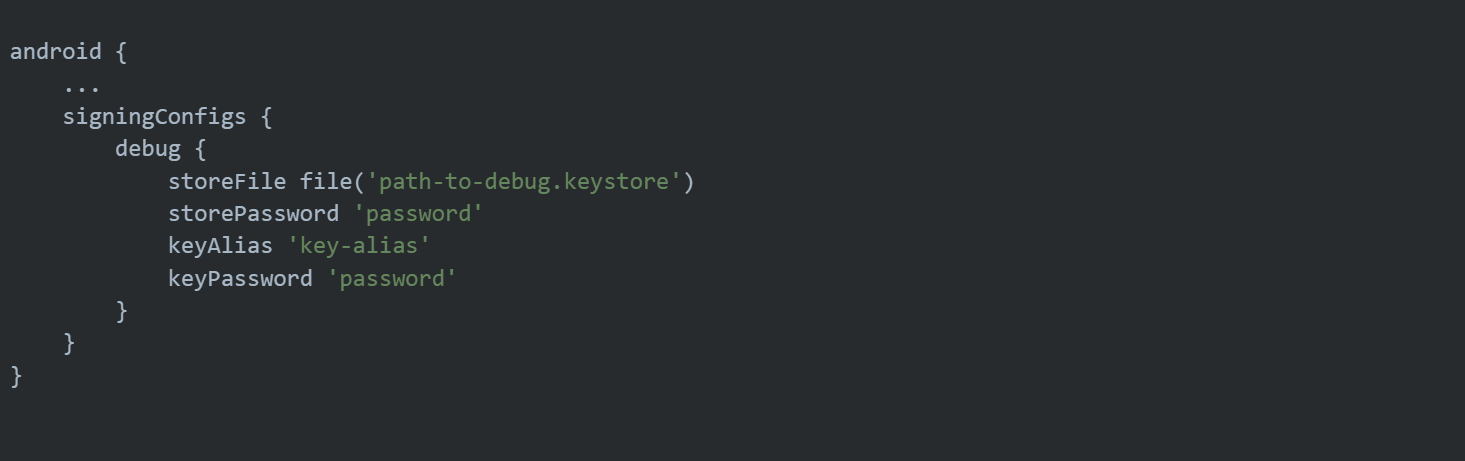
3.7.2.3. Add the following lines to the android block
3.7.2.4. Replace path-to-debug.keystore, password, and key-alias with your keystore file path, password, and key alias respectively. 3.7.2.5. Sync your project to apply changes. 3.7.2.6. Run the following Gradle task in the terminal to get the SHA-1 and SHA-256 keys
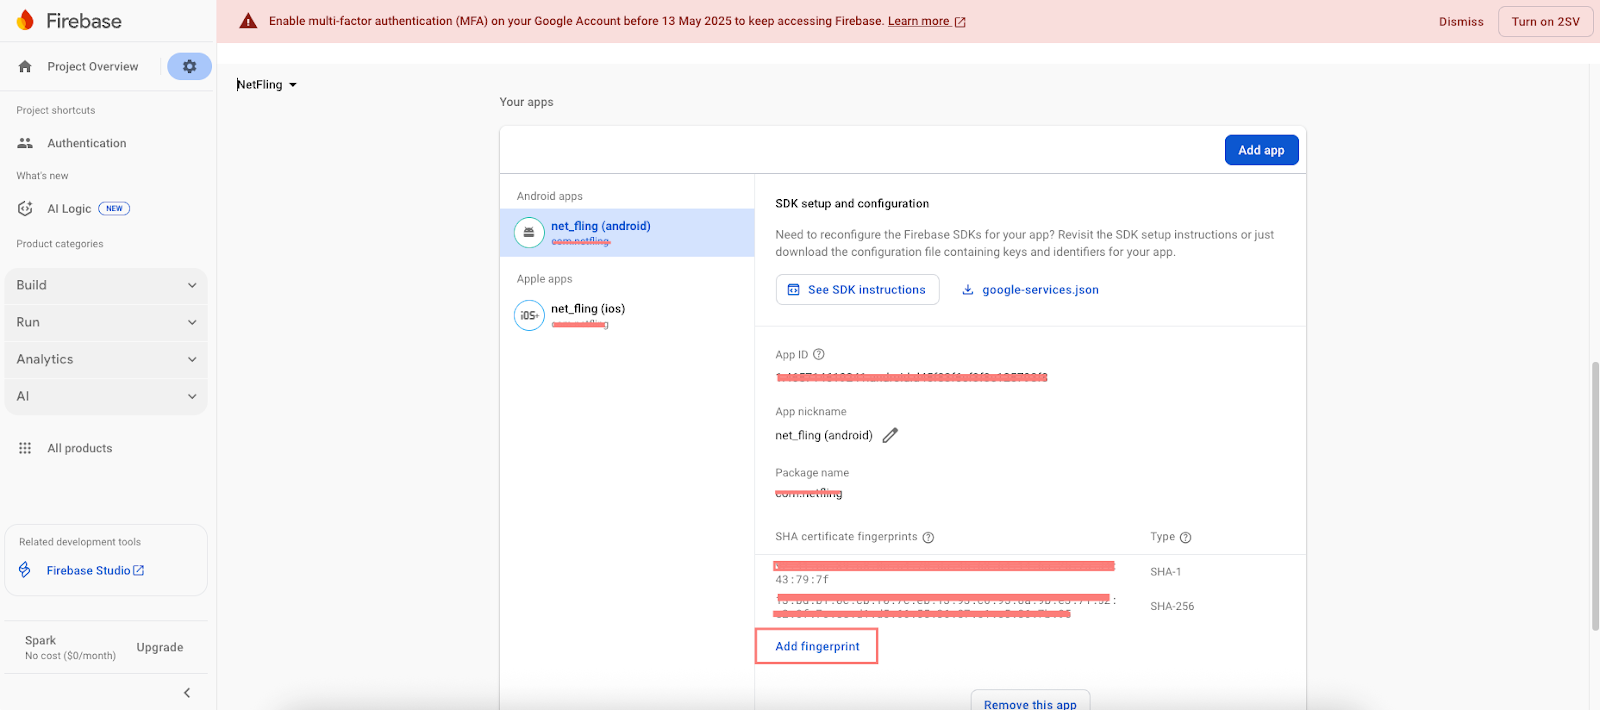
3.7.3. Adding Keys to Firebase Console:
3.7.3.1. Go to the Firebase Console.
3.7.3.2. Select your project.
3.7.3.3. For Android:
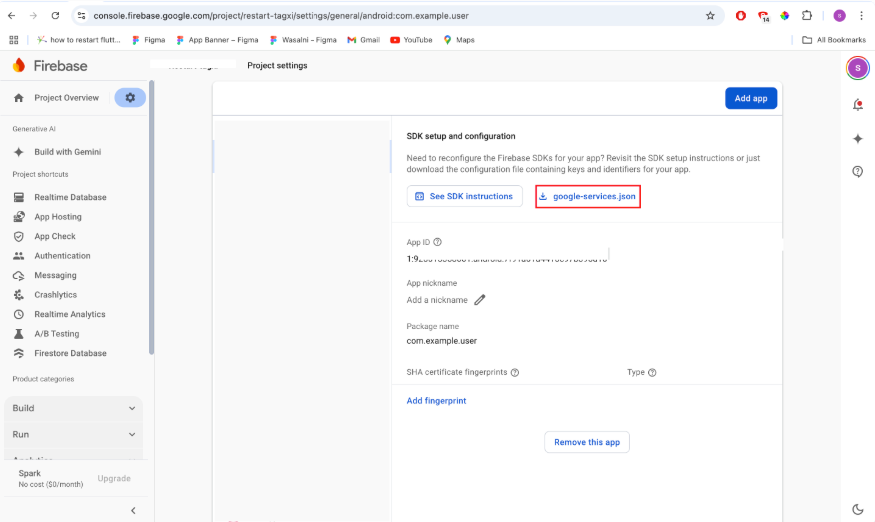
Click on the Android icon to add an Android app.
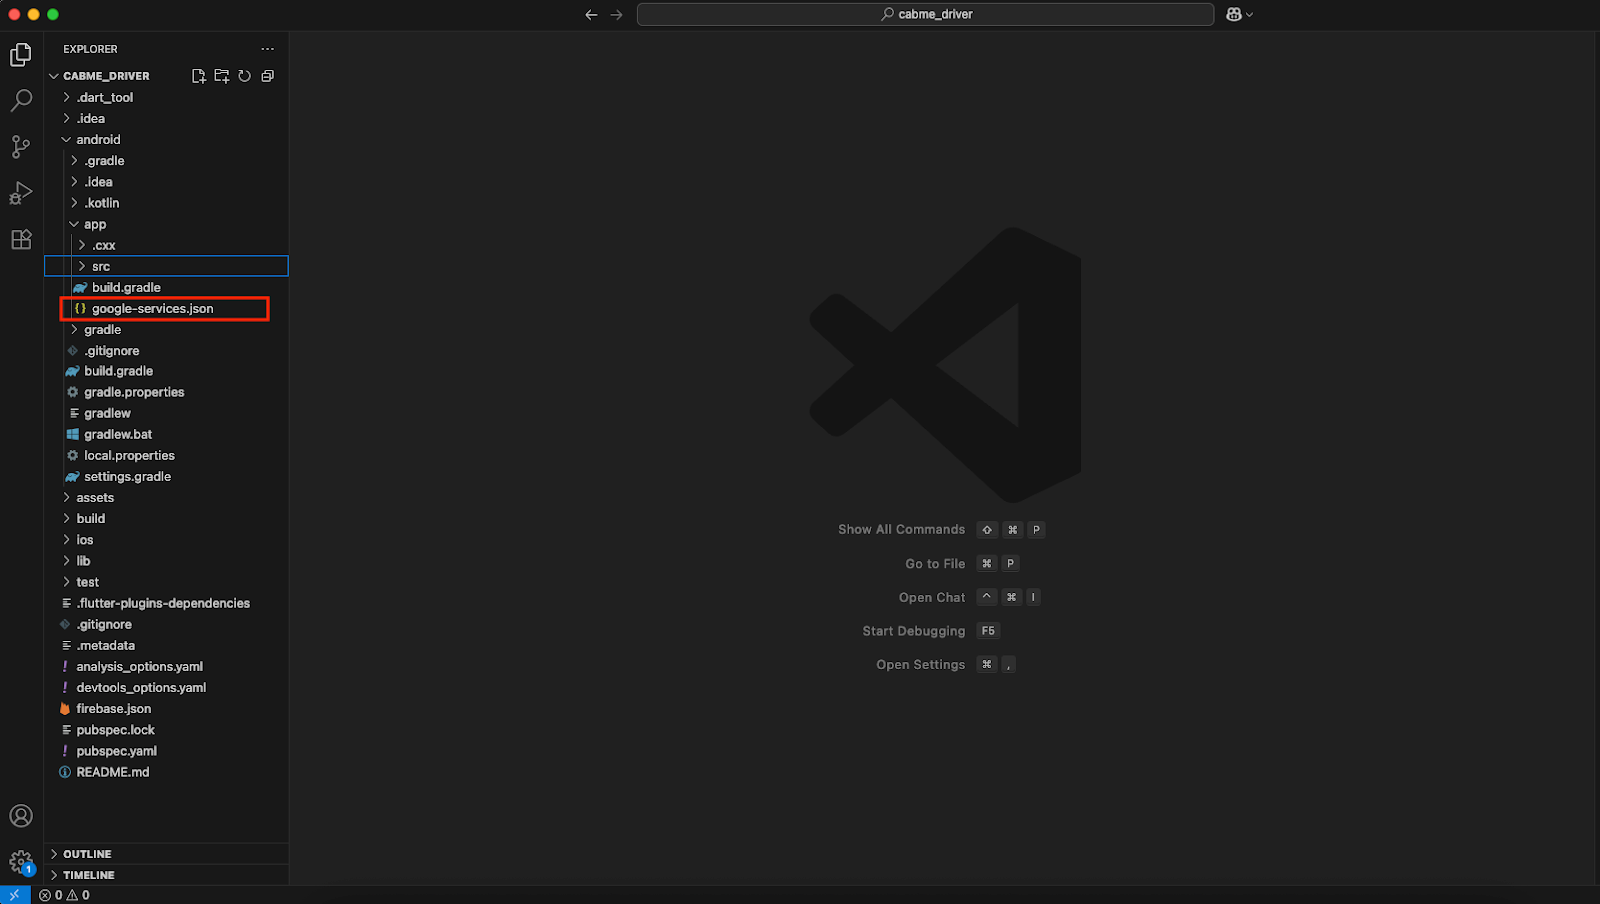
Follow the setup instructions, including adding the google-services.json file to your Flutter project’s android/app directory.
During setup, you’ll be asked for your SHA-1 key. Paste the SHA-1 key you generated earlier.
After setup is complete, you’ll have the option to download the google-services.json file again. Replace the existing file in your project if needed.
3.7.3.4. For IOS:
Click on the iOS icon to add an iOS app.
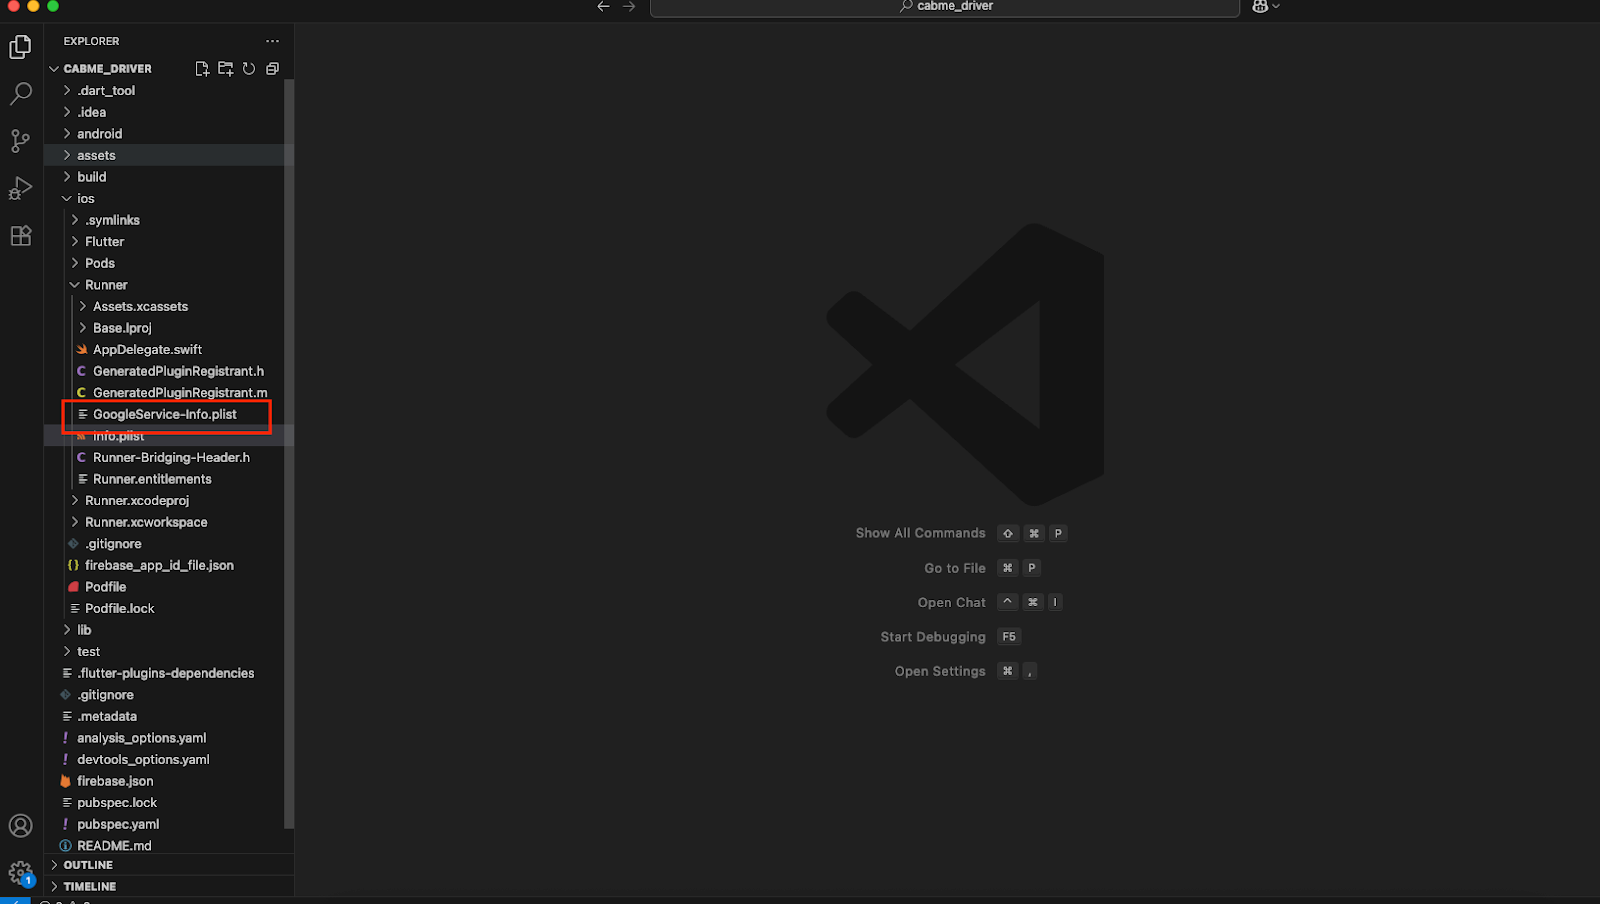
Follow the setup instructions, including downloading the GoogleService-Info.plist file.
There’s no need to add SHA-1 or SHA-256 keys for iOS.
Add the downloaded GoogleService-Info.plist file to your Flutter project’s ios/Runner directory.
Flutter IOS Setup#
4.Flutter IOS setup
4.1. Change the iOS bundle identifier:
Navigate to the ios directory within your Flutter project.
Open the Runner.xcodeproj project file using Xcode.
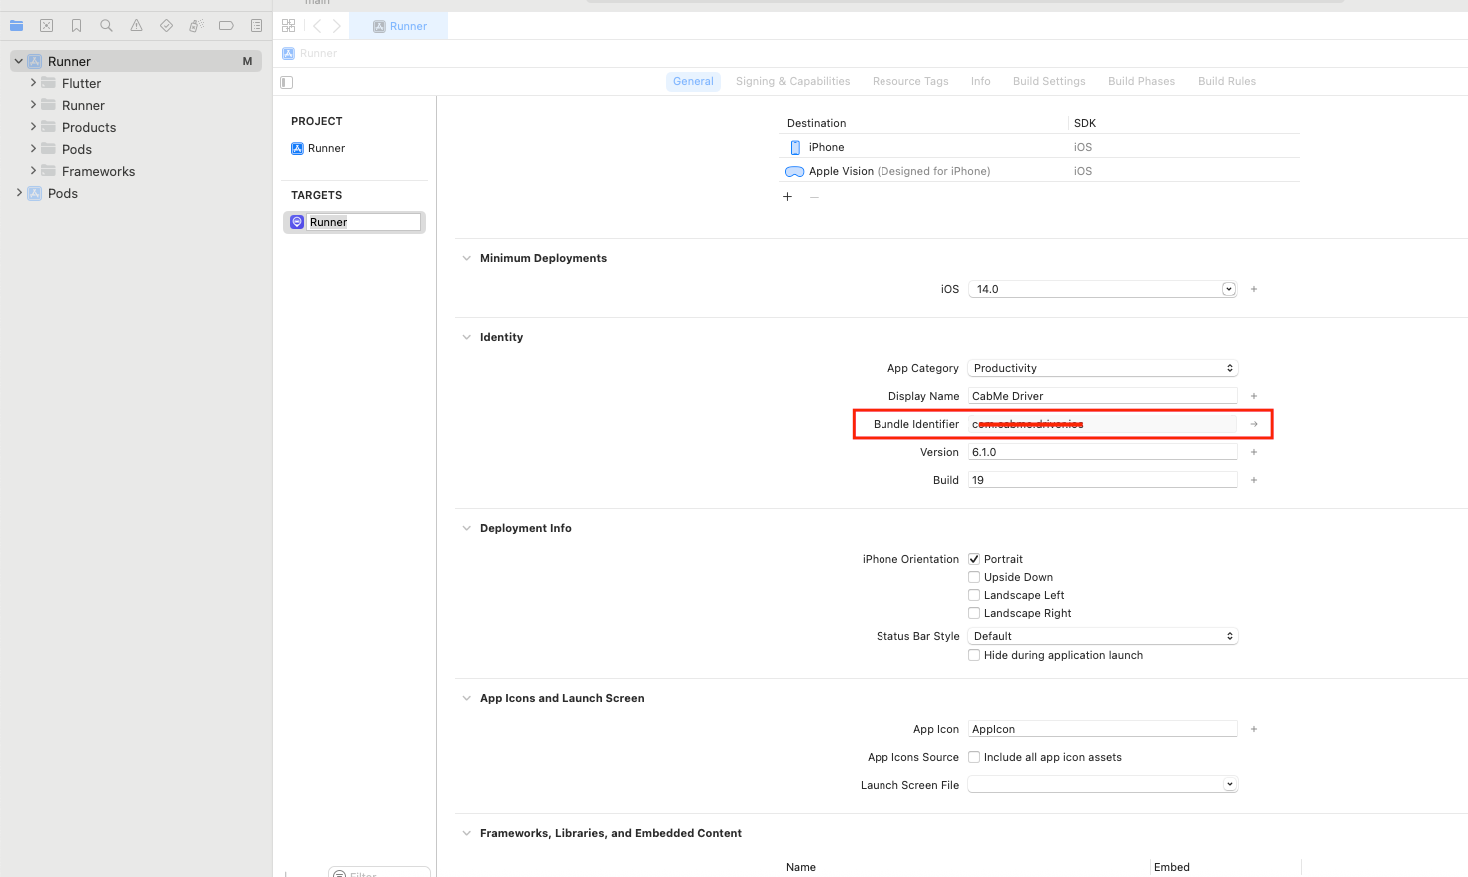
In Xcode, select the Runner project from the project navigator.
Go to the Runner target’s settings.
Under the General tab, find the Bundle Identifier field and change it to your desired bundle identifier.
4.2. To change the launcher icon
4.2.1. For iOS, you need to replace the existing icon files with your new ones. The icons for iOS are stored in the Assets.xcassets directory in the ios/Runner directory.
4.2.2. Open your Flutter project in Xcode by navigating to the ios directory and opening the .xcworkspace file with Xcode.
4.2.3. In Xcode, navigate to Runner > Assets.xcassets.
4.2.4. Replace the existing AppIcon with your new icon files. You’ll typically find different sizes labelled for various devices (e.g., iPhone, iPad).
4.3. Change Application Name in IOS.
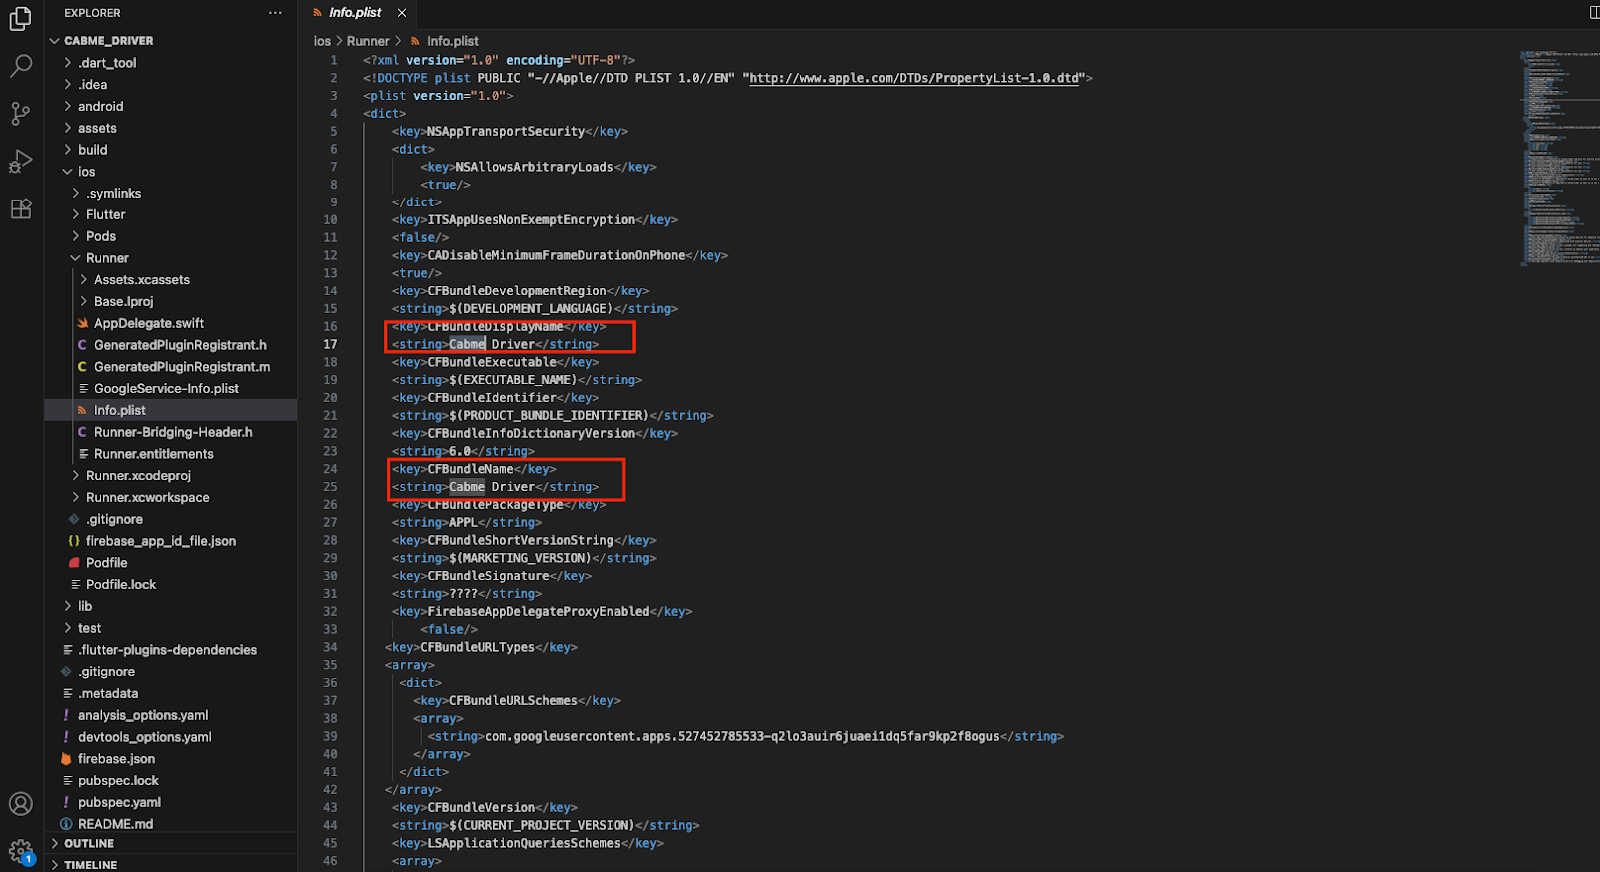
4.3.1. Open the ios/Runner/Info.plist file.
4.3.2. Locate the CFBundleDisplayName entry.
4.3.3. Change the value associated with to your desired app name.
4.4. To change the Google Maps API key.
4.4.1. Open your Flutter project in a text editor or IDE.
4.4.2. Navigate to the ios/Runner directory within your Flutter project.
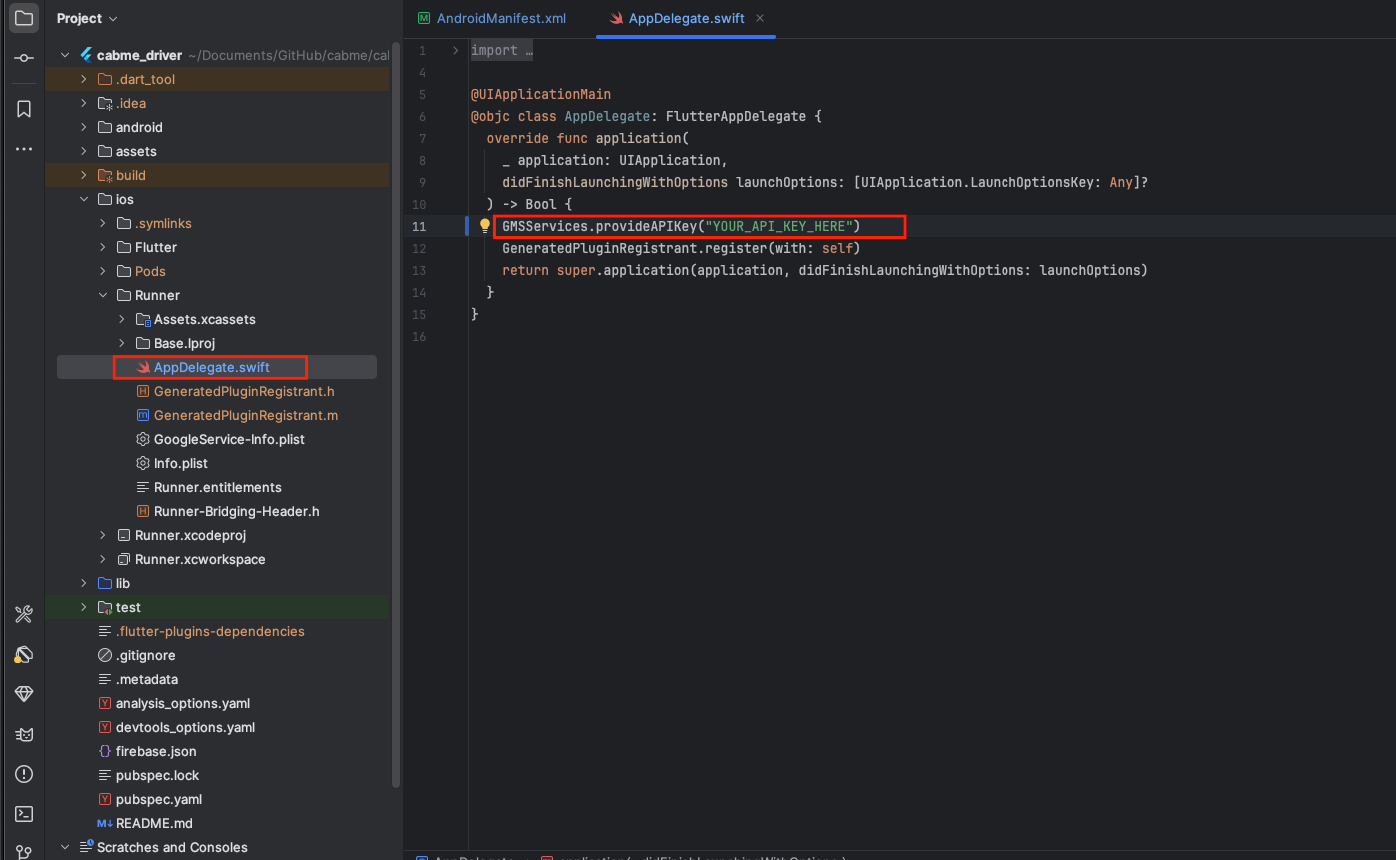
4.4.3. Locate the AppDelegate.swift file.
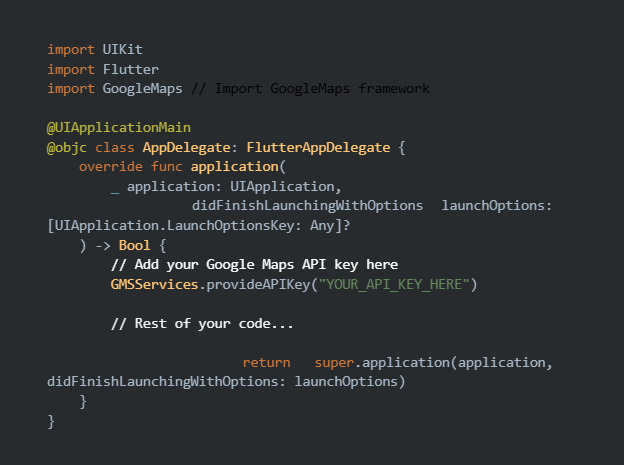
4.4.4. In the didFinishLaunchingWithOptions method, set the Google Maps API key.
Replace “YOUR_NEW_API_KEY_HERE” with your actual Google Maps API key.
After updating the API key in the AppDelegate.swift file, rebuild your Flutter app for iOS to apply the changes.
By following these steps, your Flutter app will use the new Google Maps API key specifically for iOS. Make sure you’ve also updated the API key in the Android configuration as described earlier if you want to apply changes to both platforms.
Flutter Firebase Setup#
5. Flutter Firebase Setup
5.1. Setting up Firebase for a Flutter project using the Firebase CLI involves several steps. Below is a detailed guide on how to do it:
5.1.1. Install Firebase CLI:
First, you need to install the Firebase CLI if you haven’t already. You can install it via npm (Node Package Manager) by running the following command in your terminal or command prompt:
5.1.2. Login to Firebase:
After installing the Firebase CLI, log in to your Firebase account by running the following command:
This will open a browser window prompting you to log in to your Google account associated with Firebase.
5.1.3. Create a Firebase Project:
If you haven’t already created a Firebase project, you can create one using the Firebase CLI by running:
Follow the prompts to create a new project.
5.1.4. Initialize Firebase in Your Flutter Project:
Navigate to your Flutter project directory in the terminal.
Initialize Firebase in your project by running:
This command will prompt you to select the Firebase features you want to set up. Choose the Firebase services you intend to use, such as Authentication, Firestore, etc.
5.1.5. Configure Firebase:
During the initialization process (firebase init), you’ll be asked to select the Firebase project you created or configured earlier. Choose the appropriate project from the list.
5.1.6. Install Required Dependencies:
After selecting the Firebase features, Firebase CLI will generate the necessary configuration files for your project.
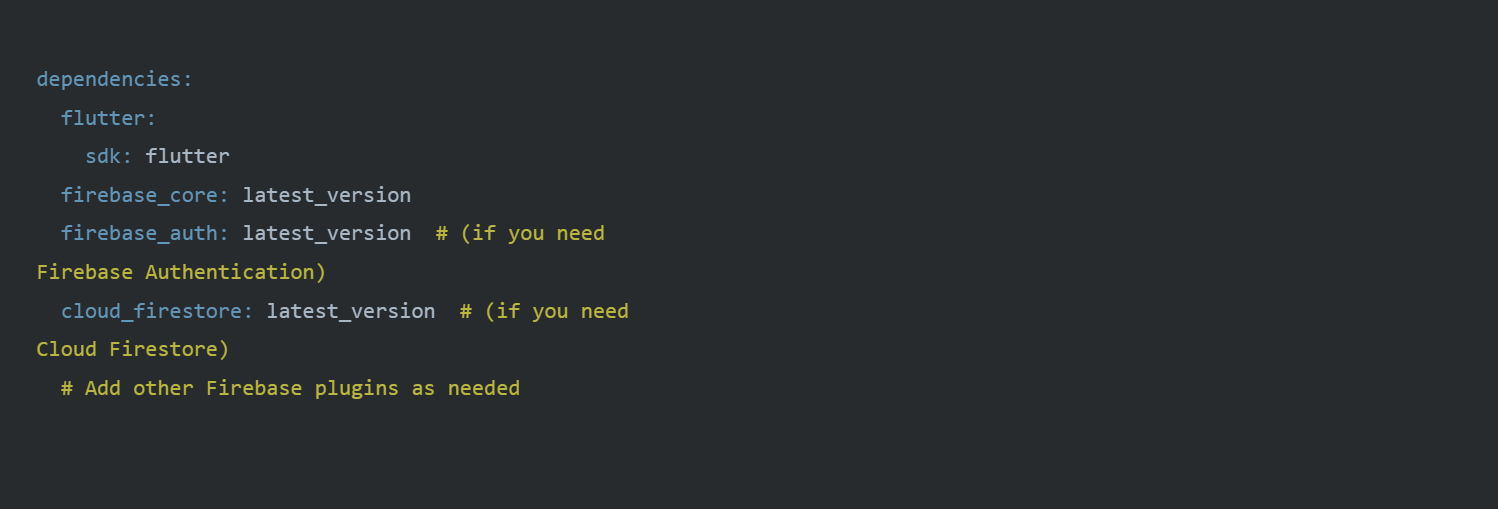
Next, you need to install the required Firebase packages in your Flutter project. You can do this by adding the dependencies to your pubspec.yaml file:
Replacelatest_versionwith the actual version numbers of the Firebase plugins you want to use. You can find the latest versions on pub.dev.
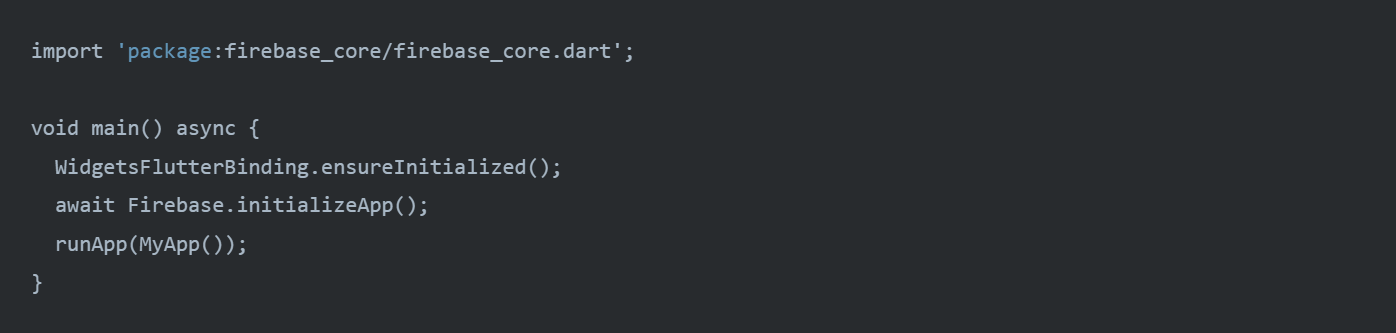
5.1.7. Initialize Firebase in Your Flutter App:
5.1.8. Using Firebase Services:
Now you can use Firebase services in your Flutter app. Import the necessary Firebase packages and follow the respective documentation for each service you want to use (e.g., Firebase Authentication, Cloud Firestore).
5.1.9. Testing:
Run your Flutter app on a device or emulator to verify that Firebase services are correctly integrated and working.
5.2. Configuring and setting up FlutterFire in your Flutter project involves several steps. Here’s a detailed guide on how to do it:
Click on “Add Project” and follow the instructions to create a new project.
Once your project is created, you’ll be redirected to the project dashboard.
5.2.2. Add an App to Your Firebase Project:
In the Firebase console, select your project.
Click on the “Add app” button (usually represented by an Android or iOS icon).
Follow the setup instructions to register your app with Firebase.
Download the google-services.json file for Android or GoogleService-Info.plist file for iOS. These files contain your Firebase project configuration details.
5.2.3. Flutter Project Setup:
Open your Flutter project in your preferred editor.
Navigate to the android/app directory for Android or ios/Runner directory for iOS, and paste the google-services.json (for Android) or GoogleService-Info.plist (for iOS) file that you downloaded earlier.
5.2.4. Add Firebase SDK to Your Flutter Project:
Open your Flutter project’s pubspec.yaml file.
Add the following dependencies:
Replacelatest_versionwith the latest version numbers of the Firebase plugins you want to use. You can find the latest versions on pub.dev.
5.2.5. Using Firebase Services:
You can now use Firebase services in your Flutter app. Import the necessary Firebase packages and follow the respective documentation for each service you want to use (e.g., Firebase Authentication, Cloud Firestore).
5.2.6. Testing:
Run your Flutter app on a device or emulator to verify that Firebase services are correctly integrated and working.
Payment Methods#
6. Payment Methods Configuration
Path:
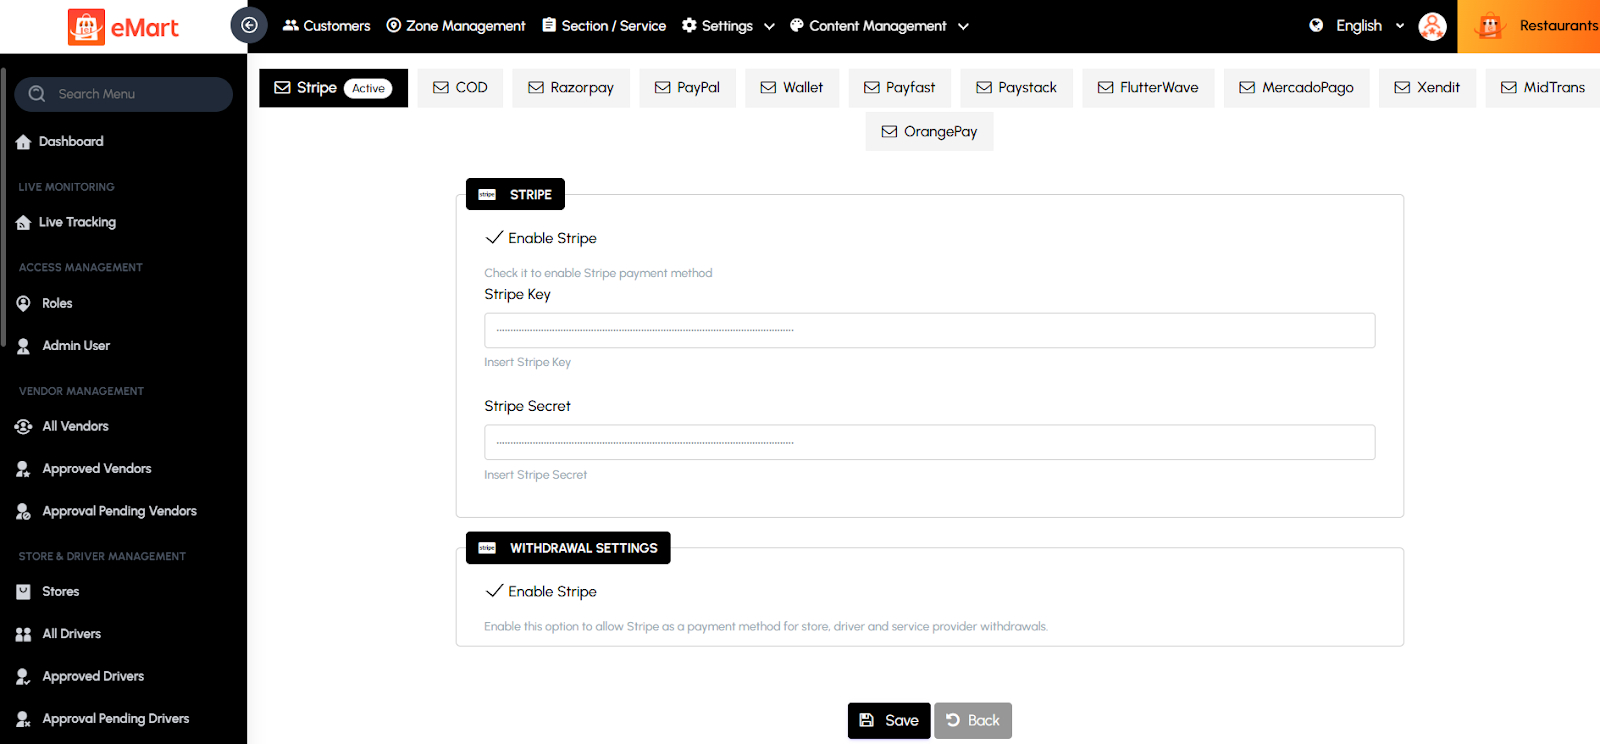
Administration Settings > Payment Methods
1. Stripe
Enable Stripe: Checkbox to activate the Stripe payment gateway.
Stripe Key: Field for entering the public API key provided by Stripe.
Stripe Secret: Field for entering the secret API key for secure server communication.
Steps to Configure:
Go to Administration Settings > Payment Methods > Stripe.
Check Enable Stripe.
Enter the Stripe Key and Stripe Secret.
Click Save.
2. COD (Cash on Delivery)
Enable COD: Checkbox to activate the COD payment method.
Steps to Configure:
Go to Administration Settings > Payment Methods > COD.
Check Enable COD.
Click Save.
4. Razorpay
Enable Razorpay: Checkbox to activate the Razorpay payment gateway.
Razorpay Key: Field for entering the Razorpay API key.
Razorpay Secret: Field for entering the Razorpay secret key.
Steps to Configure:
Go to Administration Settings > Payment Methods > Razorpay.
Check Enable Razorpay.
Enter the Razorpay Key and Razorpay Secret.
Click Save.
5. PayPal
Enable PayPal: Checkbox to activate the PayPal payment gateway.
Client ID: Enter the PayPal Client ID.
Client Secret: Enter the PayPal Secret Key.
Steps to Configure:
Go to Administration Settings > Payment Methods > PayPal.
Check Enable PayPal.
Enter the Client ID and Client Secret.
Click Save.
6. Wallet
Enable Wallet: Checkbox to activate the internal wallet system.
No additional configurations required beyond enabling the wallet feature.
7. PayFast
Enable PayFast: Checkbox to activate the PayFast gateway.
Merchant ID: Enter the PayFast Merchant ID.
Merchant Key: Enter the PayFast Merchant Key.
Steps to Configure:
Go to Administration Settings > Payment Methods > PayFast.
Check Enable PayFast.
Enter the Merchant ID and Merchant Key.
Click Save.
8. PayStack
Enable PayStack: Checkbox to activate the PayStack gateway.
PayStack Key: Enter the PayStack API Key.
PayStack Secret: Enter the PayStack Secret Key.
Steps to Configure:
Go to Administration Settings > Payment Methods > PayStack.
Check Enable PayStack.
Enter the PayStack Key and PayStack Secret.
Click Save.
9. FlutterWave
Enable FlutterWave: Checkbox to activate the FlutterWave payment gateway.
Public Key: Enter the FlutterWave Public Key.
Secret Key: Enter the FlutterWave Secret Key.
Steps to Configure:
Go to Administration Settings > Payment Methods > FlutterWave.
Check Enable FlutterWave.
Enter the Public Key and Secret Key.
Click Save.
10. MercadoPago
Enable MercadoPago: Checkbox to activate the MercadoPago payment gateway.
Public Key: Enter the MercadoPago Public Key.
Access Token: Enter the MercadoPago Access Token.
Steps to Configure:
Go to Administration Settings > Payment Methods > MercadoPago.
Check Enable MercadoPago.
Enter the Public Key and Access Token.
Click Save.
11. Xendit
Enable Xendit: Checkbox to activate the Xendit payment gateway.
API Key: Enter the Xendit API Key.
Steps to Configure:
Go to Administration Settings > Payment Methods > Xendit.
Check Enable Xendit.
Enter the API Key.
Click Save.
12. OrangePay
Enable OrangePay: Checkbox to activate the OrangePay gateway.
API Key: Enter the OrangePay API Key.
Steps to Configure:
Go to Administration Settings > Payment Methods > OrangePay.
Check Enable OrangePay.
Enter the API Key.
Click Save.
13. MidTrans
Enable MidTrans: Checkbox to activate the MidTrans payment gateway.
Merchant ID: Enter the MidTrans Merchant ID.
API Key: Enter the MidTrans API Key.
Steps to Configure:
Go to Administration Settings > Payment Methods > MidTrans.
Check Enable MidTrans.
Enter the Merchant ID and API Key.
Click Save.
FAQ#
7. Frequently Asked Questions
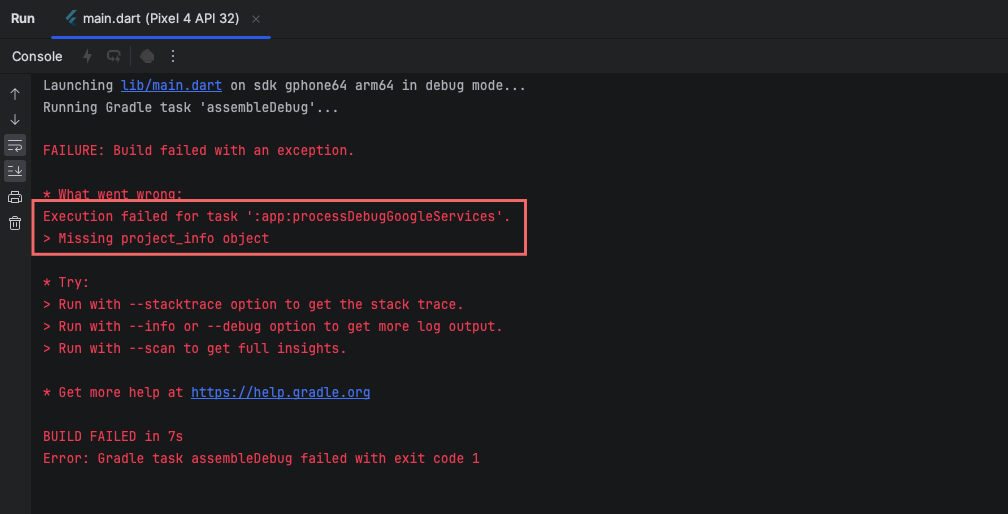
7.1. What should I do if I get the error message “Missing project_info object” in my Flutter project?
The error message you’re encountering, “Missing project_info object,” typically arises in Flutter projects when there’s a misconfiguration or missing information related to Firebase services. Here’s how you can troubleshoot and potentially resolve this issue
Solution :
1. Check google-services.json: If you’re using Firebase services in your Flutter app, ensure that you have the google-services.json file placed in the correct location within your Android project. This file contains important configuration information for Firebase services. It should be located in the android/app directory of your Flutter project.
2. Verify Firebase Setup: Double-check that you’ve completed all the necessary steps to set up Firebase for your Flutter project. This includes adding your app to the Firebase project using the Firebase Console, downloading and adding the google-services.json file to your Android project, and configuring Firebase services in your Flutter app’s code (if applicable).
3. Update Google Services Plugin: Ensure that you’re using the latest version of the Google Services Gradle plugin in your Android project. You can check the latest version on the Google Services Gradle Plugin page and update the version number in your android/build.gradle file accordingly.
4. Check Flutter and Firebase Versions Compatibility: Make sure that you’re using compatible versions of Flutter and Firebase. Sometimes, using outdated versions of either can lead to compatibility issues. Refer to the Firebase Flutter documentation and ensure compatibility with your Flutter version.
5. Sync Gradle Files: After making any changes to your Android project configuration, such as updating the google-services.json file or modifying the Gradle build files, make sure to sync your Gradle files in Android Studio. This can be done by clicking on the “Sync Project with Gradle Files” button.
6. Rebuild the Project: After ensuring all configurations are correct, try rebuilding your Flutter project. You can do this by running flutter clean followed by flutter pub get and then rebuilding the project (flutter run or flutter build).
7. Check for Error Logs: Look for more detailed error messages or stack traces in the console output or build logs. These can provide additional clues about the underlying issue causing the “Missing project_info object” error.
Web Documentation#
Introduction
Welcome to eMart, the all-in-one solution for your everyday needs. Our platform seamlessly integrates multiple services into one convenient app, providing you with everything from delicious meals to reliable transportation, all with the click of a button. With eMart, convenience is just a tap away.
eMart is a comprehensive solution for multi-vendor delivery systems, created with Flutter, Firebase, and the Laravel Framework, known for its expressive and elegant syntax. This product includes three apps: Customer, Store, and Driver. This documentation provides guidance for setting up the eMart website and applications. It’s recommended to use Laravel Homestead, a virtual machine that satisfies all system requirements, as your local development environment. Ensure your server meets the following requirements.
Key Features:
1.1 : Multi Vendor Items Delivery:
Craving your favorite dish? Explore a wide range of cuisines from local restaurants and food vendors. Order in with ease and have your meal delivered straight to your doorstep. With eMart’s multivendor food delivery service, you’re spoiled for choice.
1.2 : eCommerce Marketplace:
Experience non-stop shopping excitement with our extensive eCommerce marketplace. Browse through a diverse selection of products from various vendors, ranging from electronics and clothing to home goods and accessories. Find exactly what you need, all in one place.
1.3 : Parcel Delivery:
Need to send a package? No problem. Our parcel delivery service connects you with reliable couriers who can deliver your parcels safely and on time. Whether it’s a small envelope or a large package, we’ve got you covered.
1.4 : Taxi Booking:
Getting around town has never been easier. Book a taxi with just a few taps and enjoy hassle-free transportation to your destination. Our network of drivers ensures prompt service and comfortable rides wherever you need to go.
1.5 : Car Rental:
Planning a road trip? Rent a car through eMart and hit the road with confidence. Choose from a variety of vehicles to suit your needs, whether it’s a compact car for city driving or an SUV for a family adventure. Our seamless booking process makes renting a car a breeze.
1.6 : Admin Panel:
For vendors, our user-friendly admin panel provides all the tools you need to manage your products, orders, and deliveries efficiently. Monitor sales, update inventory, and communicate with customers—all from one centralized dashboard.
1.7 : Website Integration:
Our website complements our app, offering users another convenient way to access our services. Whether you prefer browsing on your desktop or mobile device, our website provides the same seamless experience as our app.
1.8 : Secure Payments:
Shop and pay with confidence thanks to our secure payment system. We support various payment methods, including credit/debit cards, mobile wallets, and cash on delivery, ensuring a smooth and secure transaction every time.
1.9 : Customer Support:
Have questions or need assistance? Our dedicated customer support team is here to help. Whether it’s tracking an order, resolving an issue, or providing general assistance, we’re just a message away.
1.10 : Promotions and Deals:
Take advantage of special promotions and deals offered by our vendors. From discounts on food orders to exclusive offers on car rentals, there’s always a way to save with eMart.
Experience the Convenience of eMart Today:
Whether you’re craving a meal, shopping for essentials, sending a package, booking a ride, or renting a car, eMart has you covered. Download the app or visit our website to discover the ultimate convenience of eMart. Welcome to a world where everything you need is just a tap away. Welcome to eMart.
Server Requirement#
To run eMart smoothly, your server must meet the following minimum requirements:
2.1. Prerequisites
Web Server: Apache or NGINX
PHP: Version 8.0 or above
Database: MySQL 5.7+
Composer: For managing PHP dependencies
Domain: Specify your domain name (e.g., example.com) for the application to function properly.
SSL Certificate: Required for secure connections (HTTPS)
FTP: Used for transferring files between local and server environments.
Cron Job: Required for running Laravel scheduled tasks automatically.
2.2. APIs & External Services
Google Maps API Key for Accurate Search Result Required for map display, geolocation, and business search Enable Places, Maps JavaScript, and Geocoding APIs
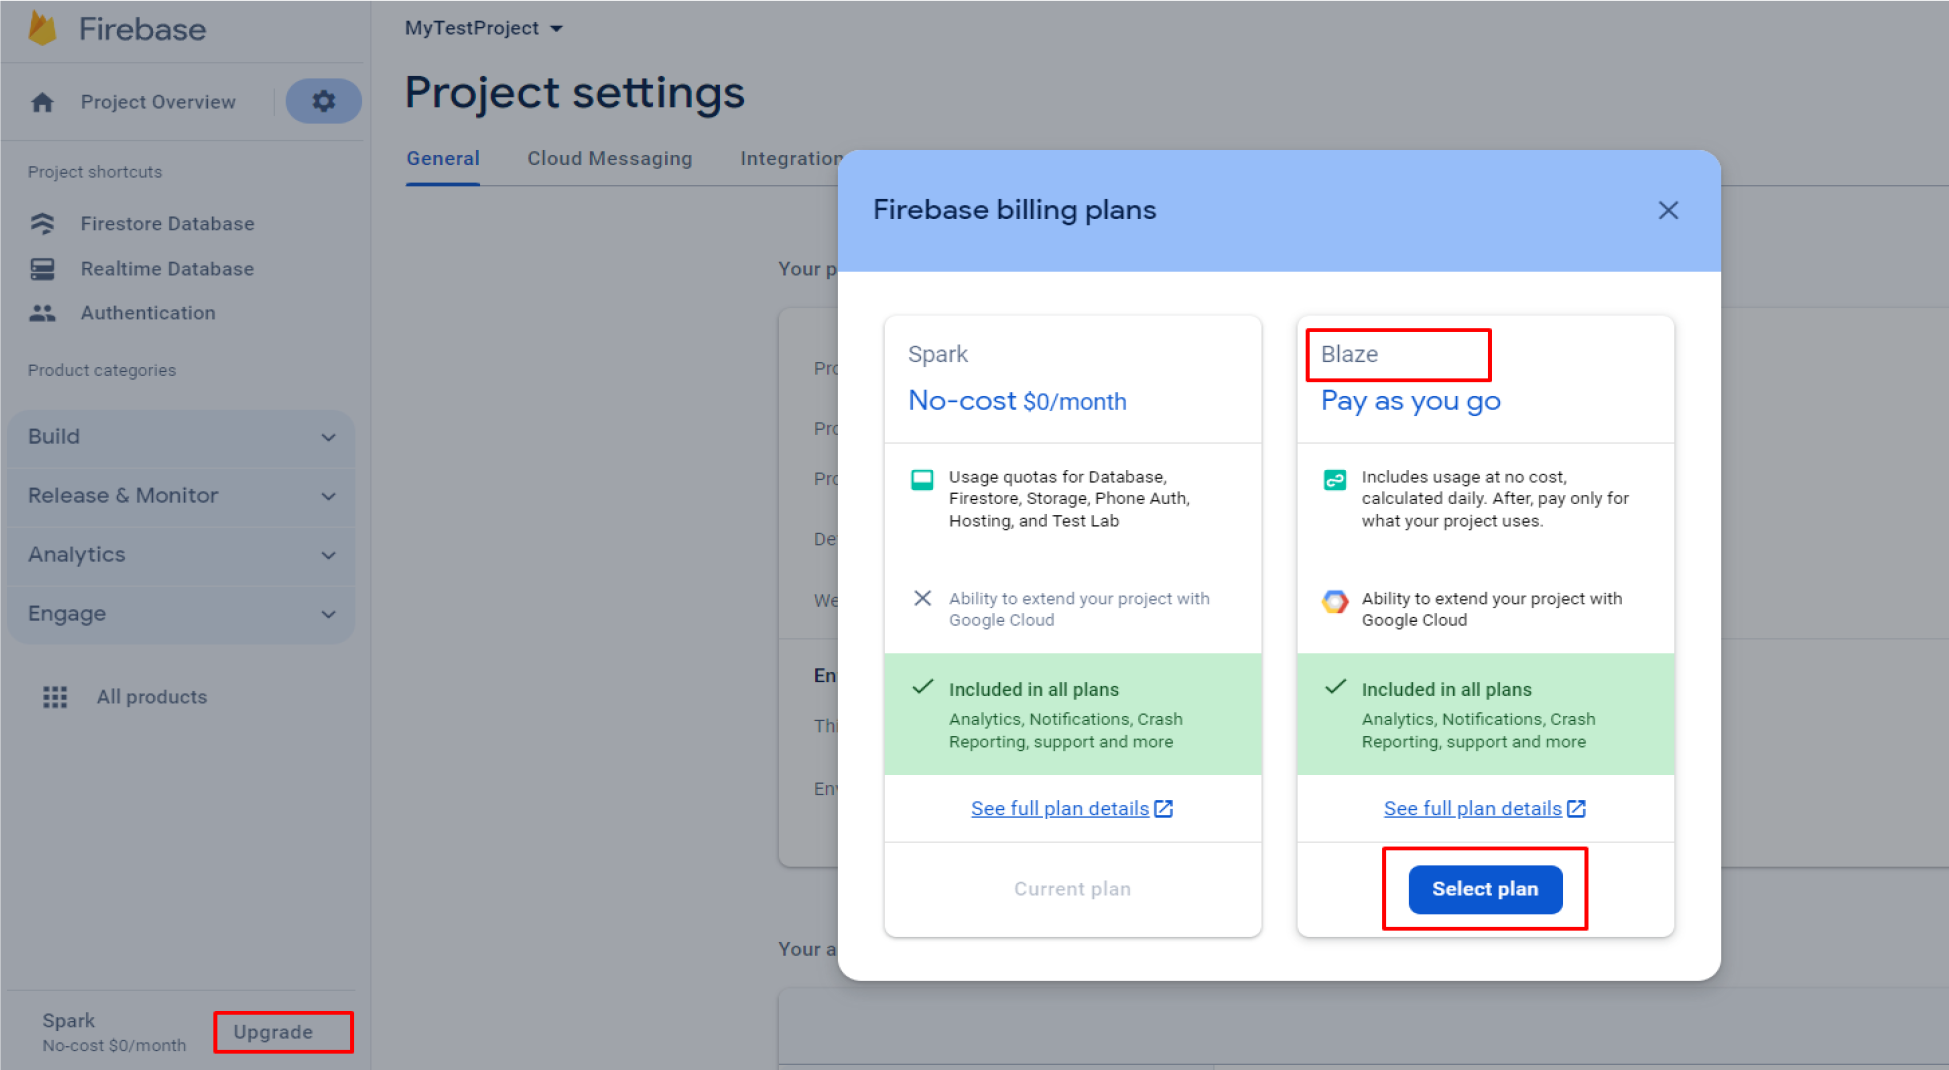
Google Firebase Account with Upgraded (Blaze) Plan
3.2 : Click on “Go to console” in the top right corner.
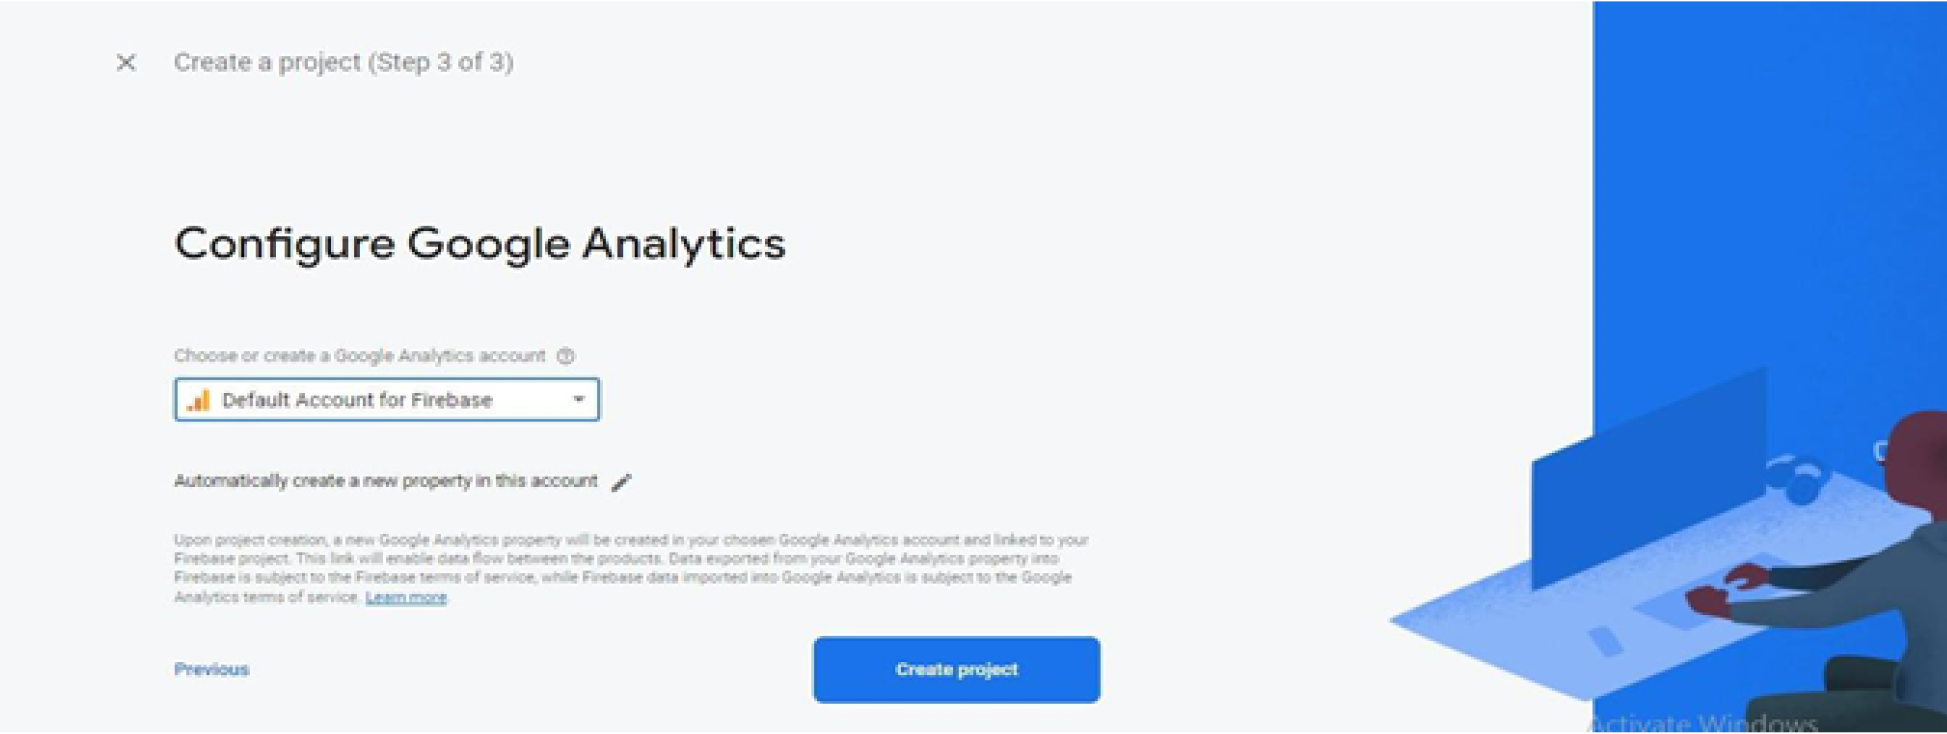
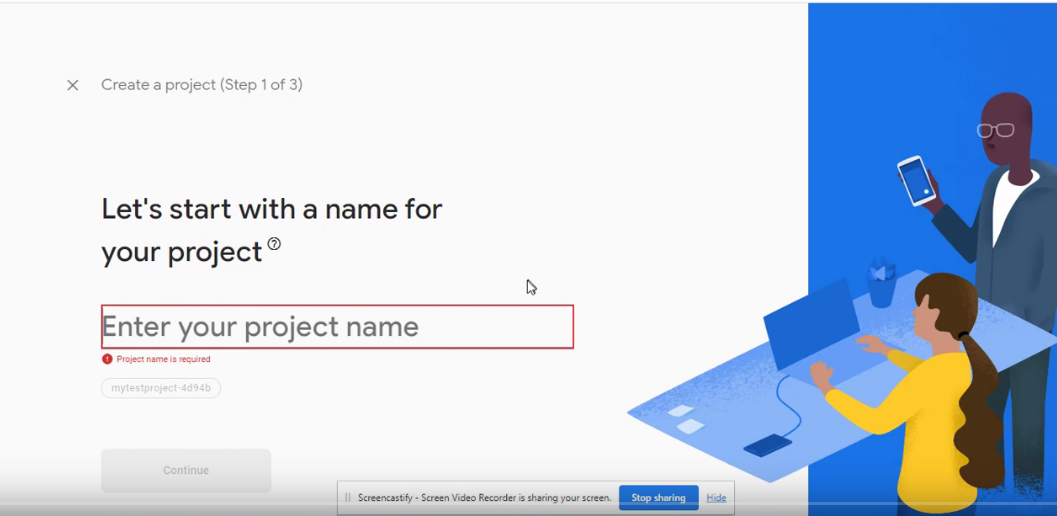
3.3 : Click on “Add project”, it will redirect you to the new project creation page Enter your project name and click on “Continue” again click on “Continue” after that select “Default Account fo firebase” and then click on “Create Project”
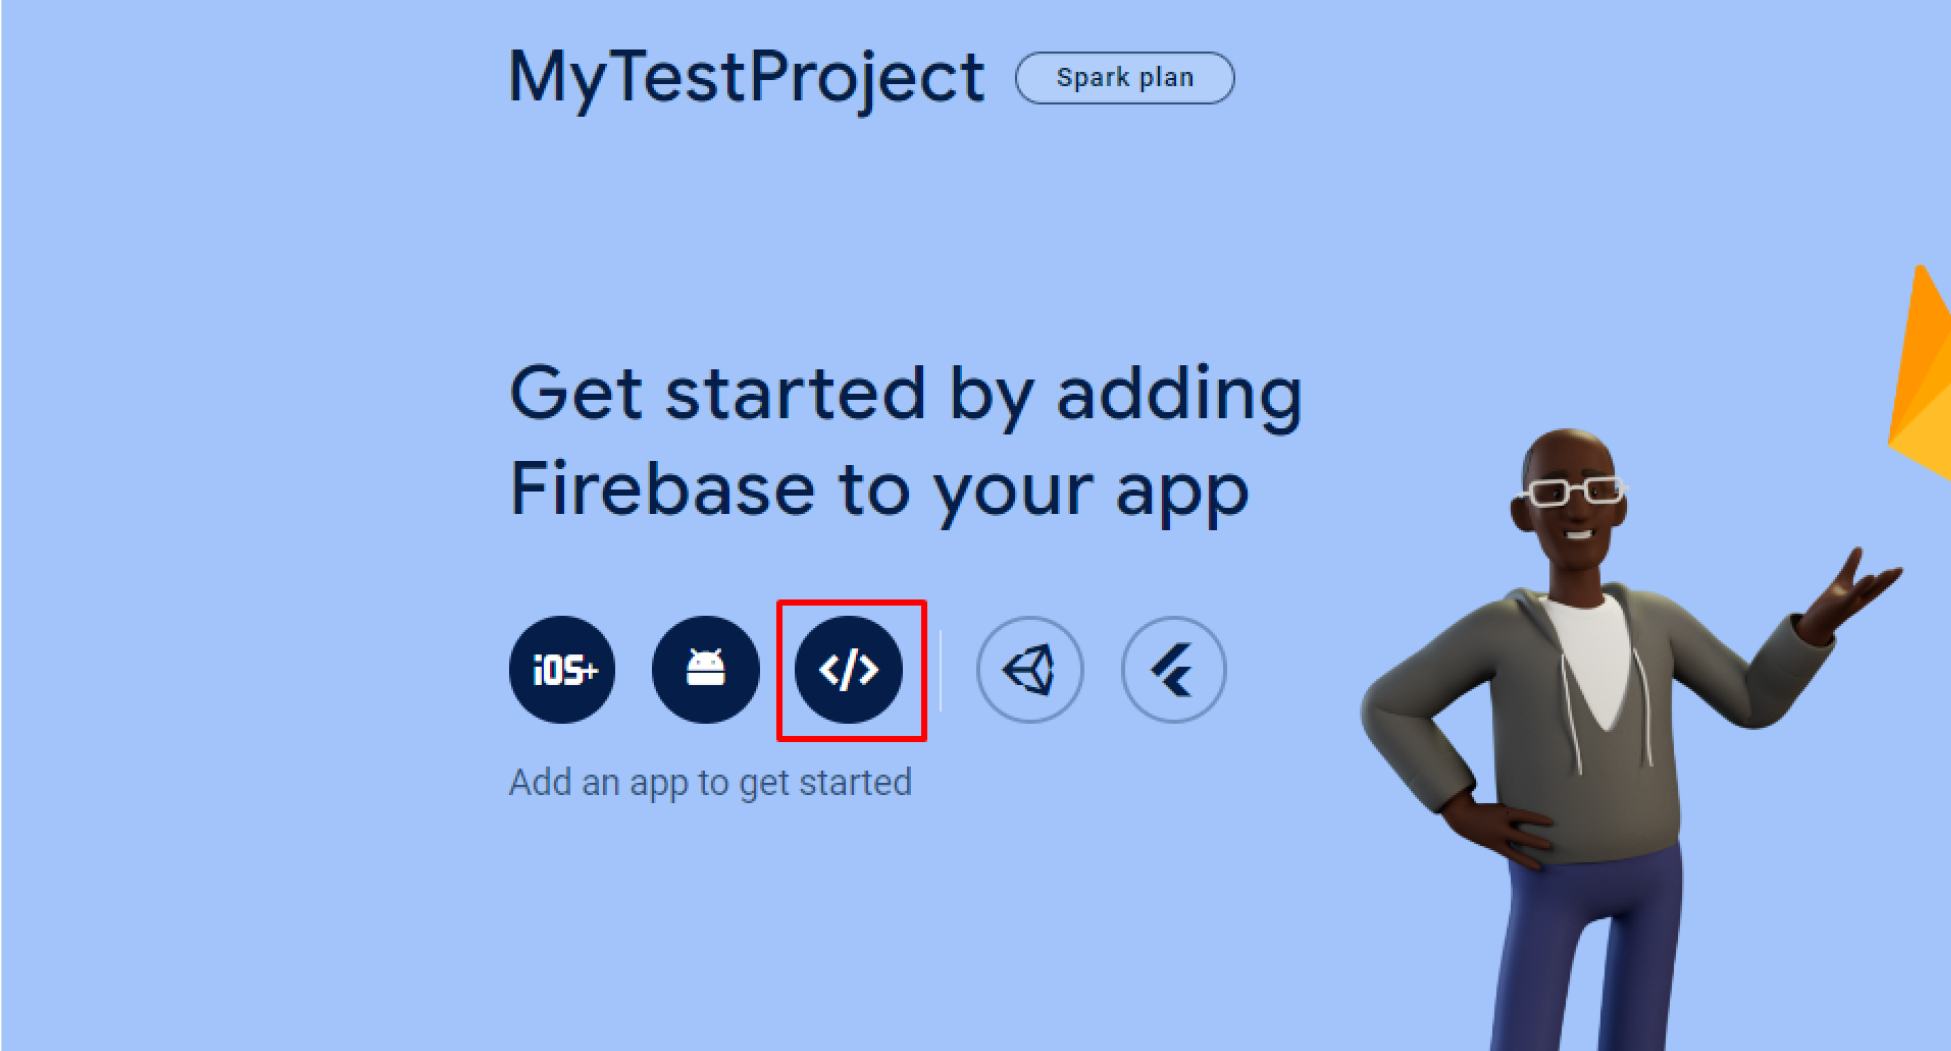
3.4 : After successfully creating a new project, you will be directed to the overview page. From there, simply navigate to the icons link to proceed further.
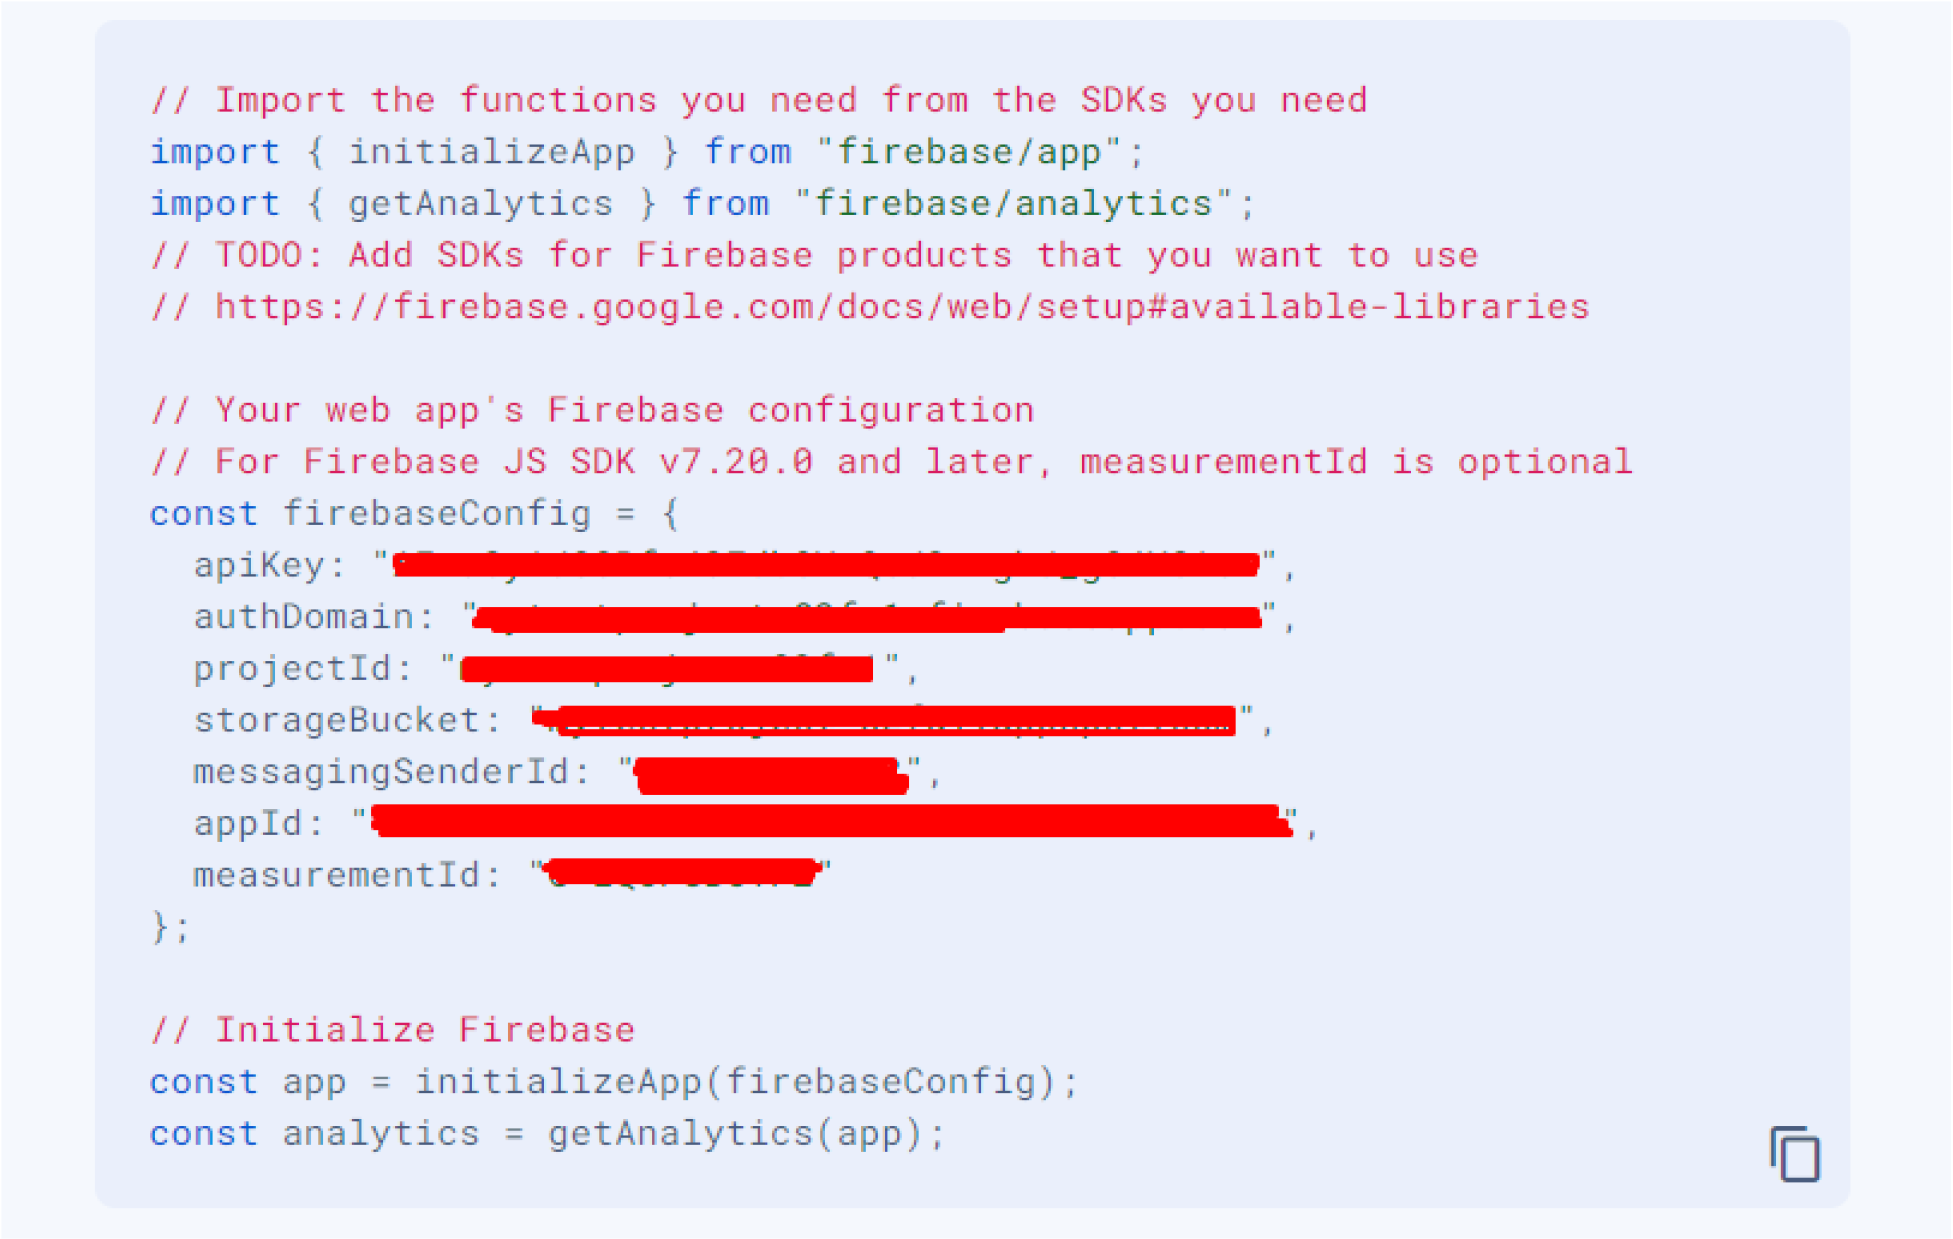
Upon redirection, you’ll land on the ‘Add Firebase to your web app’ page. Here, input your app’s nickname and proceed by clicking ‘Register app’. Afterward, scroll down to find detailed information as outlined below.
All of these details will be incorporated into both the app and admin panel documentation for comprehensive reference and seamless integration.
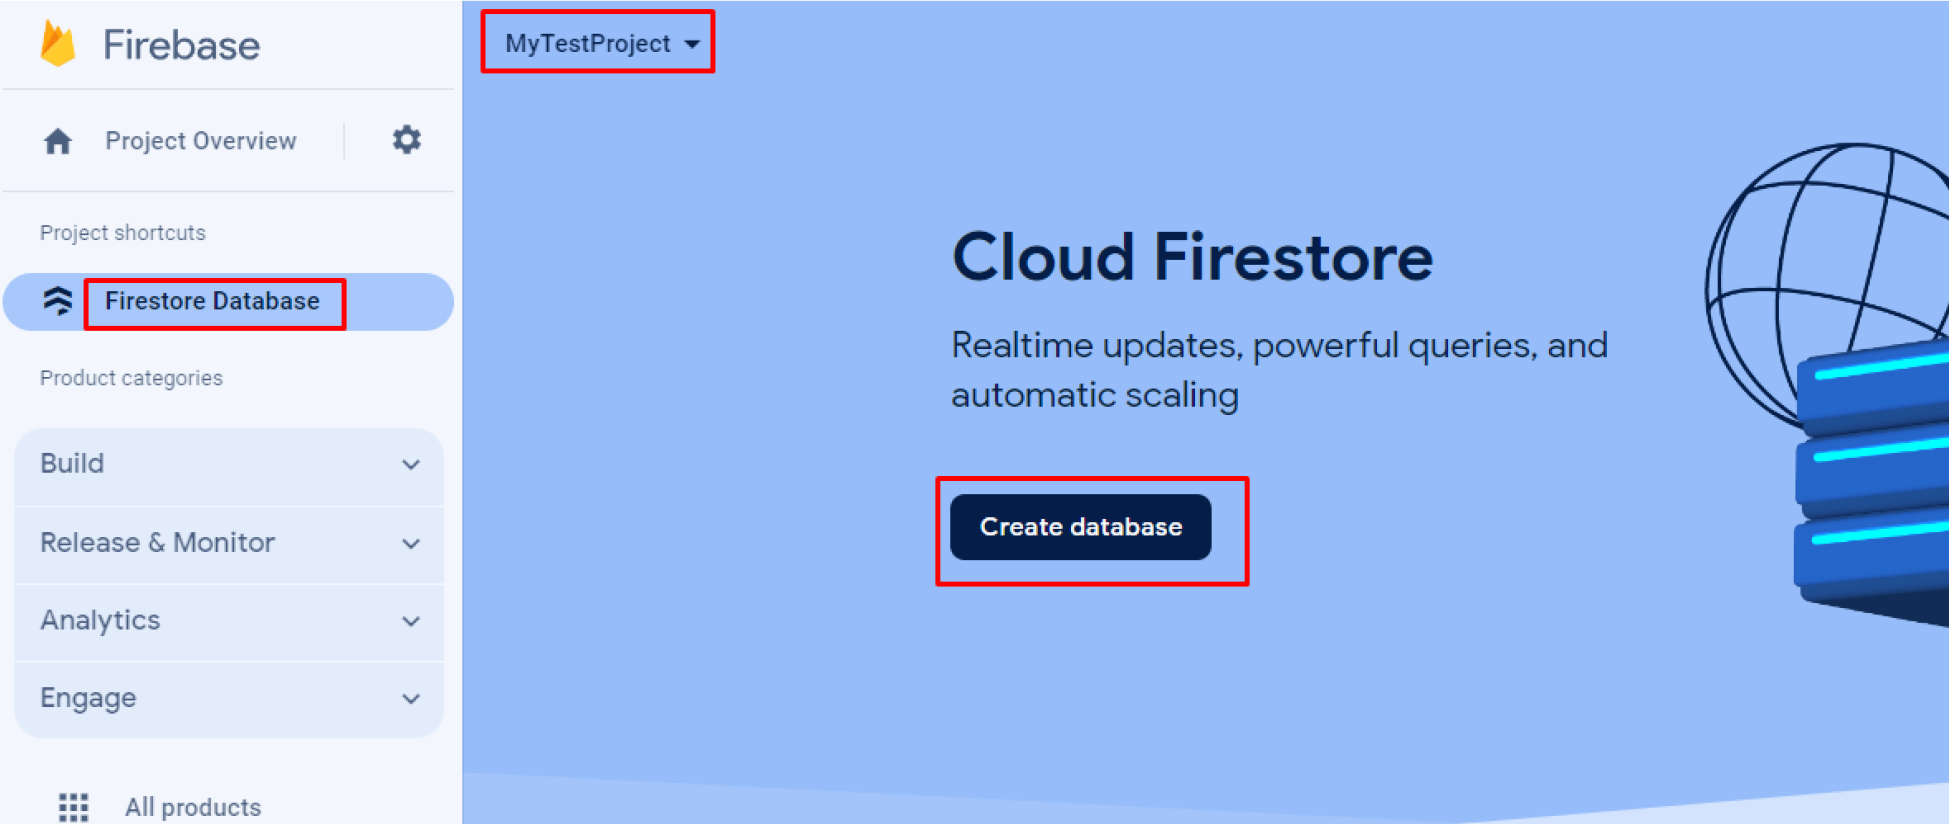
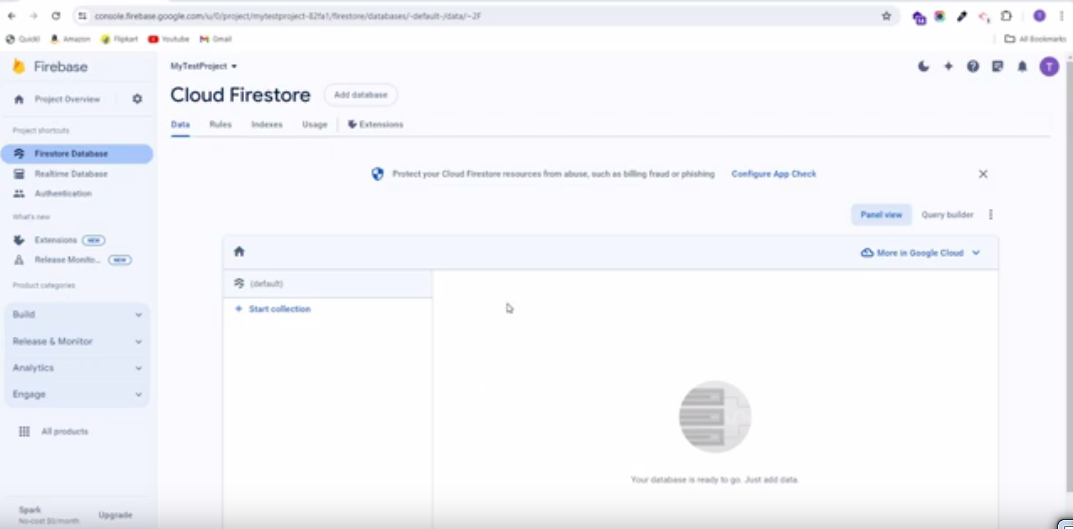
3.5 : Next, navigate to ‘Firestore Database’ in the left sidebar. Select your project name from the drop-down menu, and then proceed by clicking on ‘Create database’.
3.6 : Choose your preferred option and click on the ‘Next’ button. Subsequently, proceed by clicking on “Enable”
3.7 : Following that, locate “Realtime Database” in the left sidebar. Select your project name from the drop-down menu, and proceed by clicking on “Create Database”
3.8 : Choose your preferred option and proceed by clicking the “Next” button, then click on “Enable” to activate the selected feature.
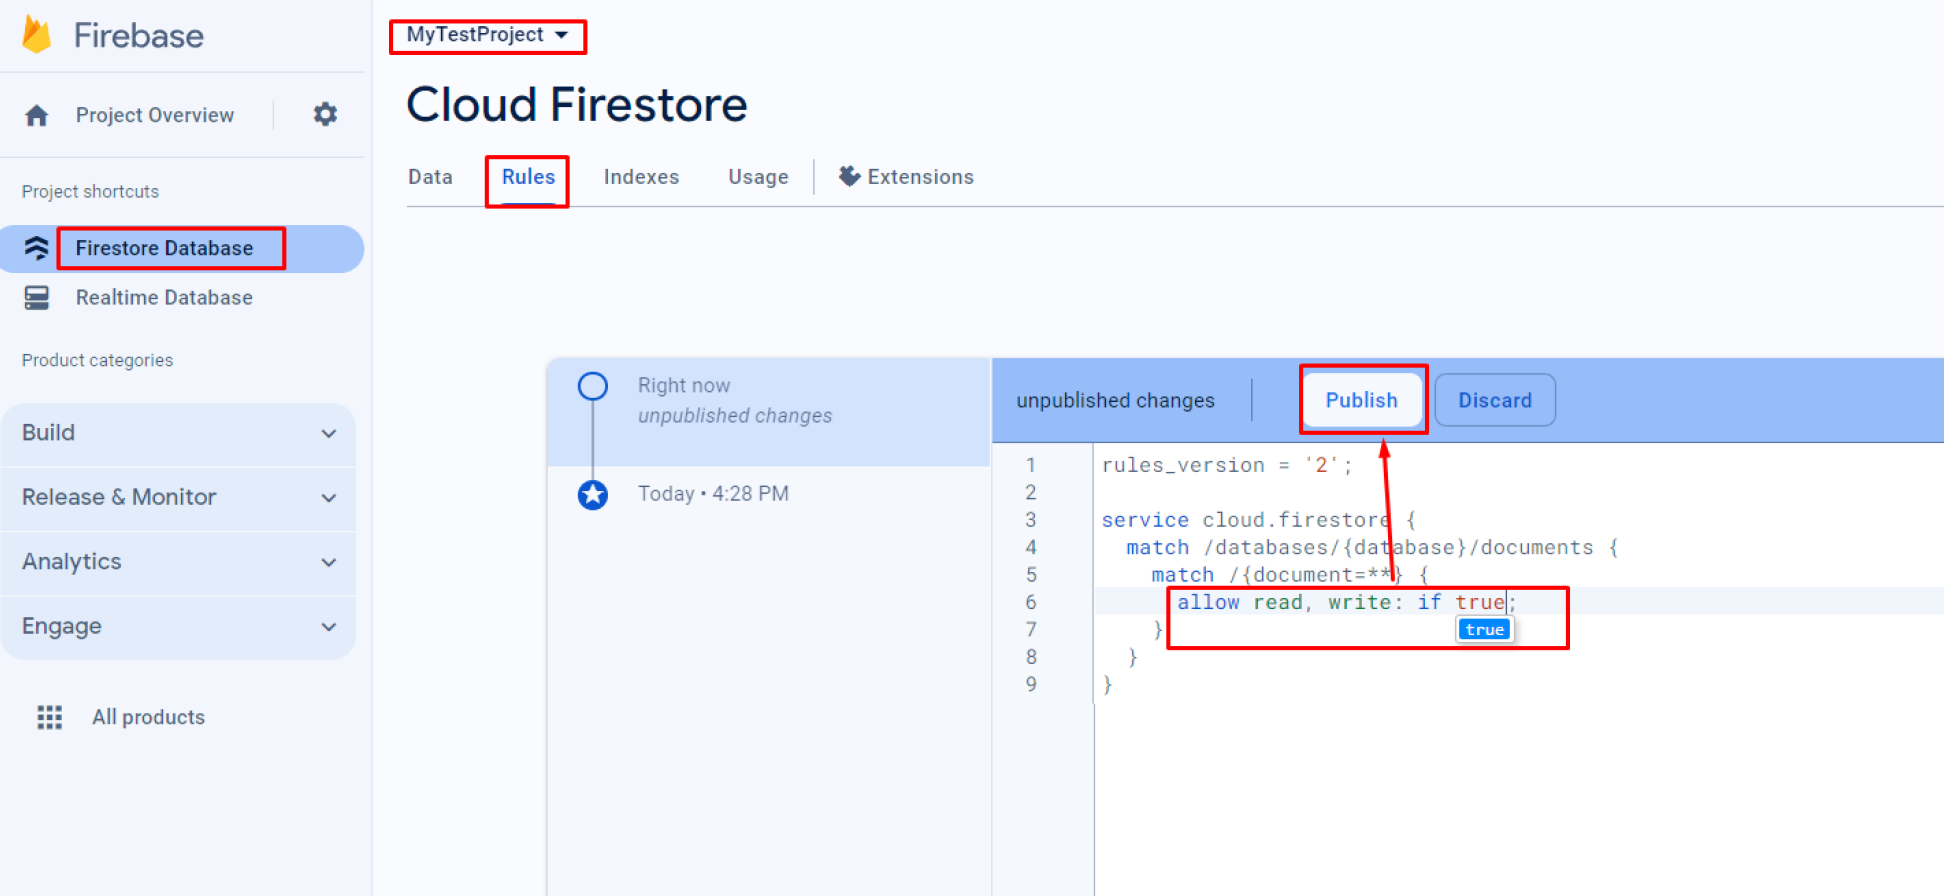
3.9 : Firstore Database Rules Update.
3.10: Upgrade your firebase plan.
See Video
Admin Panel Setup#
4. Admin Panel Setup (Laravel)
Ensure that your server meets the requirements outlined in the documentation’s Server Requirement section. Upon downloading the code, upload the admin zip file to your server and extract it. The admin panel can be installed on either a domain or a subdomain.
4.1 Connect to FTP and Setup
Follow these instructions to connect to your server using FTP and complete the application setup:
4.1.1. Connect to the server using FTP: Use an FTP client like FileZilla to connect to your server. Enter the server’s IP address, username, and password. Use port 21 for FTP or port 22 for SFTP.
4.1.2. Transfer the ZIP file: Upload your admin panel’s ZIP file to the server’s local path (e.g., /var/www/html).
4.1.3. Unzip the file: Navigate to the file’s location on the server and run the following command to extract the ZIP file: “sudo unzip your-application.zip” or you can do it from cpanel directly.
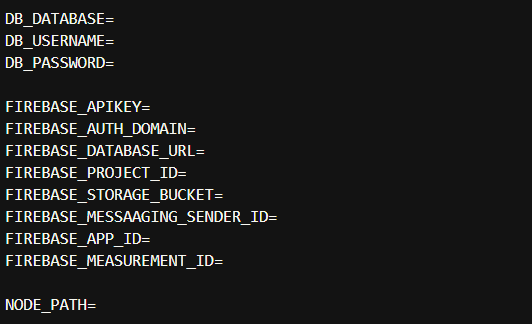
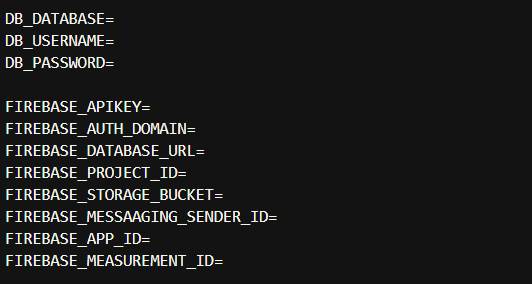
4.1.4. Update the .env file with your configuration: Modify the database and application settings which are mentioned in the .env file. Below is an example configuration:
4.1.5. Run the following command from the root directory of your admin panel terminal to install Firebase dependency modules required for scheduler functions.
4.1.6. Setup Node Js Path
To get the Node path from the terminal, you typically want to determine the location of Node.js or a specific file related to Node. Here are common ways to do this from the terminal:
To find out where Node.js is installed on your system, you can use the which command (on Linux/macOS):
which node
This will return the full path to the Node.js binary. For example:
/usr/local/bin/node
See this example: In our case, the Node.js path is something like the one below.
Copy this path and update it in your NODE_PATH variable.
4.2. CRON Job Setup
A cron job is a scheduled task in Unix-based operating systems that runs scripts or commands at specified intervals. Here’s how to set up a cron job on a server:
Steps to Set Up a Cron Job:
4.2.1. Log in to cPanel or in your web server 4.2.2. Navigate to the “Cron Jobs” Section 4.2.3. Add a New Cron Job
In the command field, enter the command or the path to the script you want to run.
Ensure the script you’re running has the correct permissions and is executable. You need to specify the correct PHP path (/usr/local/bin/php is common but may vary depending on your server setup) and please use your admin panel path in the CRON JOB command.
4.3 Map Configuration
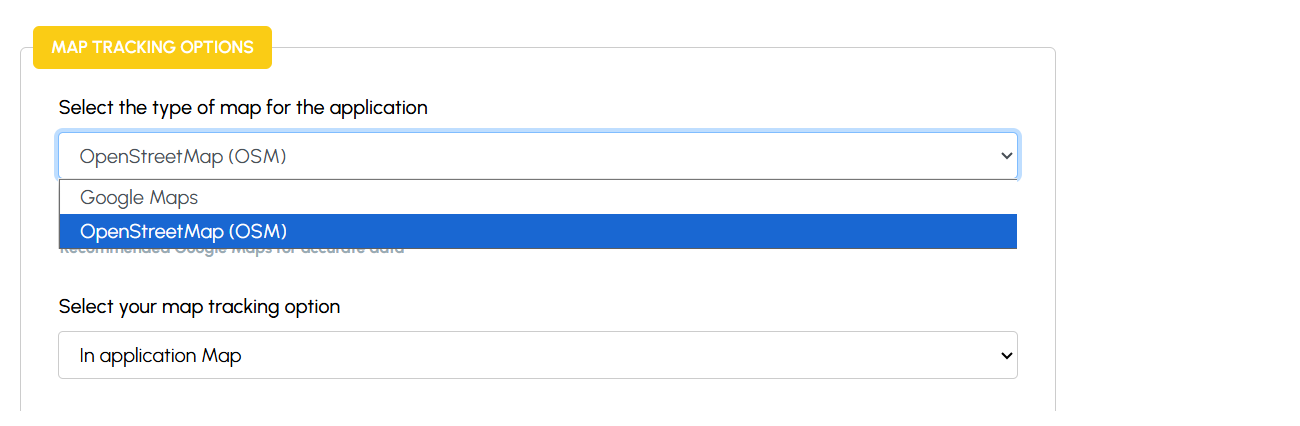
Please choose your preferred map by navigating to the Admin Panel > General Settings > Map Tracking Options.
Please Note:
Recommended Google Map for accurate location and mapping results.
4.4 Notifications Settings
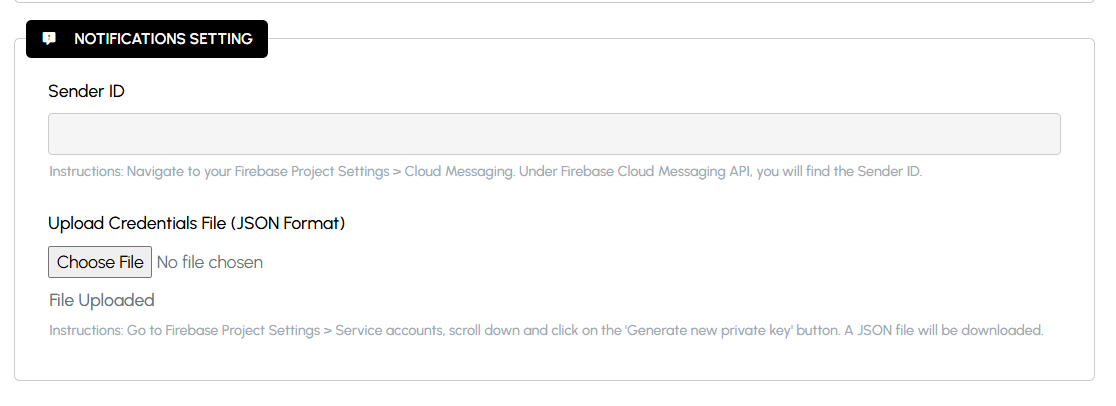
To work firebase push notification feature functions correctly, please upload your Firebase credentials file in the Admin Panel by navigating to General Settings > Notifications Settings.
Navigate to your Firebase Project Settings > Cloud Messaging. Under Firebase Cloud Messaging API, you will find the Sender ID.
Go to Firebase Project Settings > Service accounts, scroll down and click on the ‘Generate new private key’ button. A JSON file will be downloaded.
Steps to Configure:
To enable real-time push notifications for customers and drivers, you need to connect your application with Firebase Cloud Messaging (FCM).
1.Generate Firebase Credentials File
Go to the Firebase Console.
Select your project.
Navigate to Project Settings > Service Accounts.
Click Generate New Private Key (e.g., firebase-adminsdk-xxxxx.json).
Keep this file safe, as it contains your Firebase API keys and credentials.
2.Upload Firebase Credentials in Admin Panel
Log in to your CabMe Admin Panel
Go to General Settings > Notifications Settings.
Upload the JSON file you downloaded from Firebase
3.Save & Apply Settings
Once uploaded, click Save/Update Settings.
The system will now connect to Firebase for sending push notifications.
4.Verify Push Notifications
Test by creating a new booking from the user app.
The assigned driver should instantly receive a push notification.
Customers will also get updates (ride accepted, driver arriving, ride started, ride completed).
4.5 AI Settings
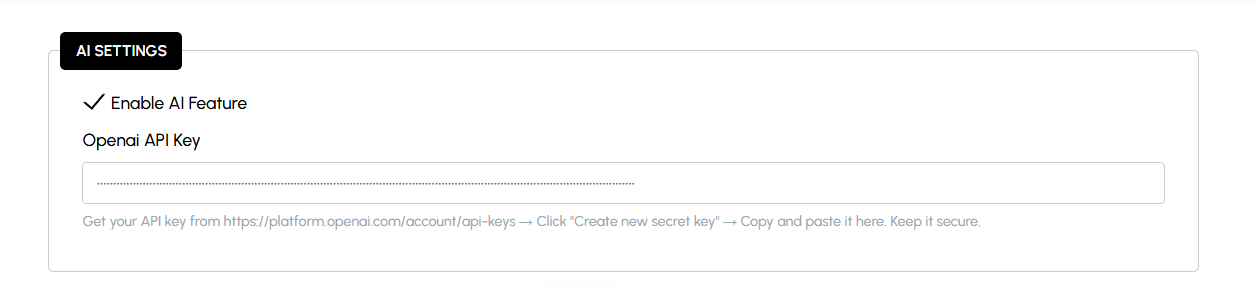
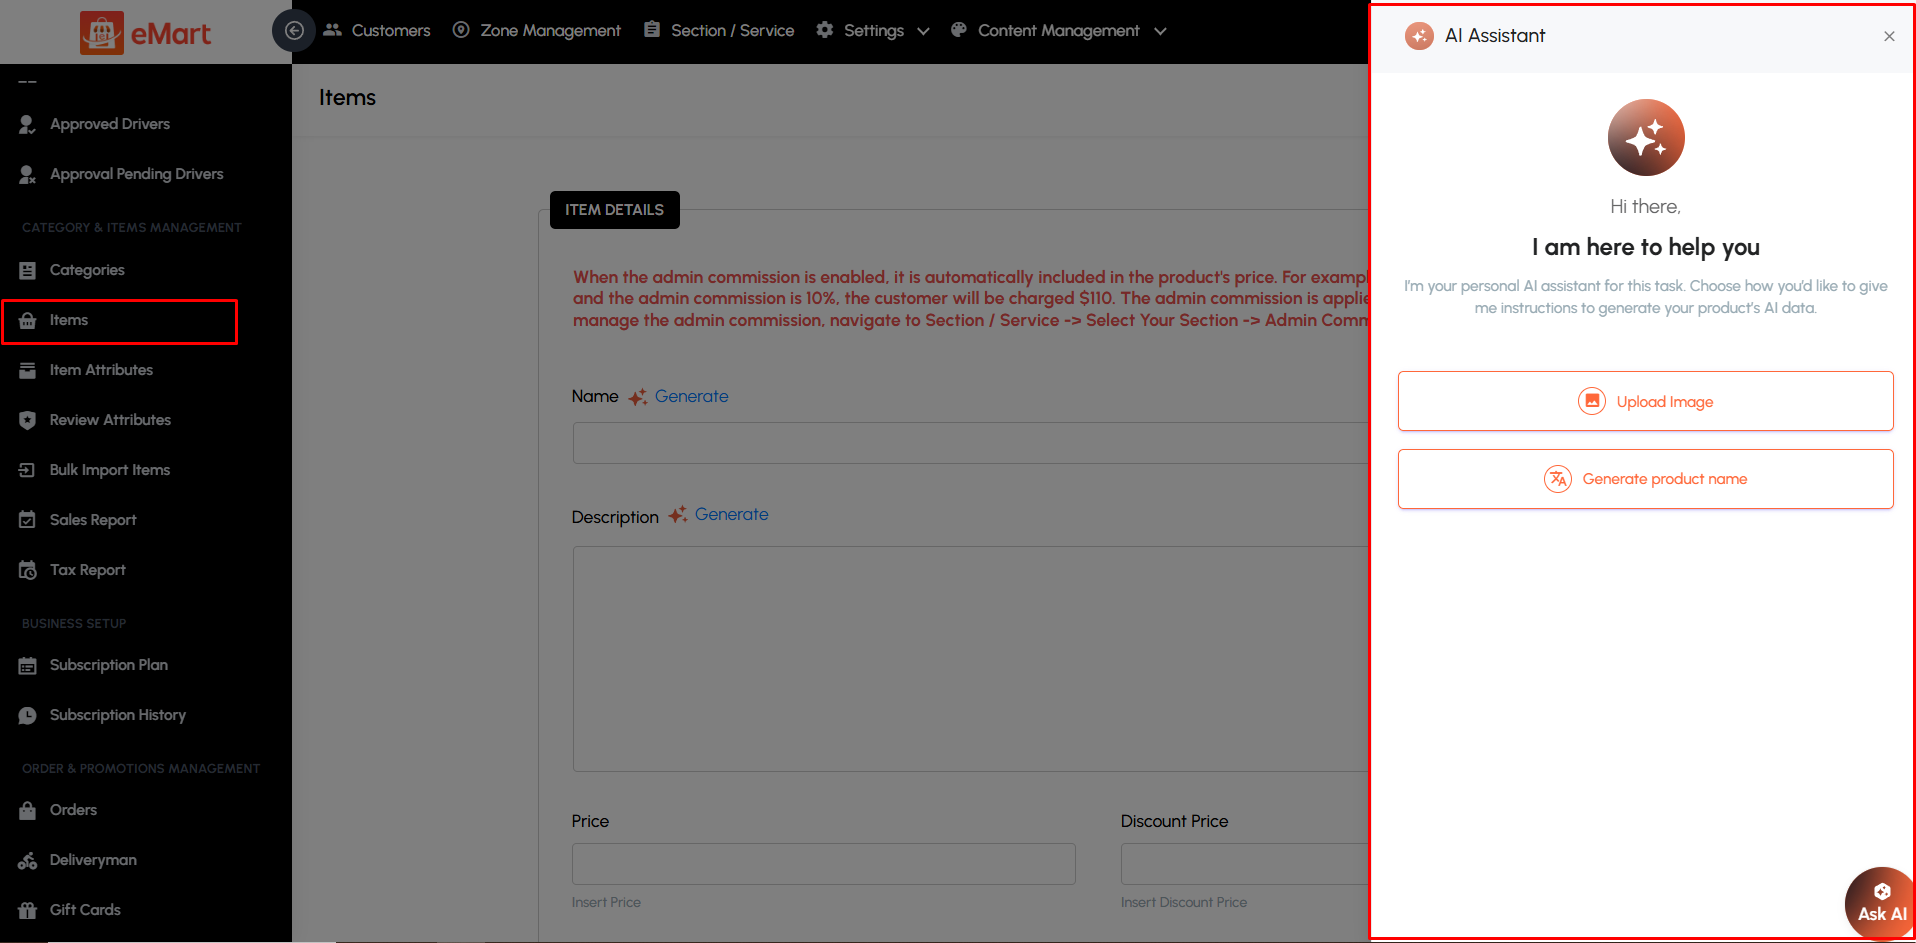
Please set up your AI settings by navigating to Settings > AI Settings menu
This AI feature enables automatic generation of product information by analyzing the product image along with the provided title and description. It extracts meaningful details and creates structured product data such as enhanced descriptions, specifications, variations and other relevant attributes to help streamline product listing and improve accuracy.
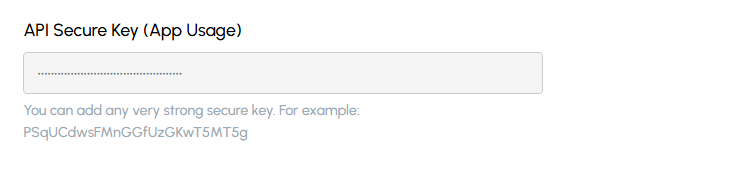
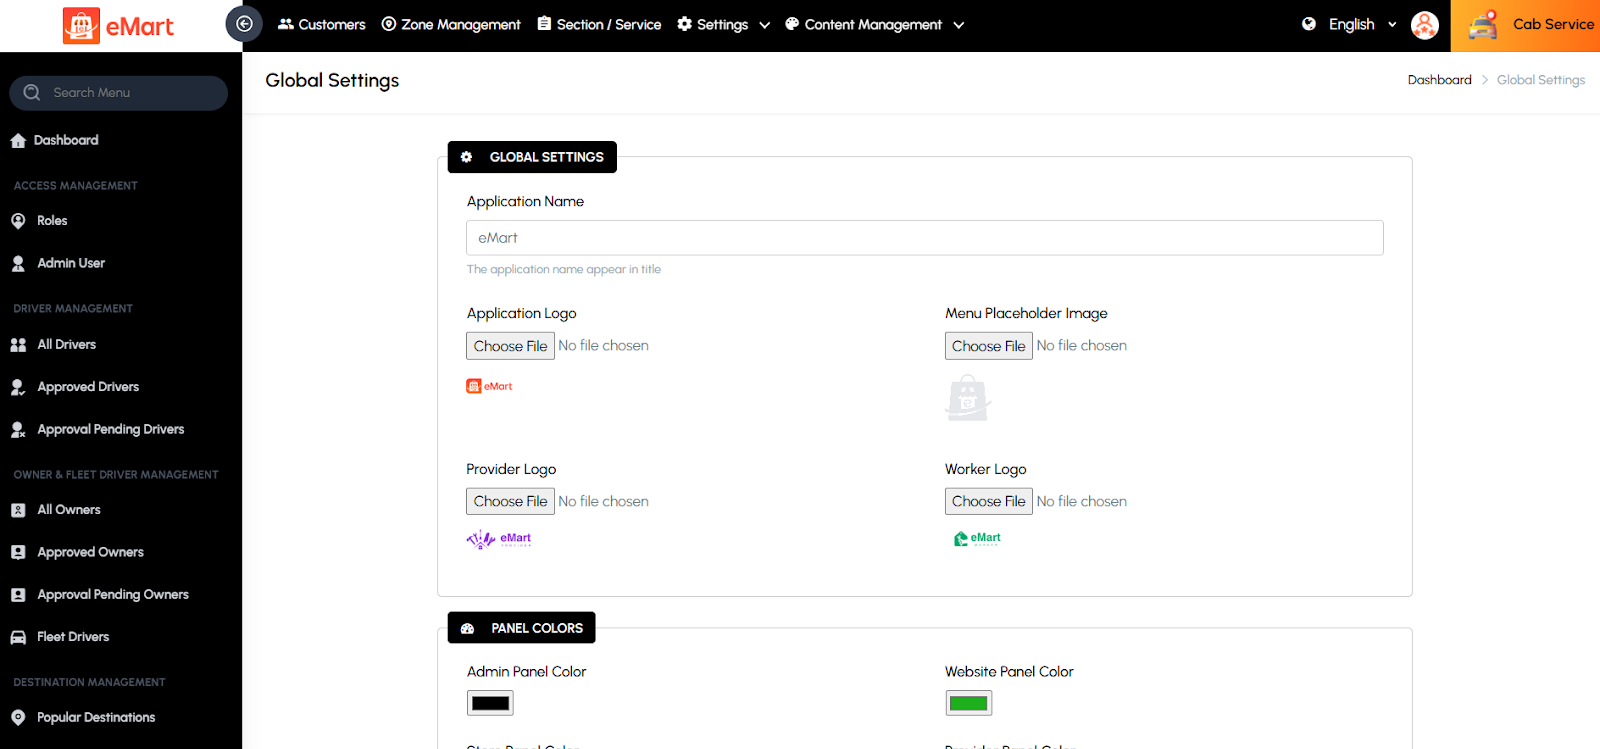
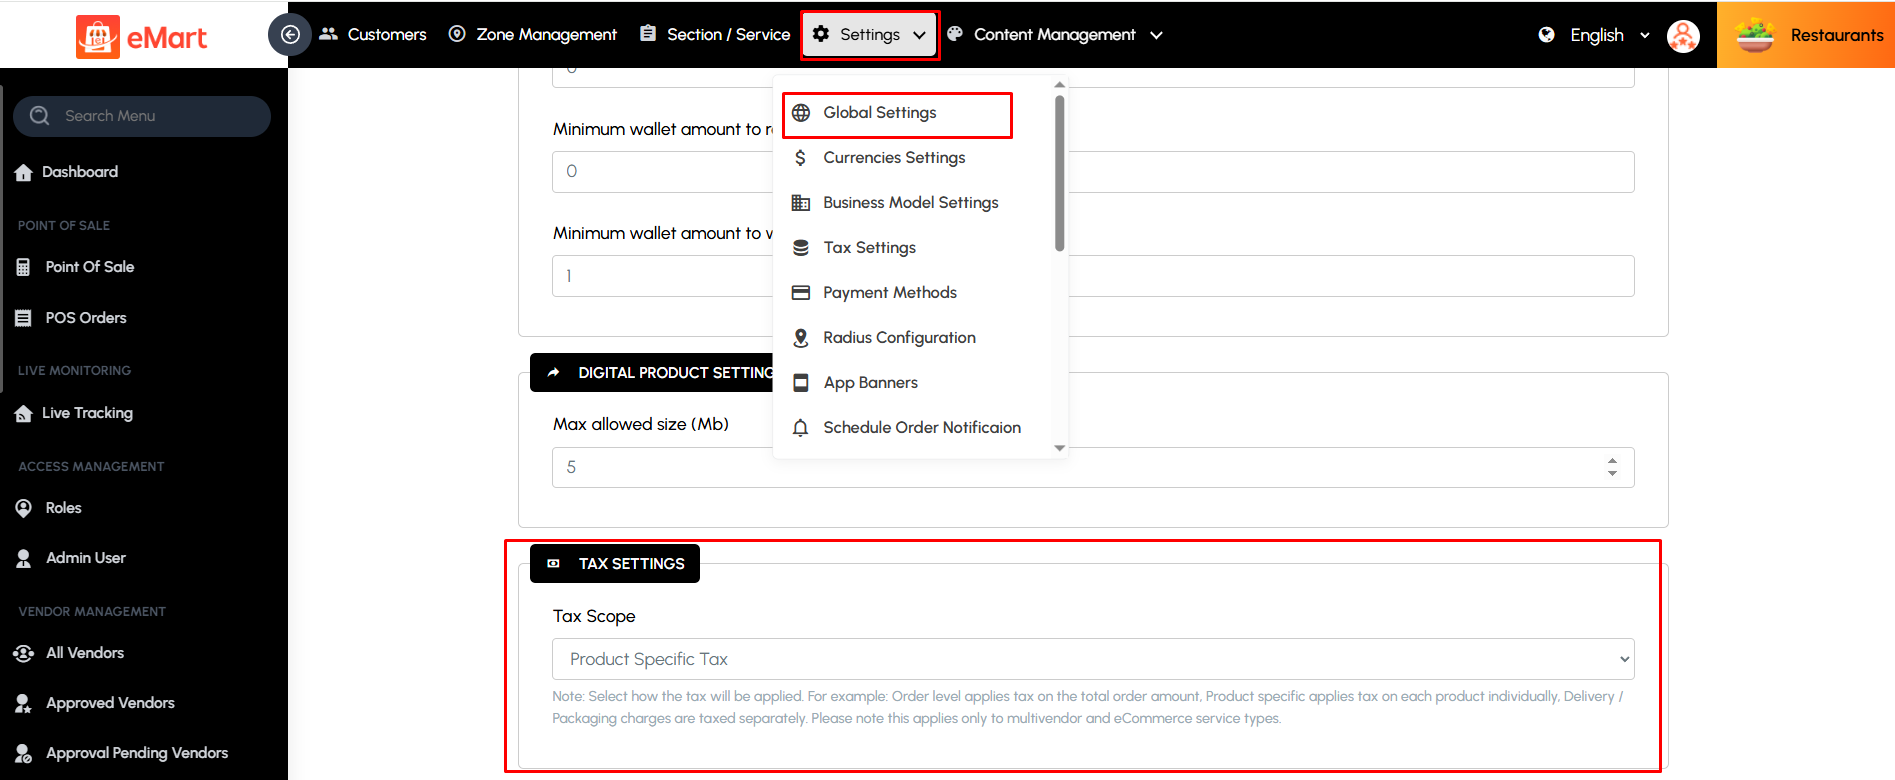
Please add your API Secure Key used in the application for AI features by navigating to Settings > Global Settings menu
4.6 Accessing the Admin Panel
Default Admin User Credentials
URL: Your desired URL where the admin panel is set up.
Email: admin@emart.com
Password: 12345678
Admin Panel Menus#
5. Admin Panel Menus Overview
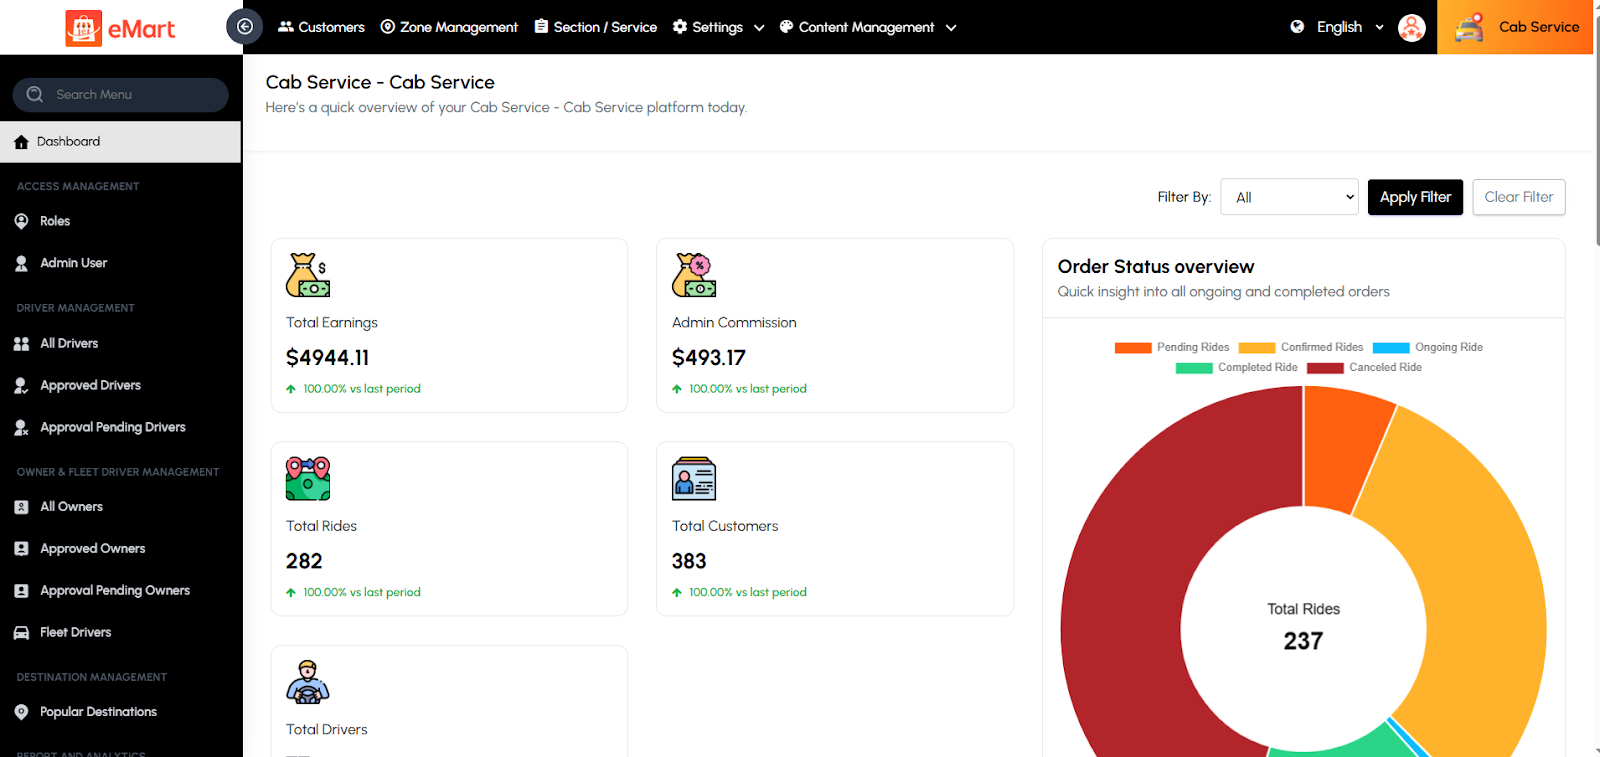
5.1. Dashboard
The Dashboard provides a summarized view of the platform’s key metrics and activities. It helps the admin monitor business performance in real time.
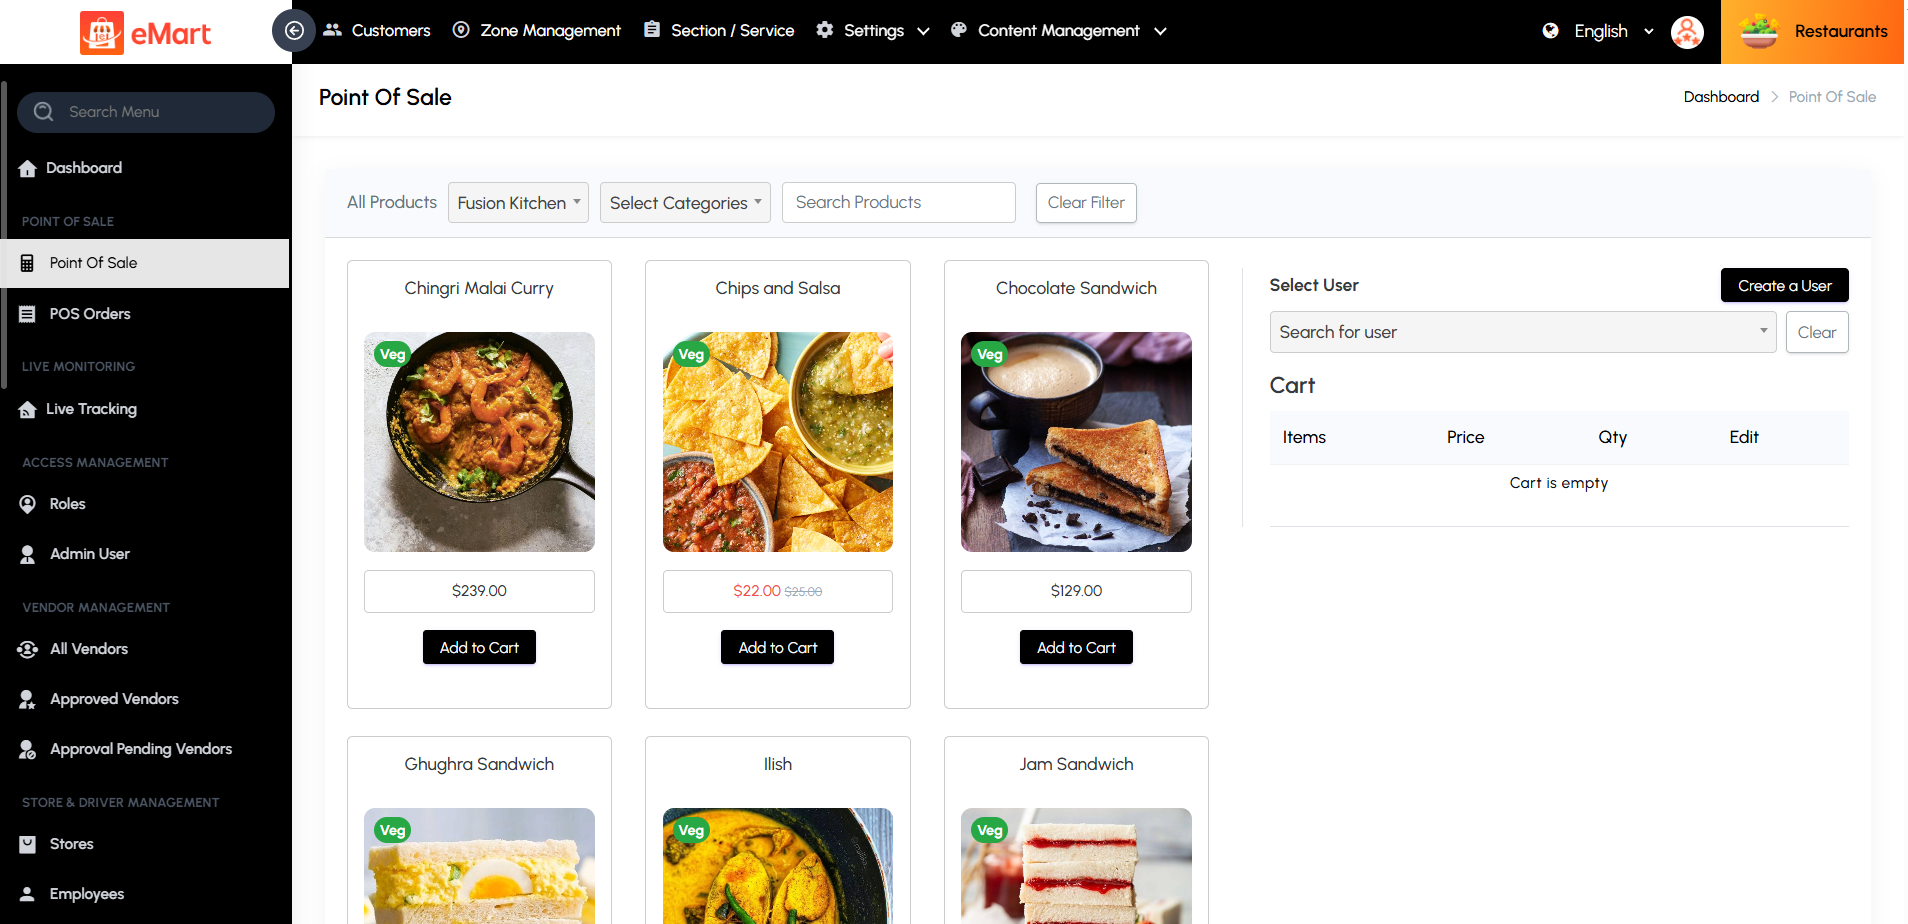
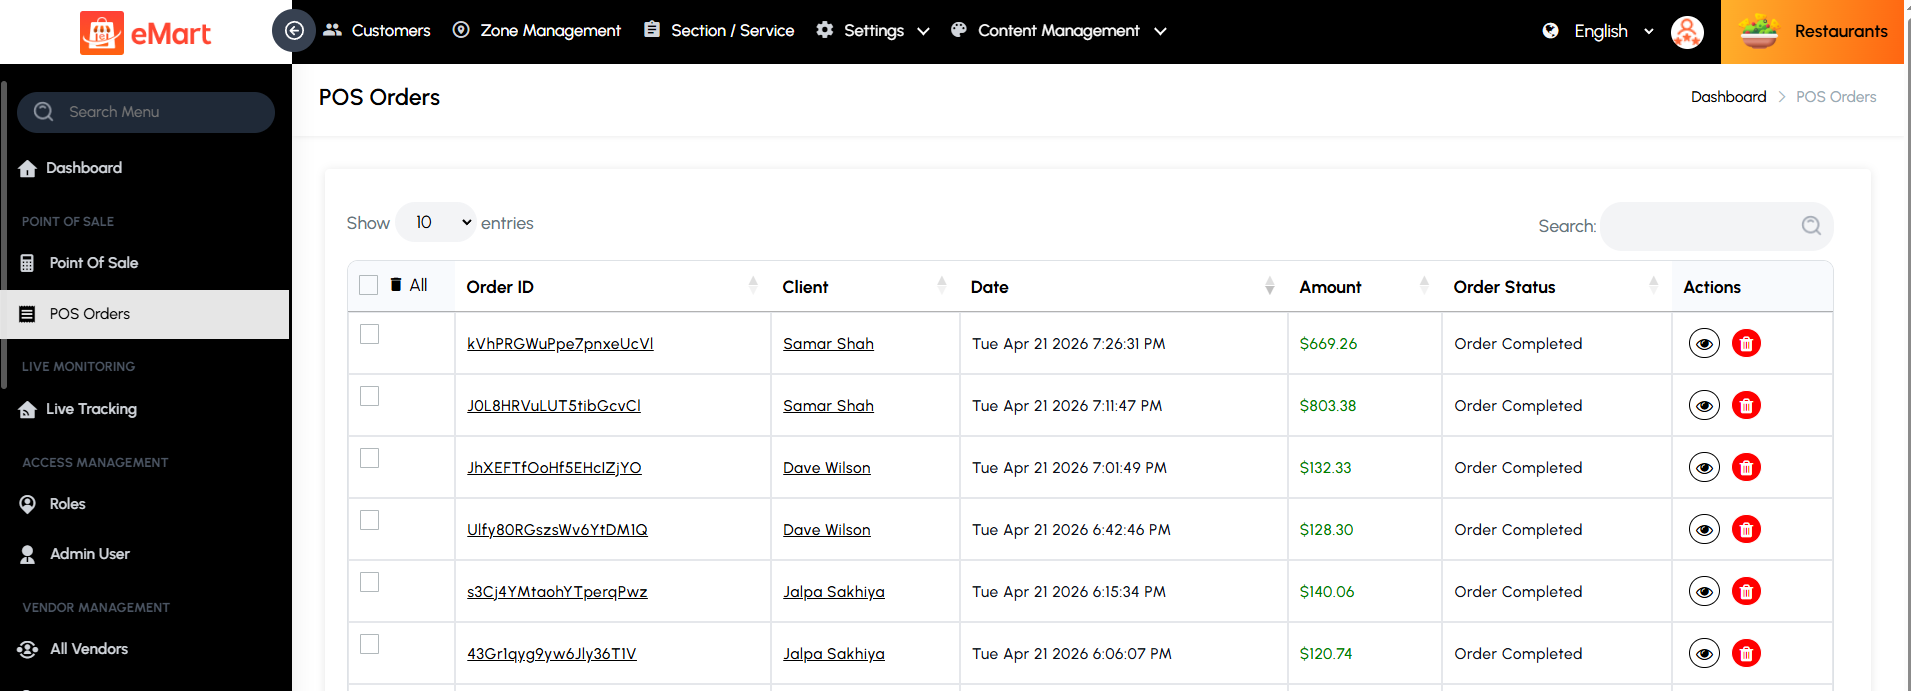
5.2. Point of Sale
Manage in-person or counter sales using the Point of Sale system. This feature allows staff to quickly create orders, add products or services, apply taxes, and process payments in real time. It’s ideal for handling walk-in customers, improving checkout efficiency, and keeping all transactions synchronized with platform order records.
POS Orders
View and manage all orders generated through the Point of Sale system. This section provides access to order details, item breakdowns. It helps track sales activity, resolve disputes, generate reports, and maintain accurate records.
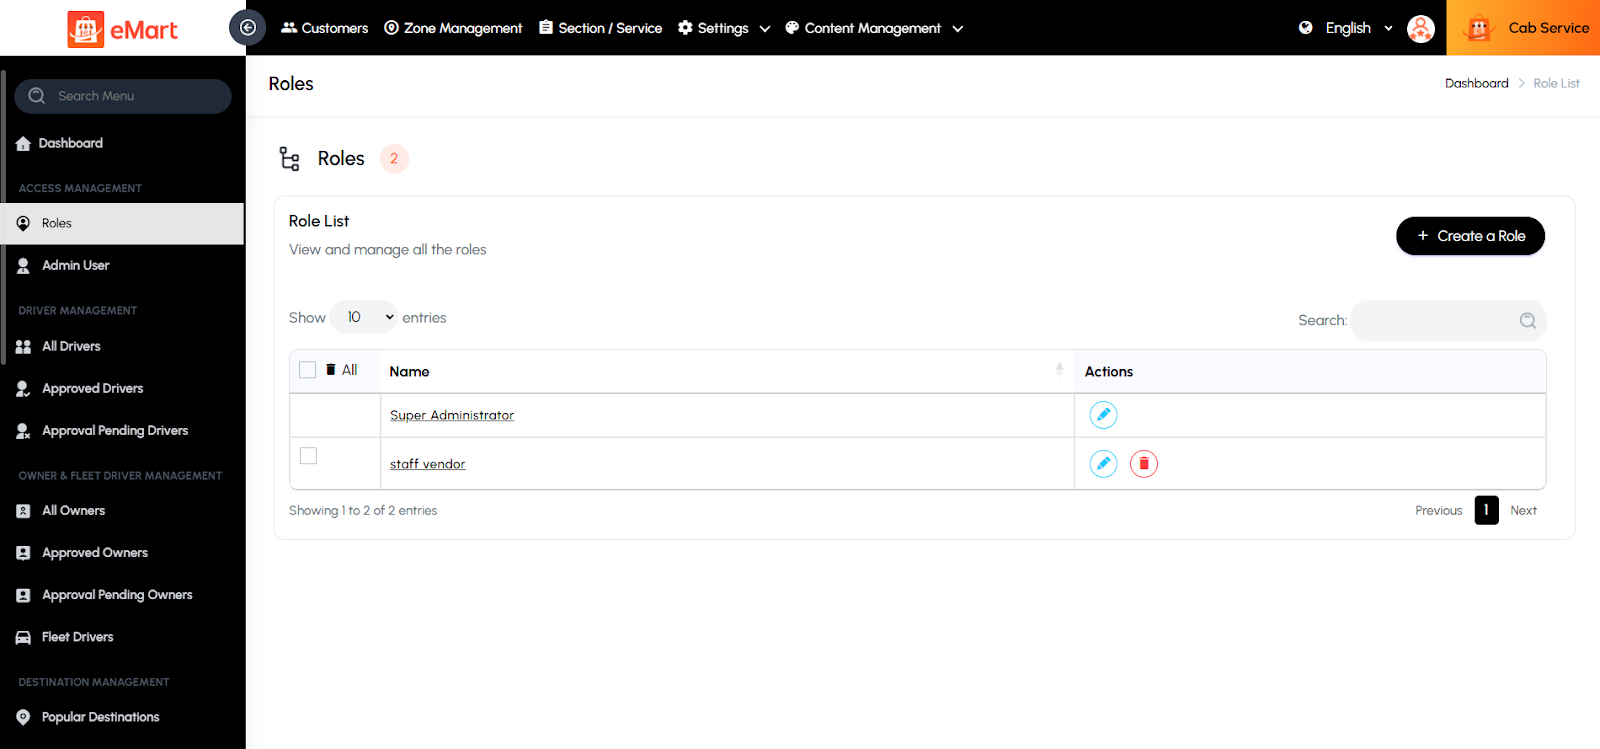
5.3. Access Management
Create and manage admin permission groups (e.g., Super Admin, Editor, Dispatcher). Control what each admin role can view or edit within the system
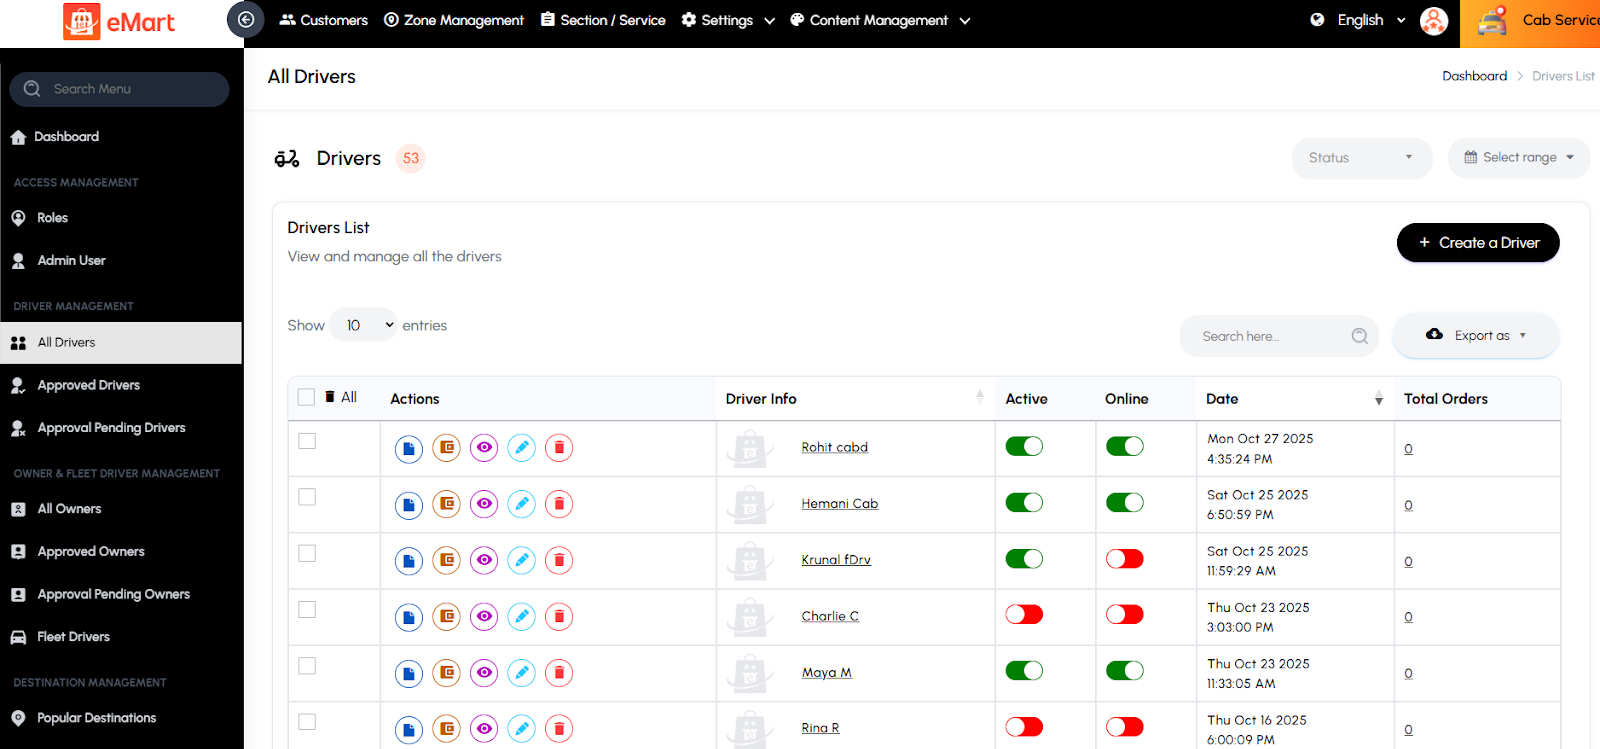
5.4. Driver Management
Used to manage all drivers who handle deliveries or rides on the platform, including individual drivers and fleet drivers associated with registered fleet owners. From this section, the admin can add new drivers, review and approve registrations, verify driver and vehicle documents, track their real-time location and activity, manage payouts, and monitor performance metrics such as completed trips, ratings, and earnings. It ensures that only verified, active, and reliable drivers and fleets operate efficiently within the system.
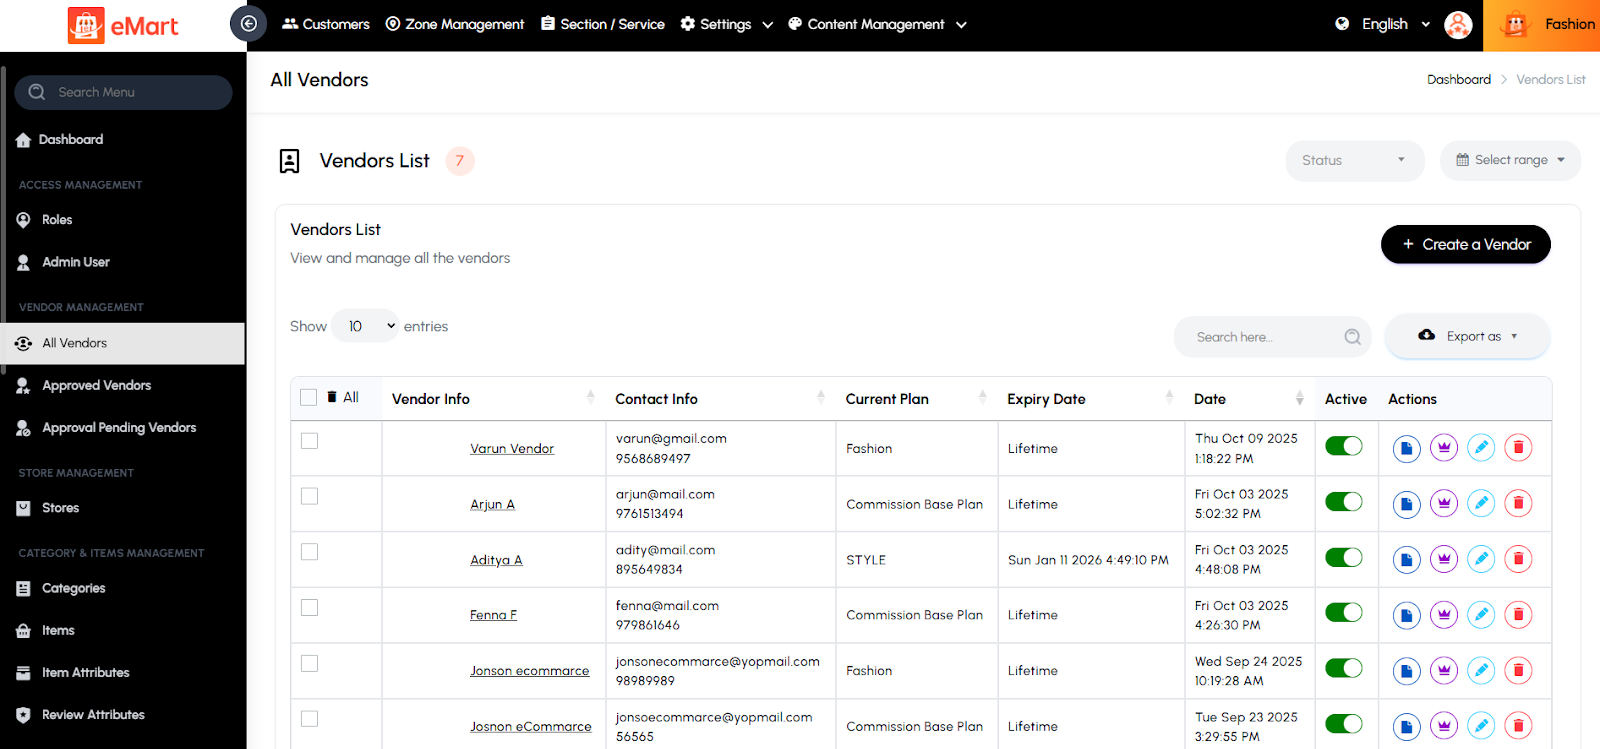
5.5. Vendor Management
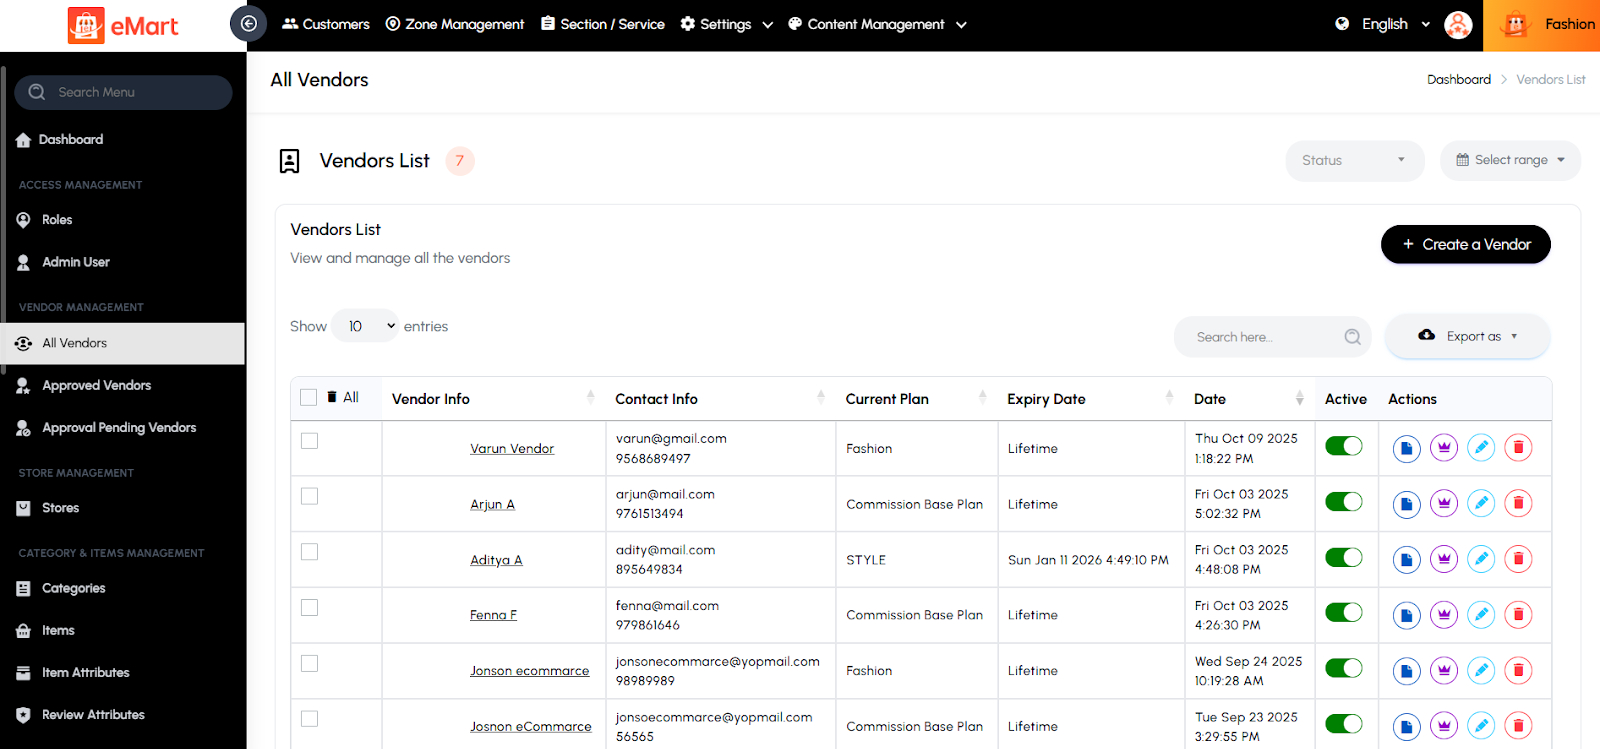
Used to manage all vendors or businesses registered on the platform. From this section, the admin can add new vendors, verify their details, approve or reject registrations, update business information, set commission rates, and monitor their sales, orders, and overall performance. It helps ensure that only verified and active vendors operate on the platform while maintaining quality and compliance.
5.6. Store Management
Used to manage all stores or branches associated with vendors on the platform. From here, the admin can create new stores, edit existing details, update business hours, manage delivery areas, and monitor performance metrics such as orders, earnings, and ratings. It ensures each store operates correctly within its assigned vendor account and follows platform policies.
5.7. Customer Management
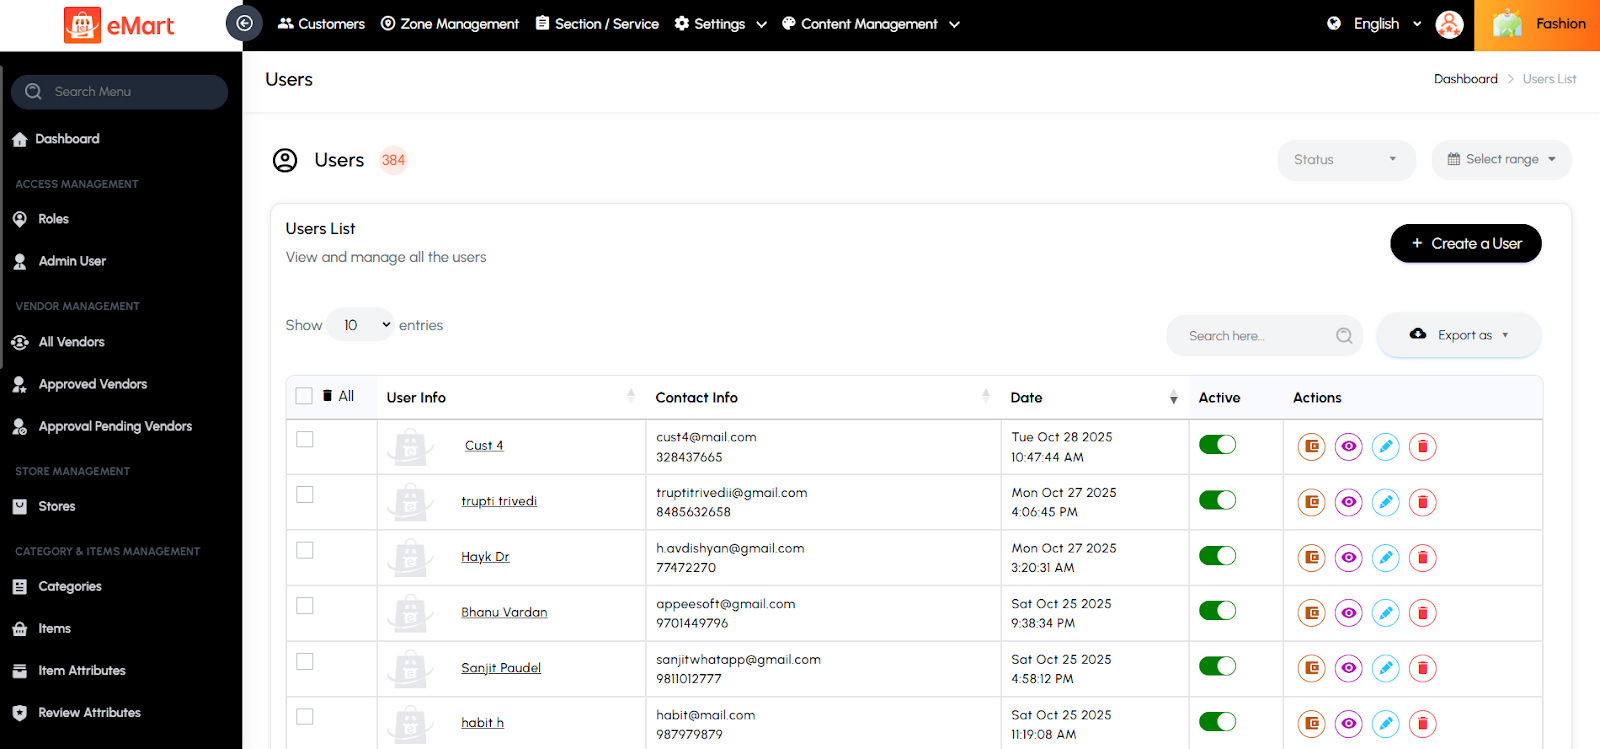
Used to manage all customer accounts registered on the platform. From this section, the admin can view customer profiles, contact details, order history, wallet balance, and activity status. It allows the admin to verify users, handle support issues, manage account status (active or blocked), and monitor user engagement across different services. This helps maintain a secure and well-managed customer base.
5.8. Zone Management
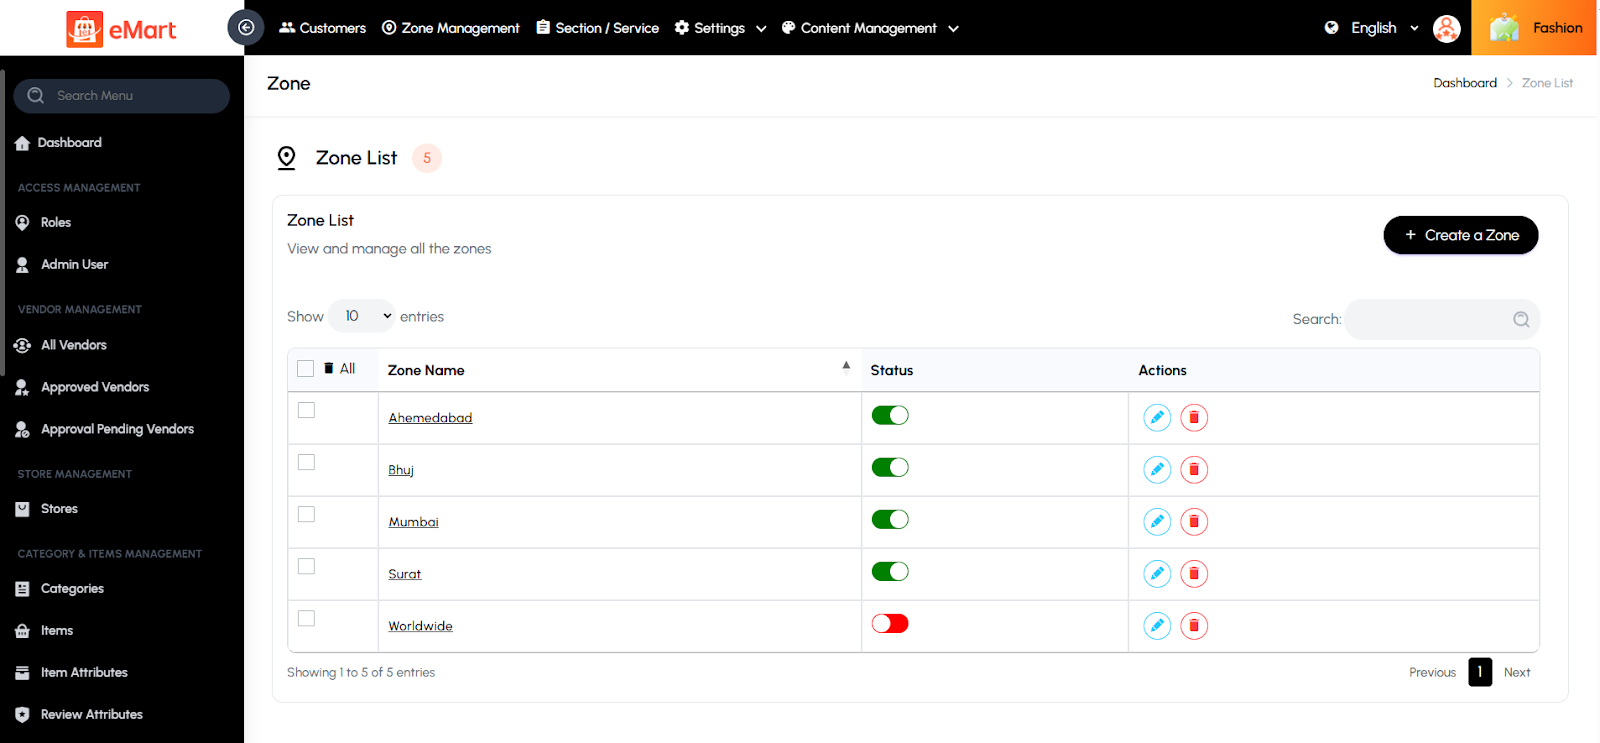
Used to define and manage geographic zones or service areas where the platform operates. From this section, the admin can create, edit, or remove zones by setting map boundaries or pin locations. It helps assign vendors, drivers, and delivery coverage based on specific regions, ensuring efficient order allocation and accurate service availability for users within defined areas.
5.9. Section / Service Management
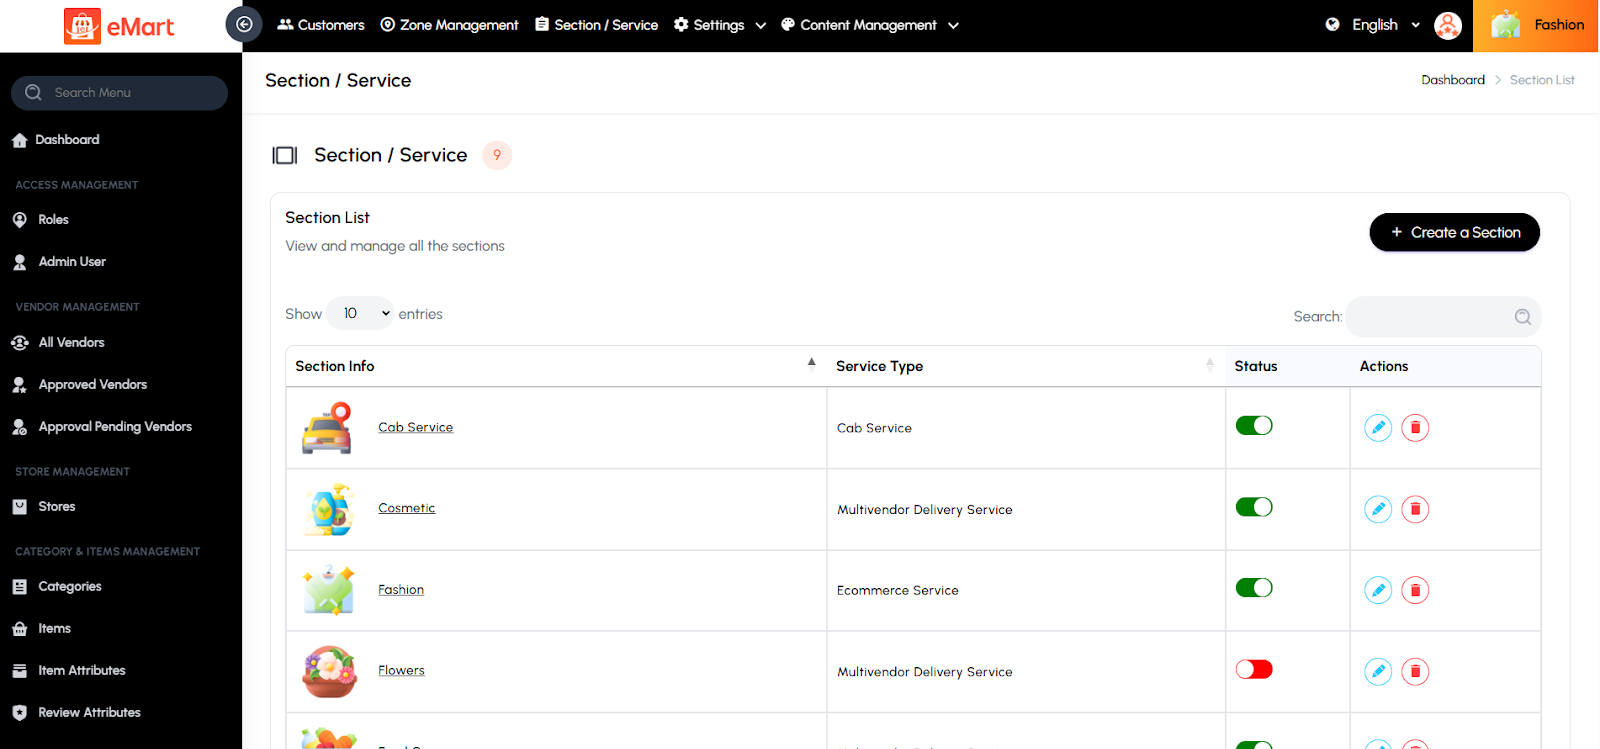
Used to manage different service sections or business types available on the platform, such as restaurants, groceries, pharmacies, or salons. From this section, the admin can create and configure sections, assign them to specific service types (e.g., Multivendor Delivery, On-Demand, etc.), and customize related settings like categories, menus, and delivery options. It helps control which services are active on the platform and how their data and menus appear in the admin and user apps.
5.10. Settings
Used to configure and control all core features and operational settings of the platform. This section allows the admin to define system-wide preferences such as business logic, currency, taxes, payments, delivery configurations, and application content. It ensures the platform runs smoothly and aligns with business requirements, branding, and policies.
Global
Used to set general platform configurations such as app name, logo, contact information, and default preferences applied across all services.
Currency
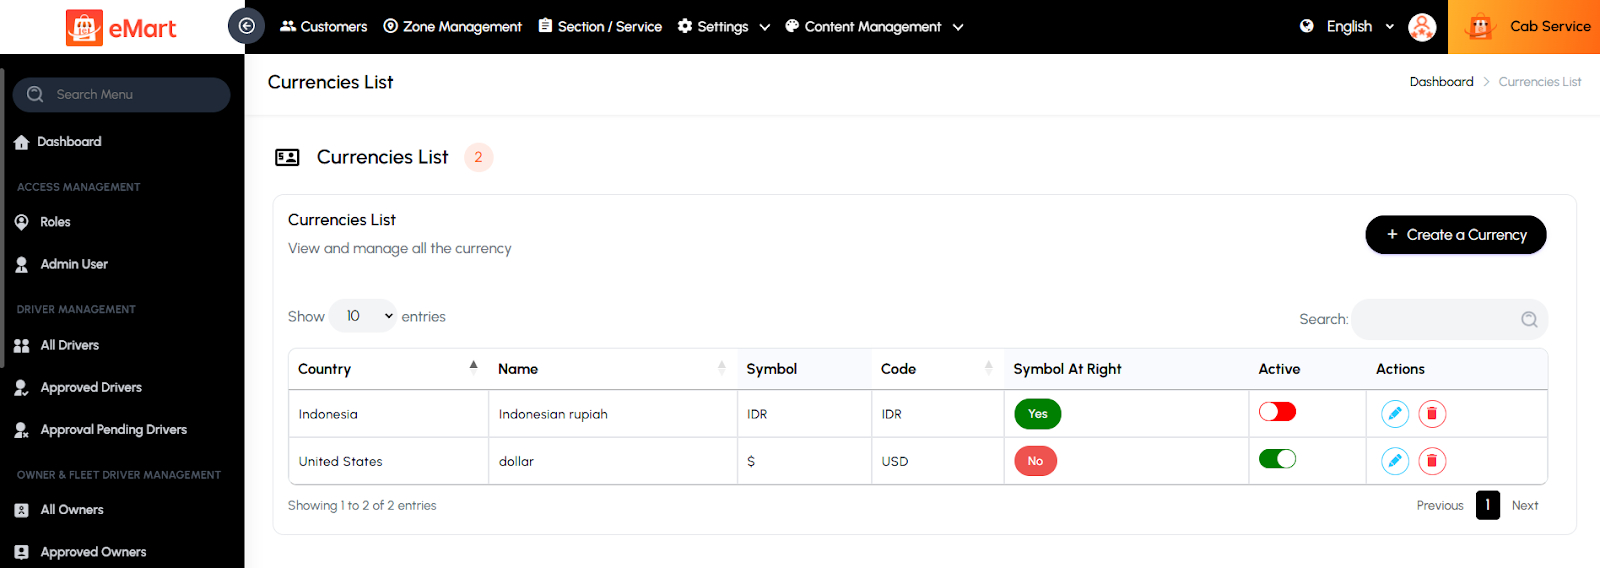
Used to manage supported currencies on the platform. The admin can add or update currency codes, symbols, and conversion rates for multi-country operations.
Business Model
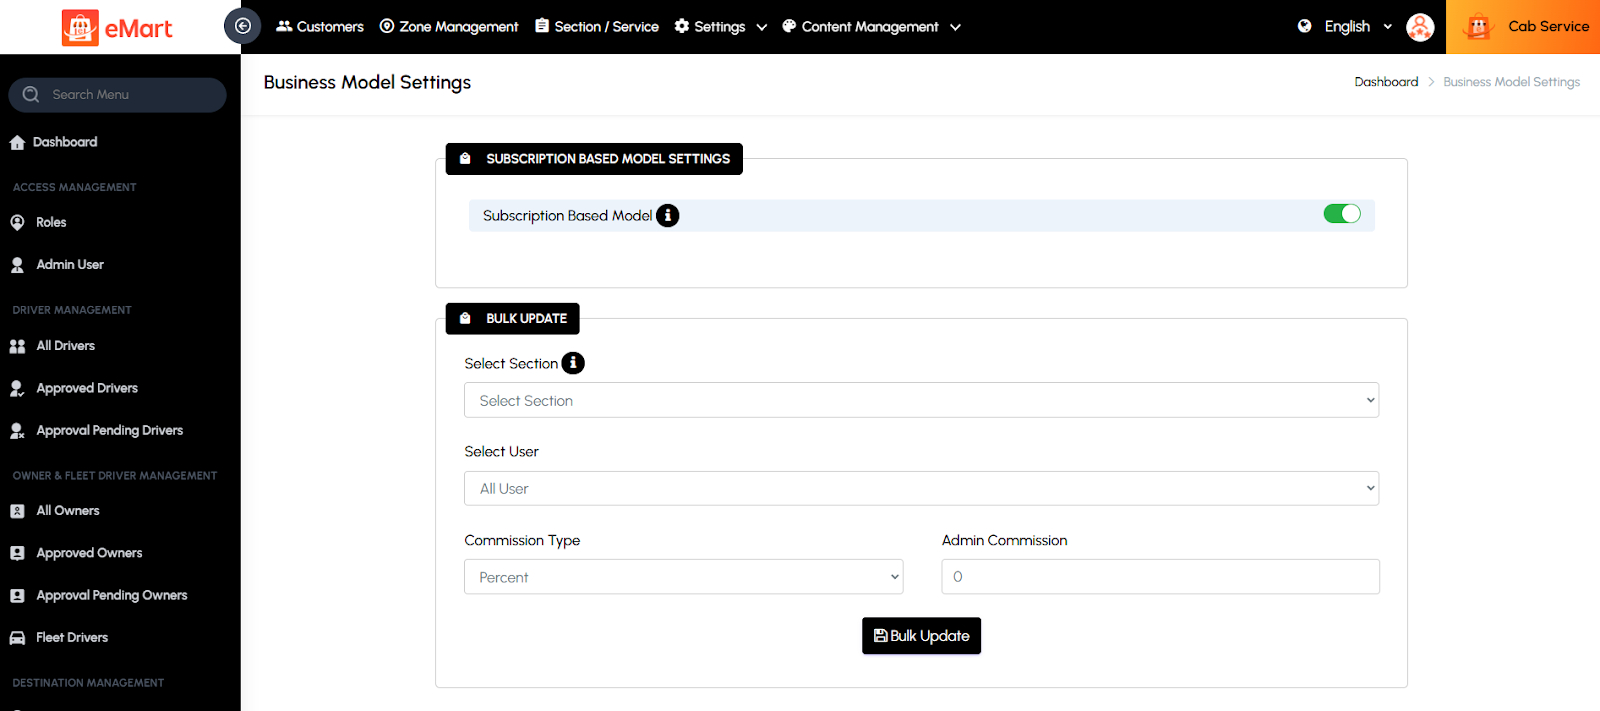
Used to define the platform’s operational model—such as commission-based, subscription-based, or hybrid—determining how revenue is generated from vendors and drivers.
Tax
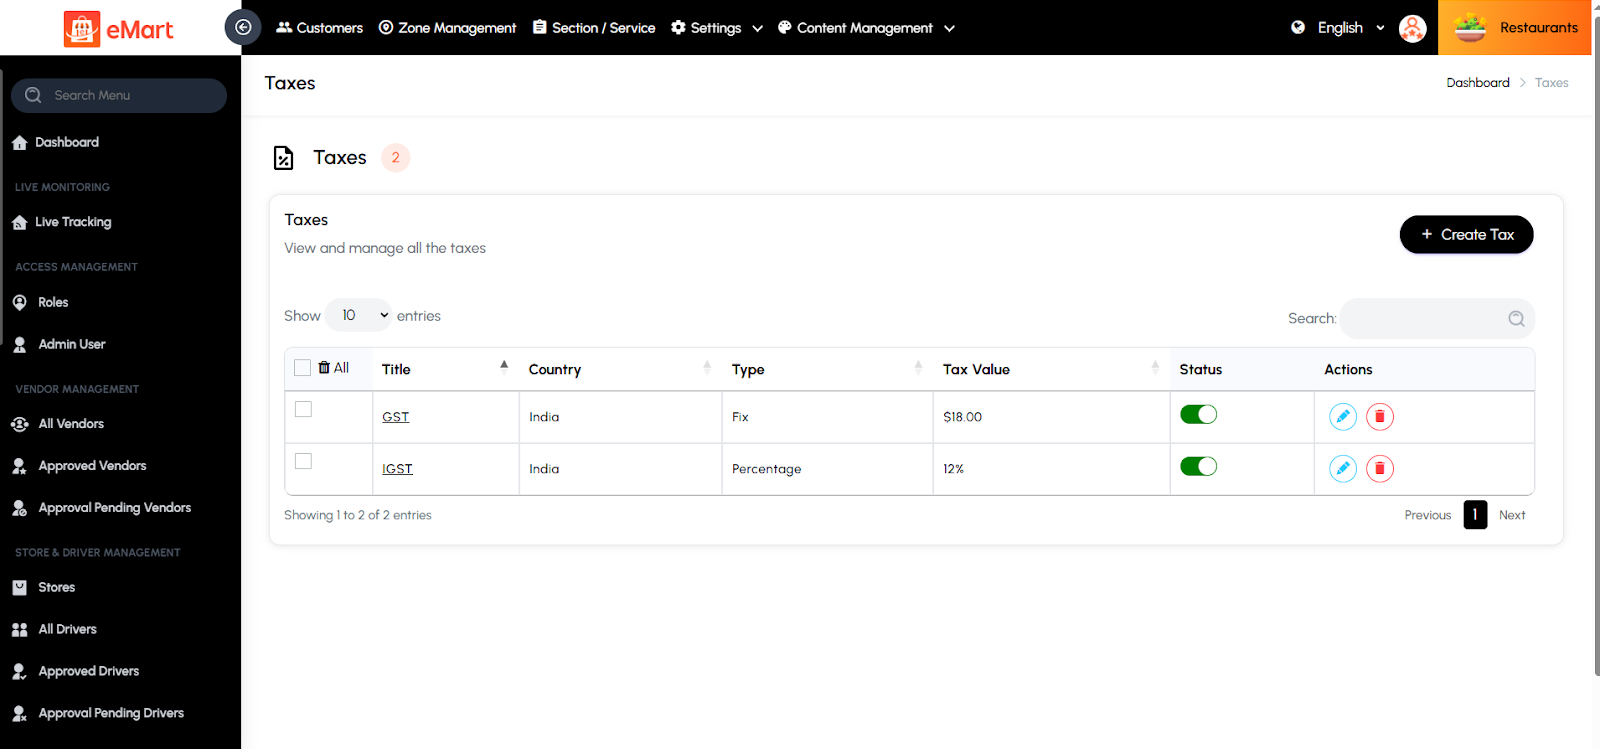
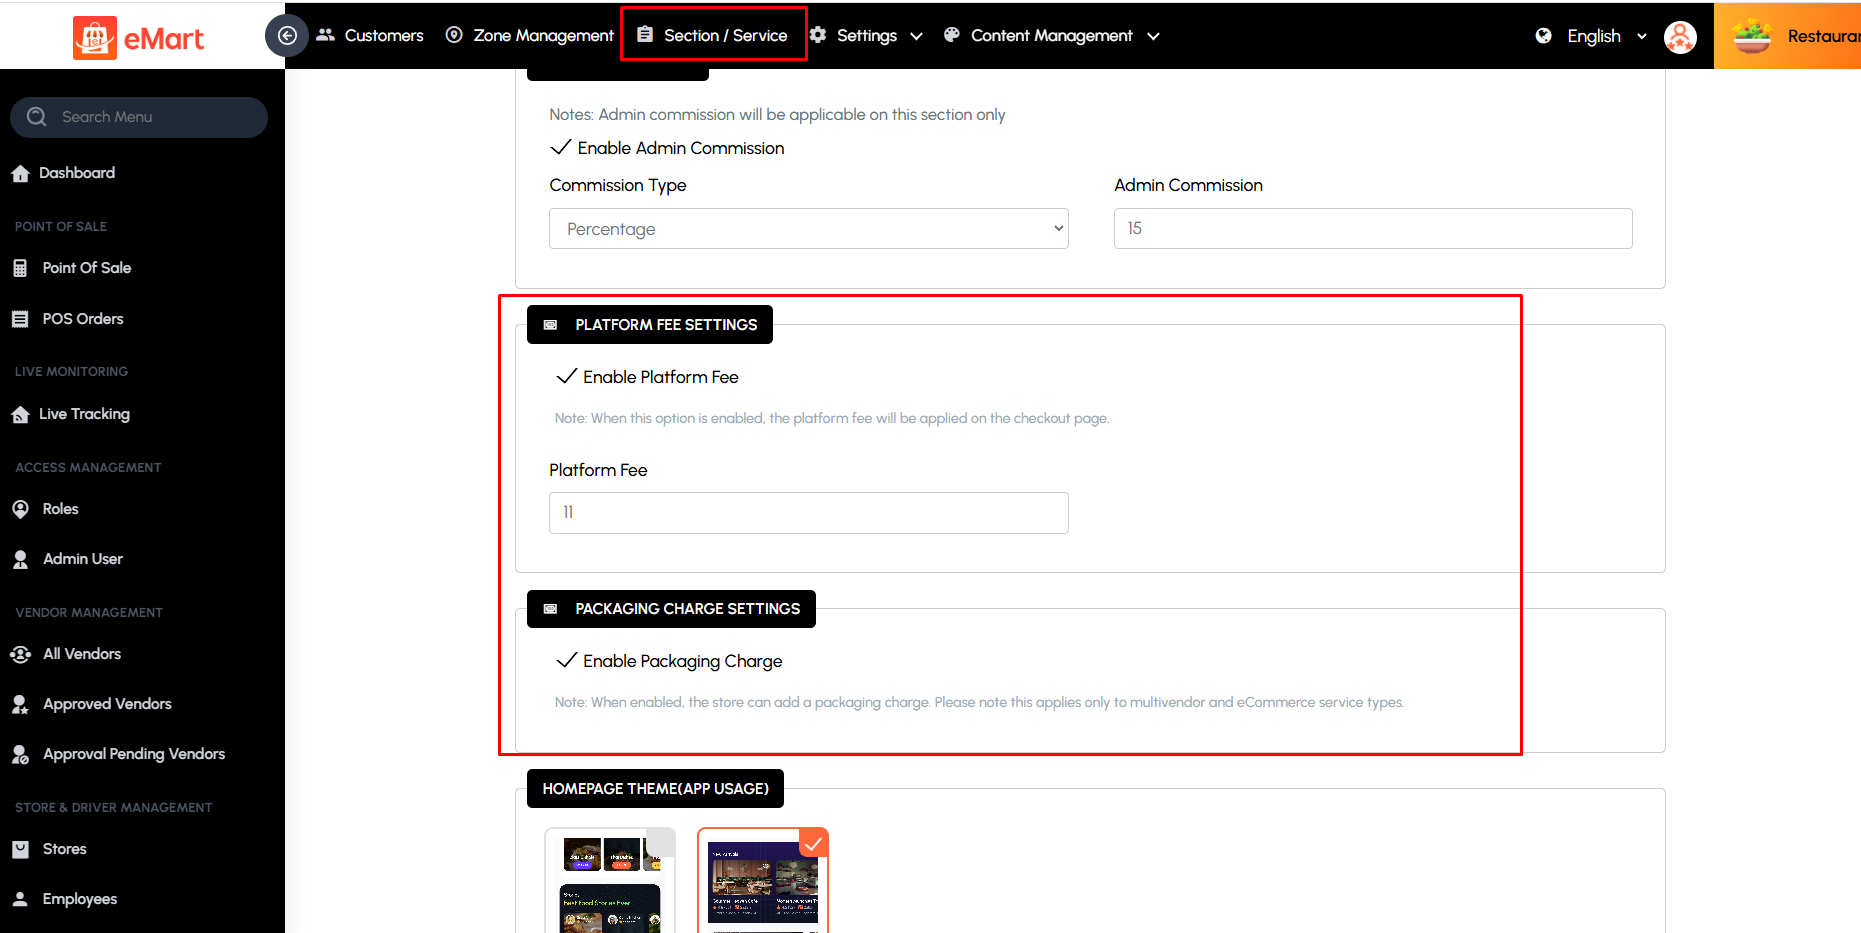
The Tax Settings page allows administrators to configure taxes applicable across all services. Admins can define tax types such as GST, VAT, or other local taxes and specify rates for each service category. This page ensures that all fare calculations include accurate tax amounts, maintains compliance with local tax regulations, and provides transparency for customers and drivers. Proper tax configuration also helps in generating accurate financial reports and simplifies accounting and regulatory reporting. Now supports scope options: Product Level, Order Level, Tax on Delivery Fee, Tax on Packing Charge, and Tax on Platform Fee, along with country-wise tax.
Please Note:
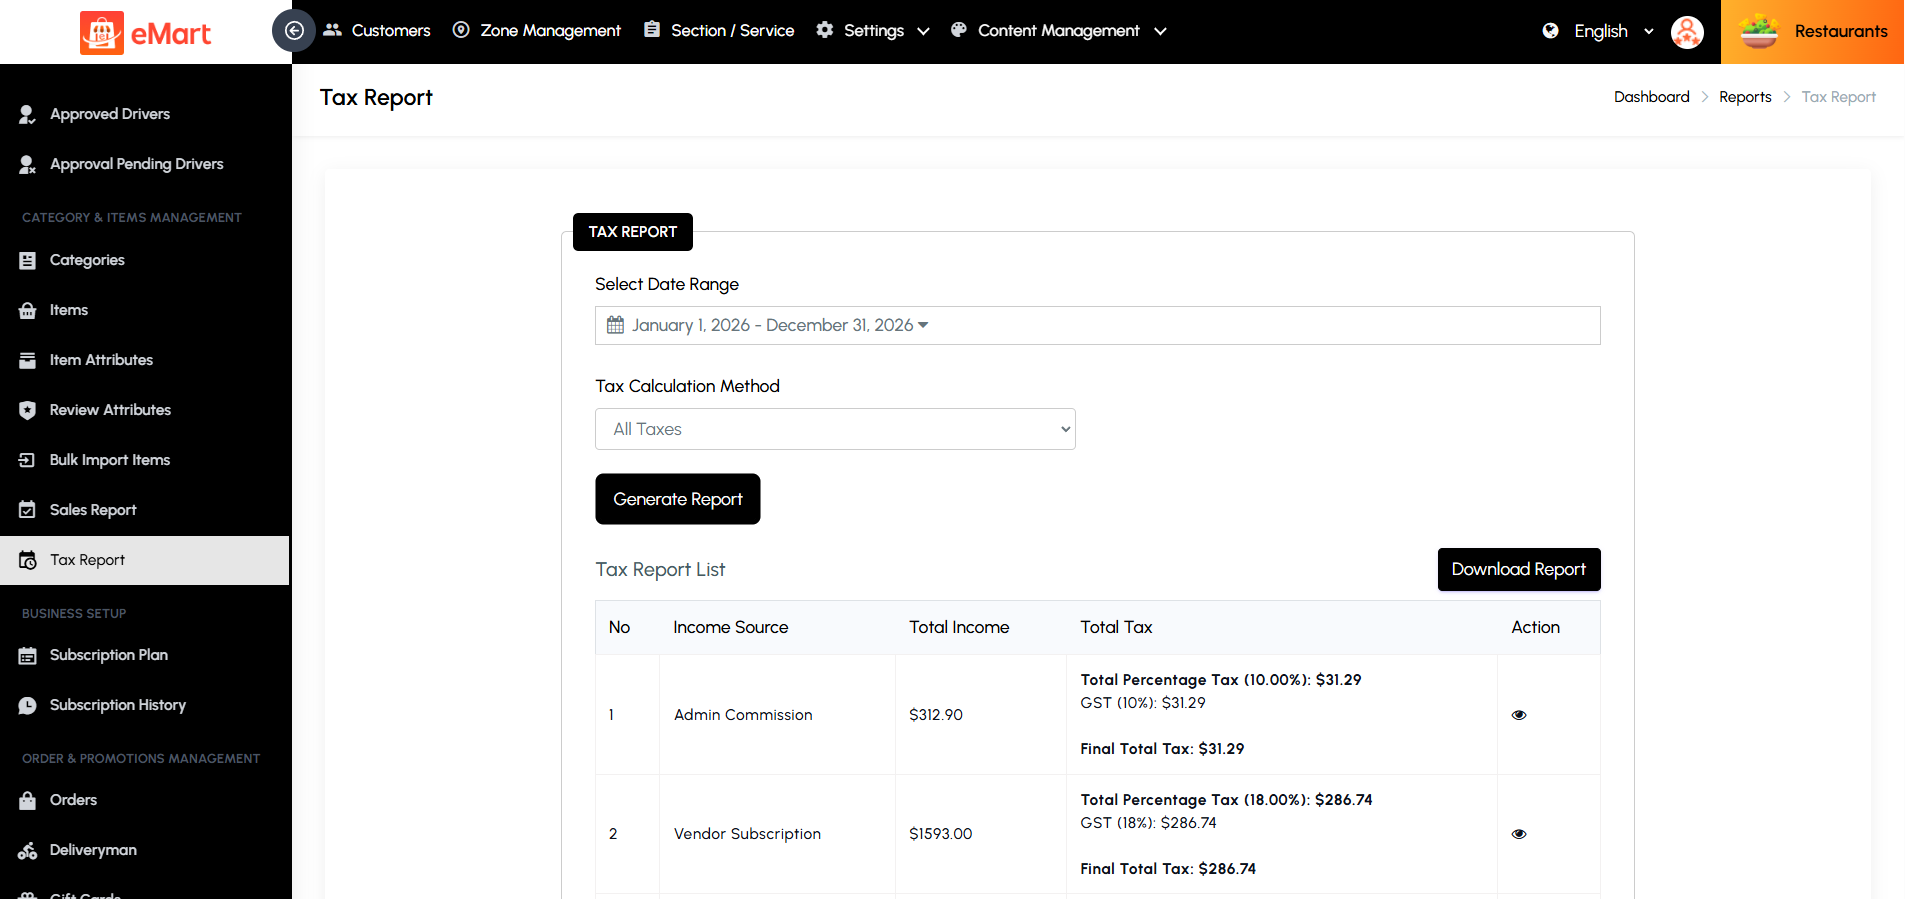
Admin Commission Tax and Vendor Subscription Tax is used only for admin tax reports to calculate taxes on income.
Admins can also select which tax scope applies for users, allowing flexibility to apply taxes at either the product level or order level. Also Platform Fee and Packing Charge is enabled, the configured tax will also apply to these components.
Please Note:
Packing & Platform tax setting located under Section & Tax Scope setting located under Settings > Global Settings
Payment Method
Used to configure available payment gateways and methods (like Stripe, PayPal, Razorpay, COD). The admin can enable or disable specific gateways and manage related credentials.
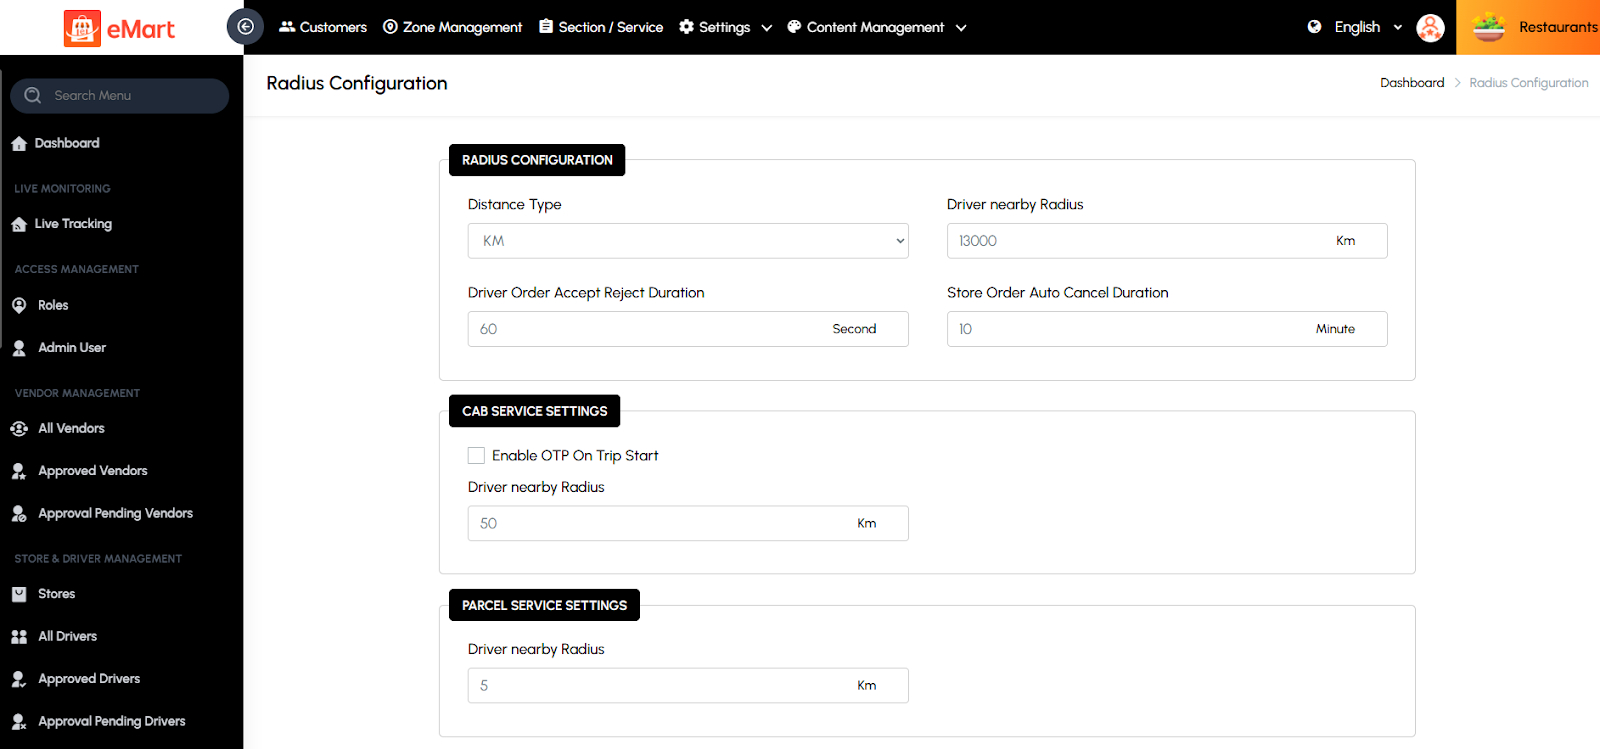
Radius Configuration
Used to define service and delivery radius limits for vendors and drivers. This ensures that orders or rides are assigned within specific distance boundaries for efficient service.
App Banners
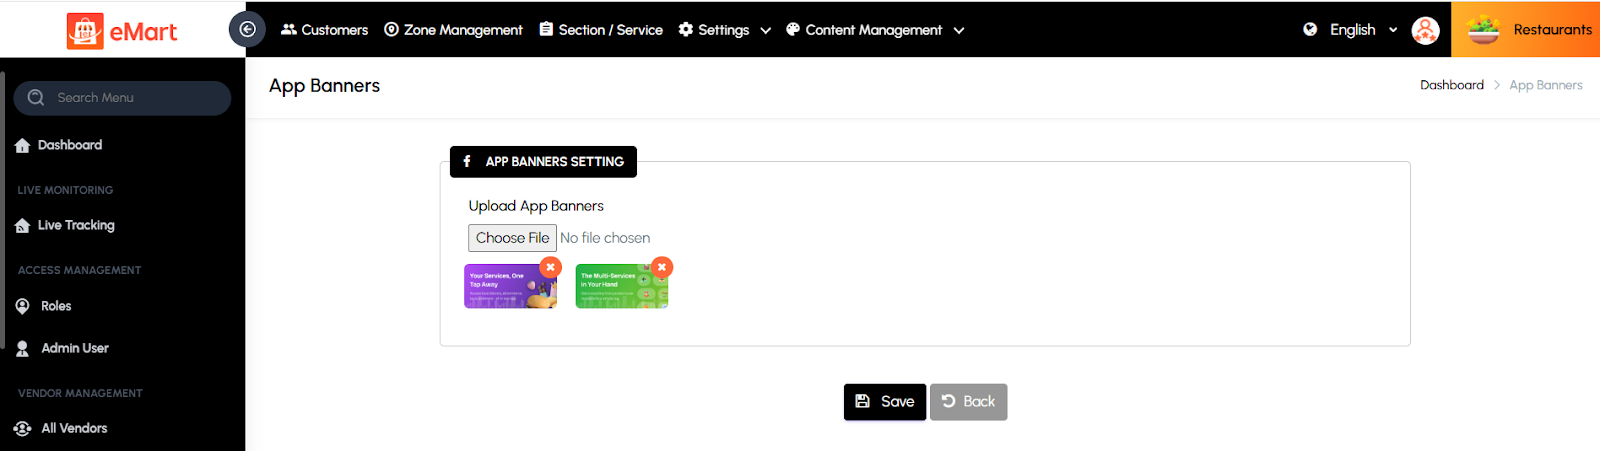
Used to manage promotional banners displayed in the app or website. The admin can upload banner images, set redirection links, and control their display order or duration.
Schedule Order Notification
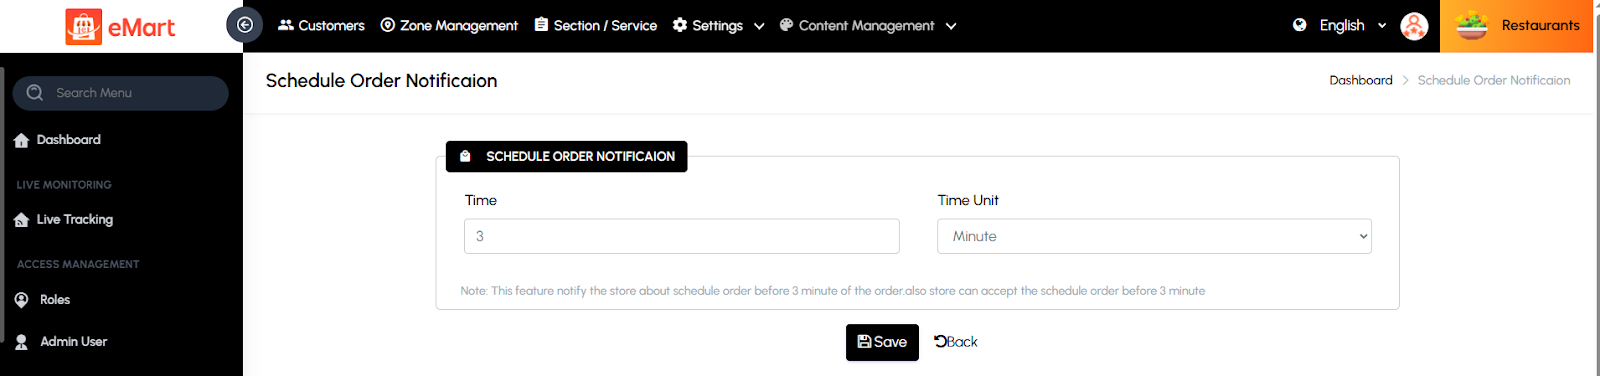
Used to configure automatic notifications for scheduled orders or deliveries. The admin can set time intervals and message templates for reminders and updates.
Delivery Charges
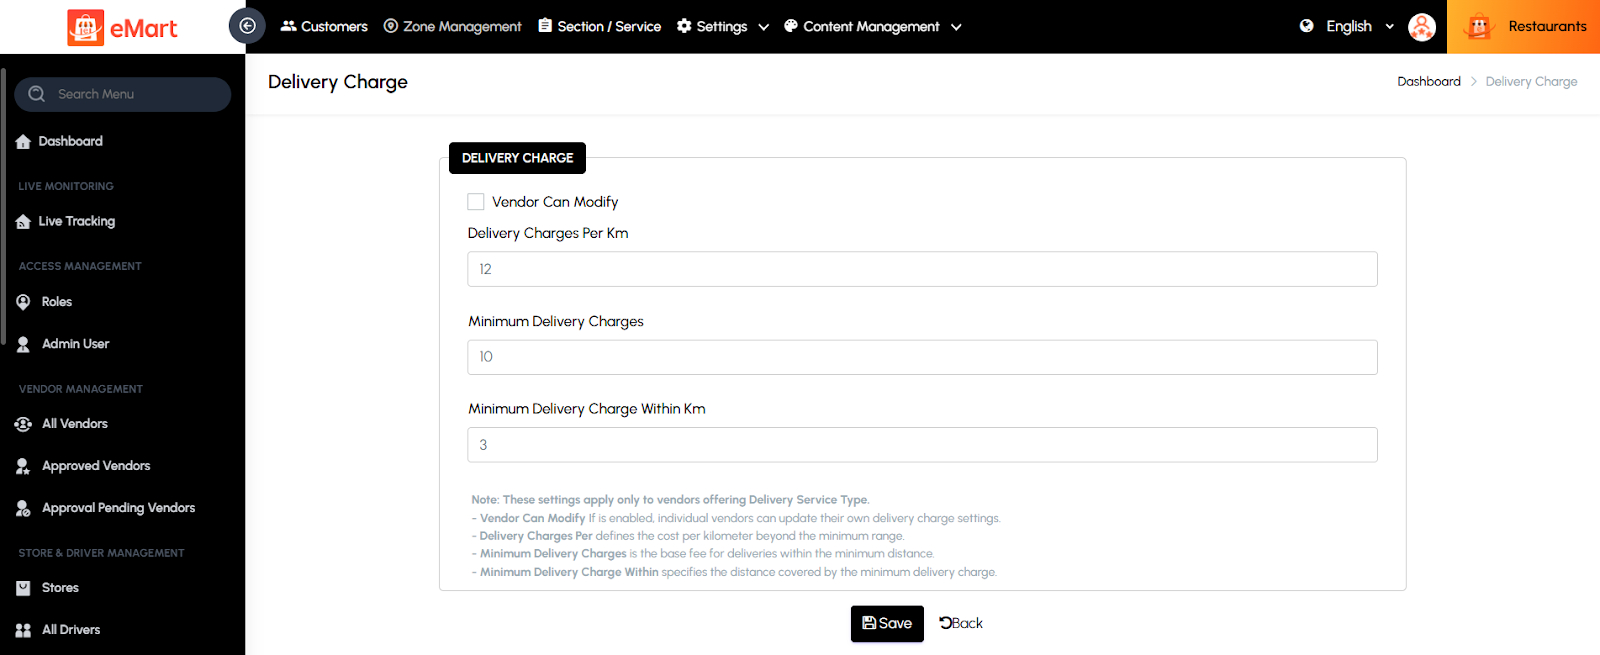
Used to set up and manage delivery fee rules. The admin can configure base charges, per-kilometer or per-mile rates, and free delivery thresholds.
AI Settings
This section allows administrators to manage AI-powered features integrated into the platform using OpenAI. It enables the automatic generation of complete product details — including descriptions, keywords, and specifications — based on the product title and an uploaded image. Admins can configure the API key, control AI usage limits, and adjust feature availability. This feature streamlines the product creation process, saving time for vendors while ensuring high-quality and consistent product data across the platform.
Document Verification
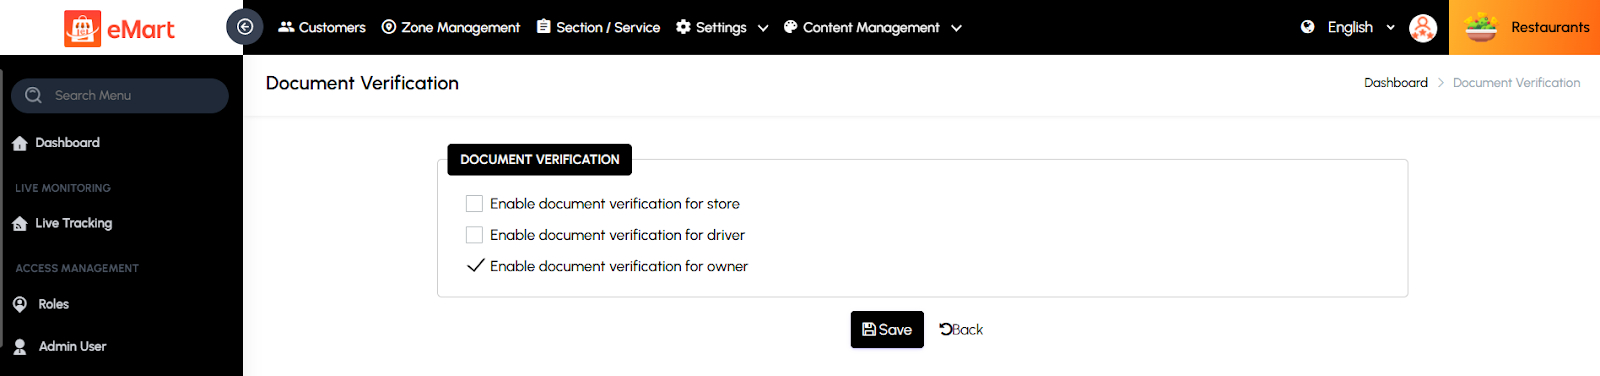
Used to manage required documents for user verification, such as IDs for drivers, vendors, or owners. The admin can define mandatory fields, document types, and approval processes.
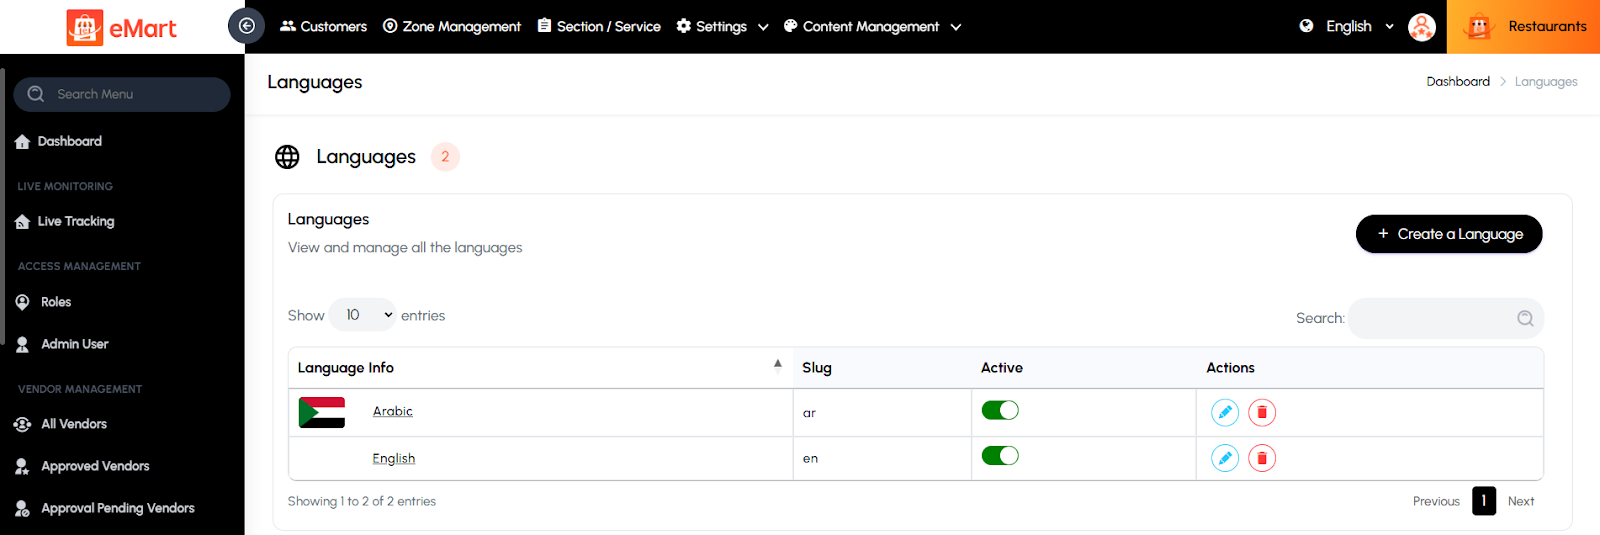
Languages
Used to manage language options for multi-lingual support. The admin can add or update languages and upload translation files for the user and admin interfaces.
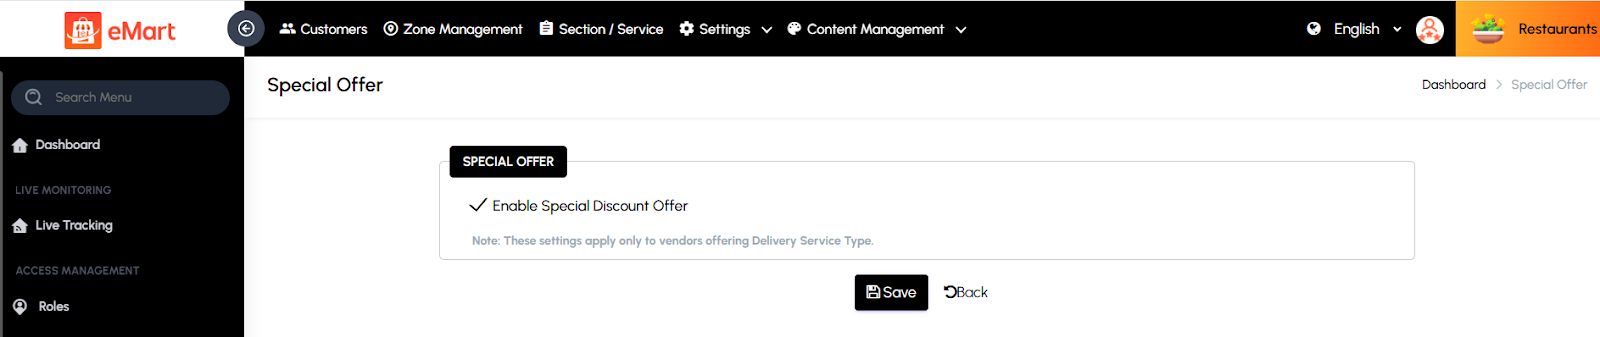
Special Offer
Used to create and manage platform-wide promotional offers or limited-time discounts to attract users and boost sales.
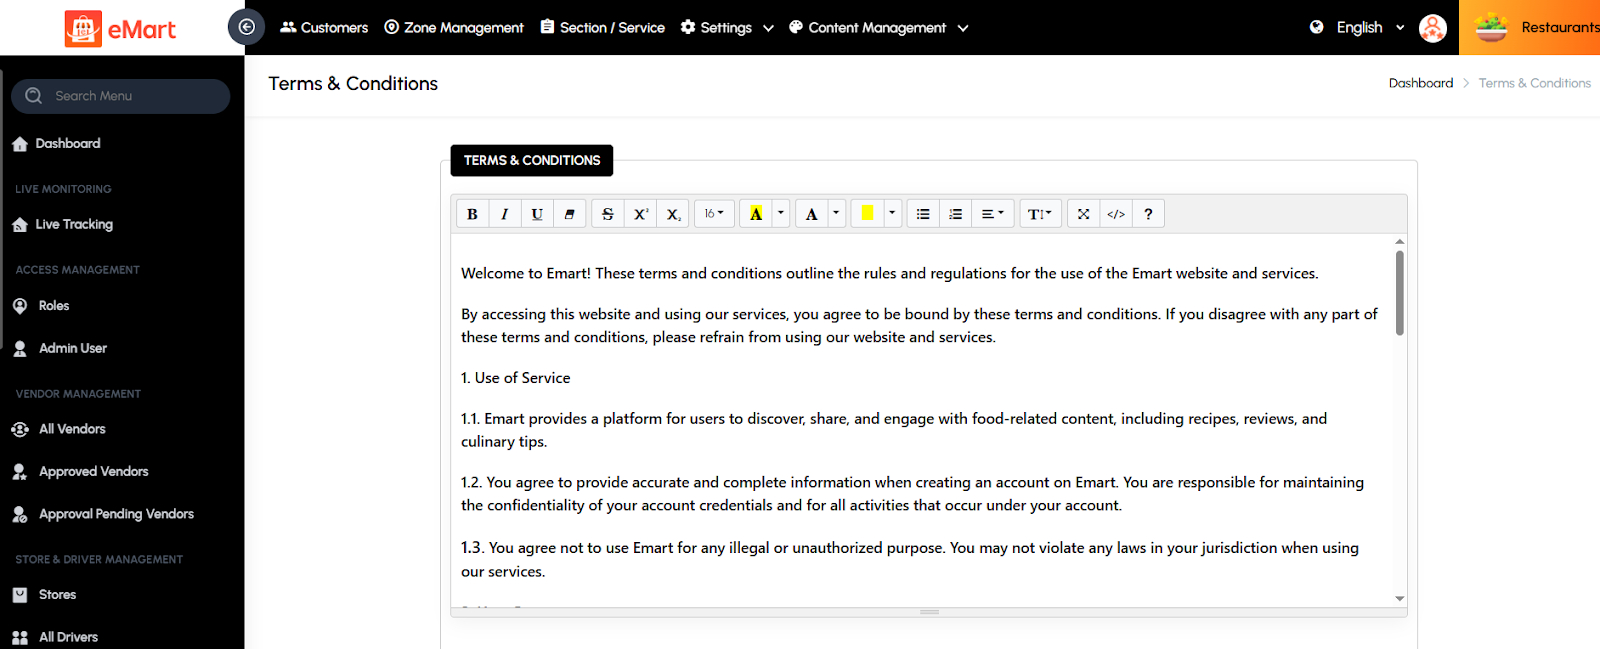
Terms & Conditions
Used to update and maintain the platform’s official terms of service, ensuring users understand the rules and responsibilities when using the application.
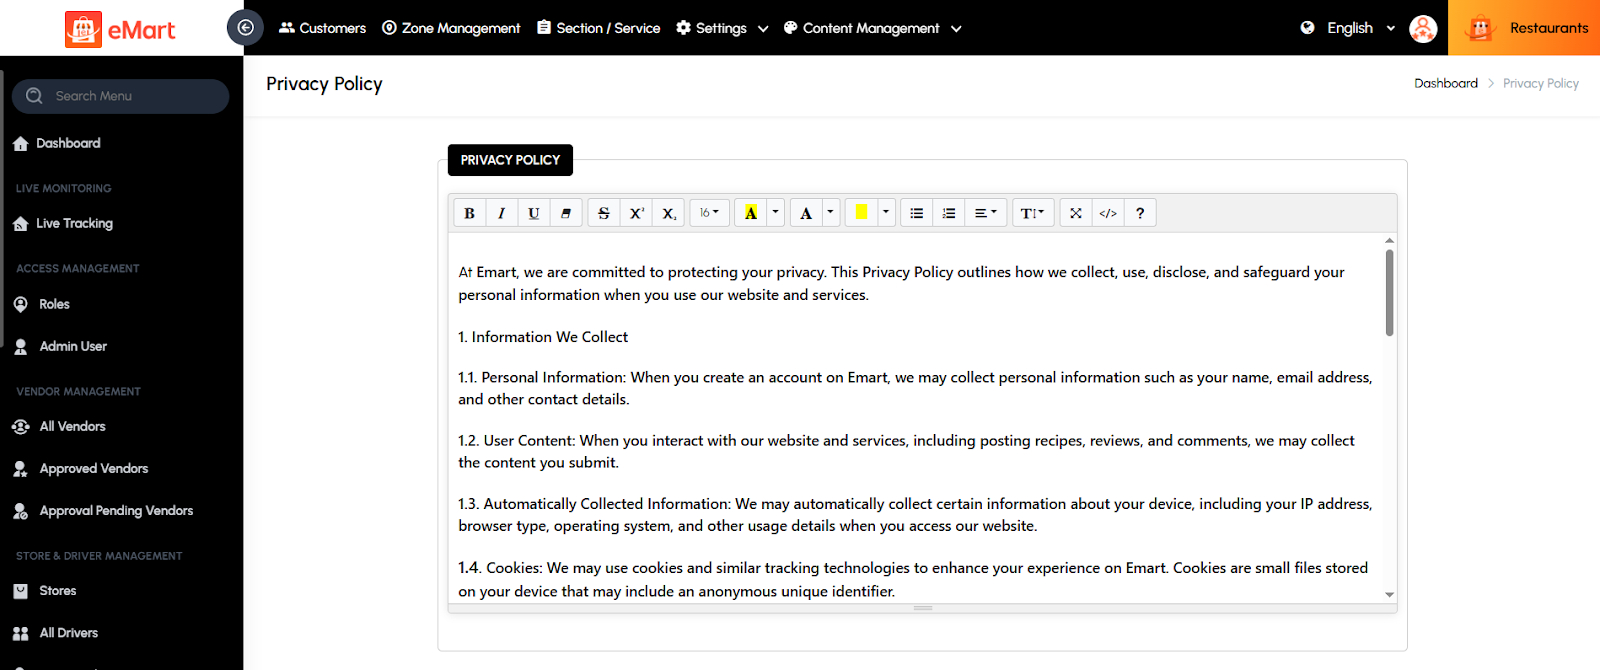
Privacy Policy
Used to define and manage the platform’s privacy and data protection policies, explaining how user data is collected, used, and secured.
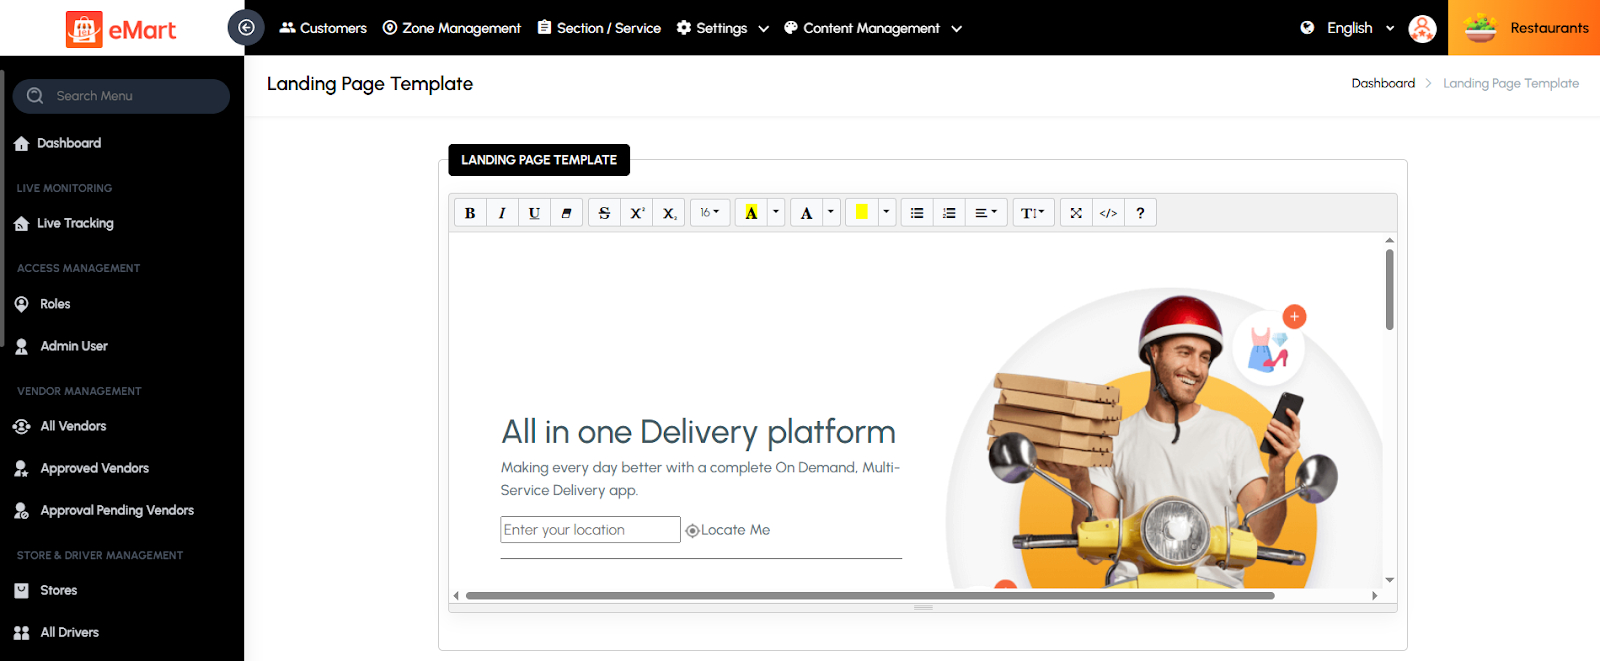
Landing Page Template
Used to design and manage the structure and content of the website’s landing page. The admin can configure banners, sections, and promotional content to enhance presentation.
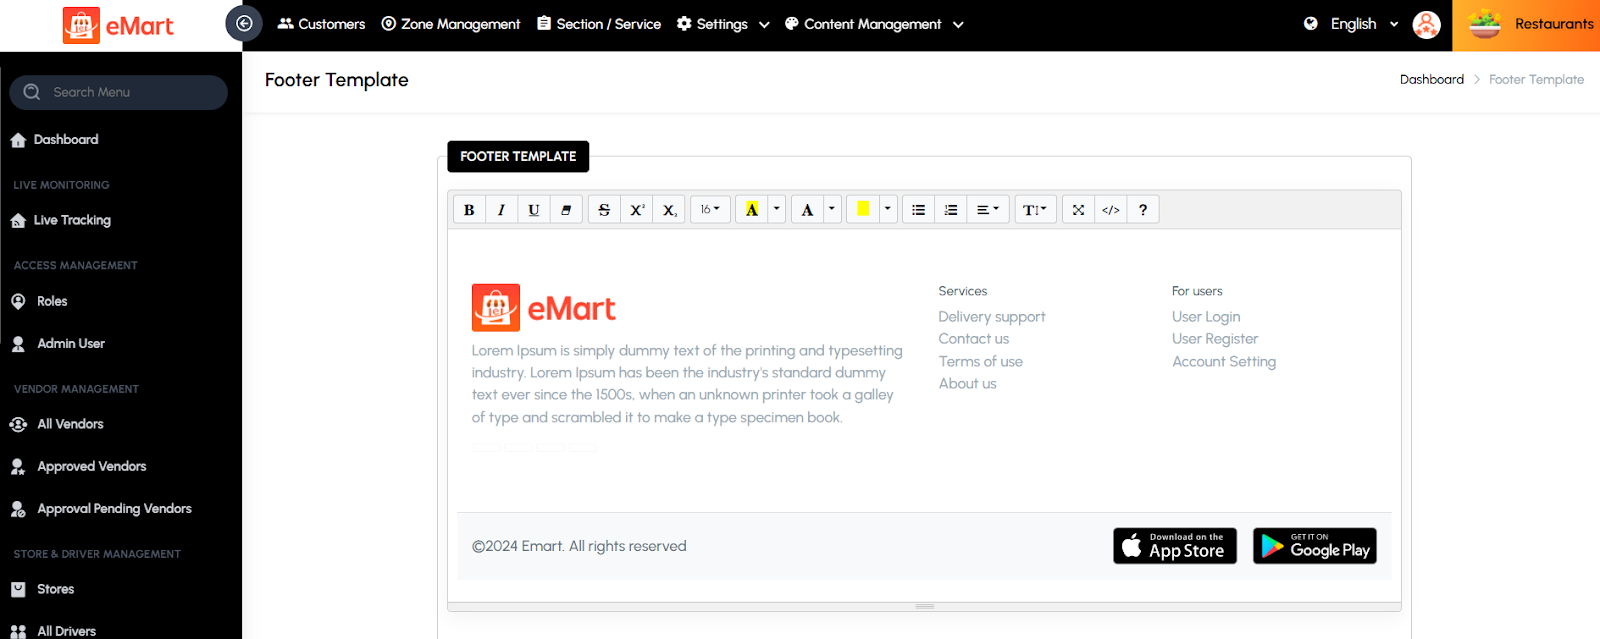
Footer Template
Used to customize the footer section of the website or app. The admin can add quick links, contact details, social media handles, and copyright information for branding consistency.
5.11. Content Management
Used to manage all visual and informational content displayed in the app and website. This section helps the admin control banners, static pages, onboarding screens, and email templates to ensure consistent branding, user engagement, and communication throughout the platform.
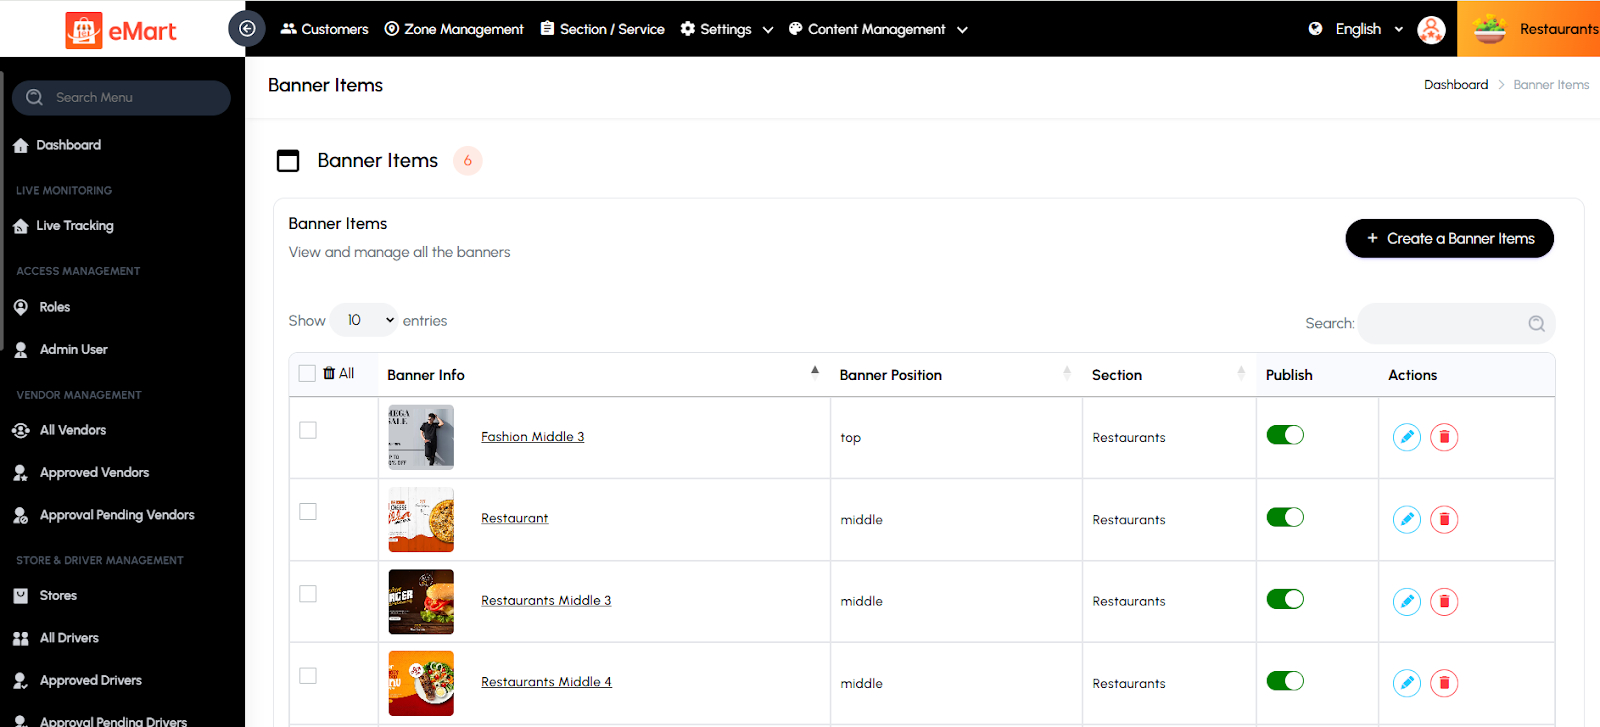
Banner Items
Used to create and manage promotional or featured banners displayed in various sections of the app or website. The admin can upload images, set redirect links, define display order, and schedule banners for specific time periods or service types.
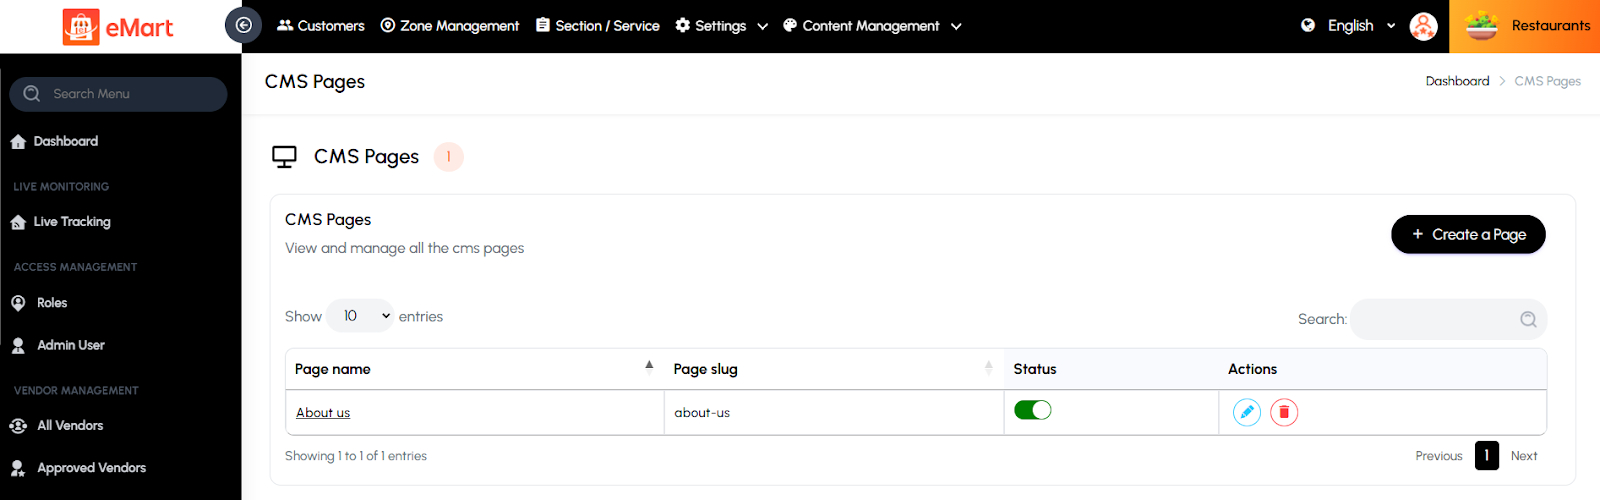
CMS Pages
Used to manage static content pages such as About Us, Help Center, or Refund Policy. The admin can create, edit, and publish pages without modifying the code, ensuring quick updates to informational content.
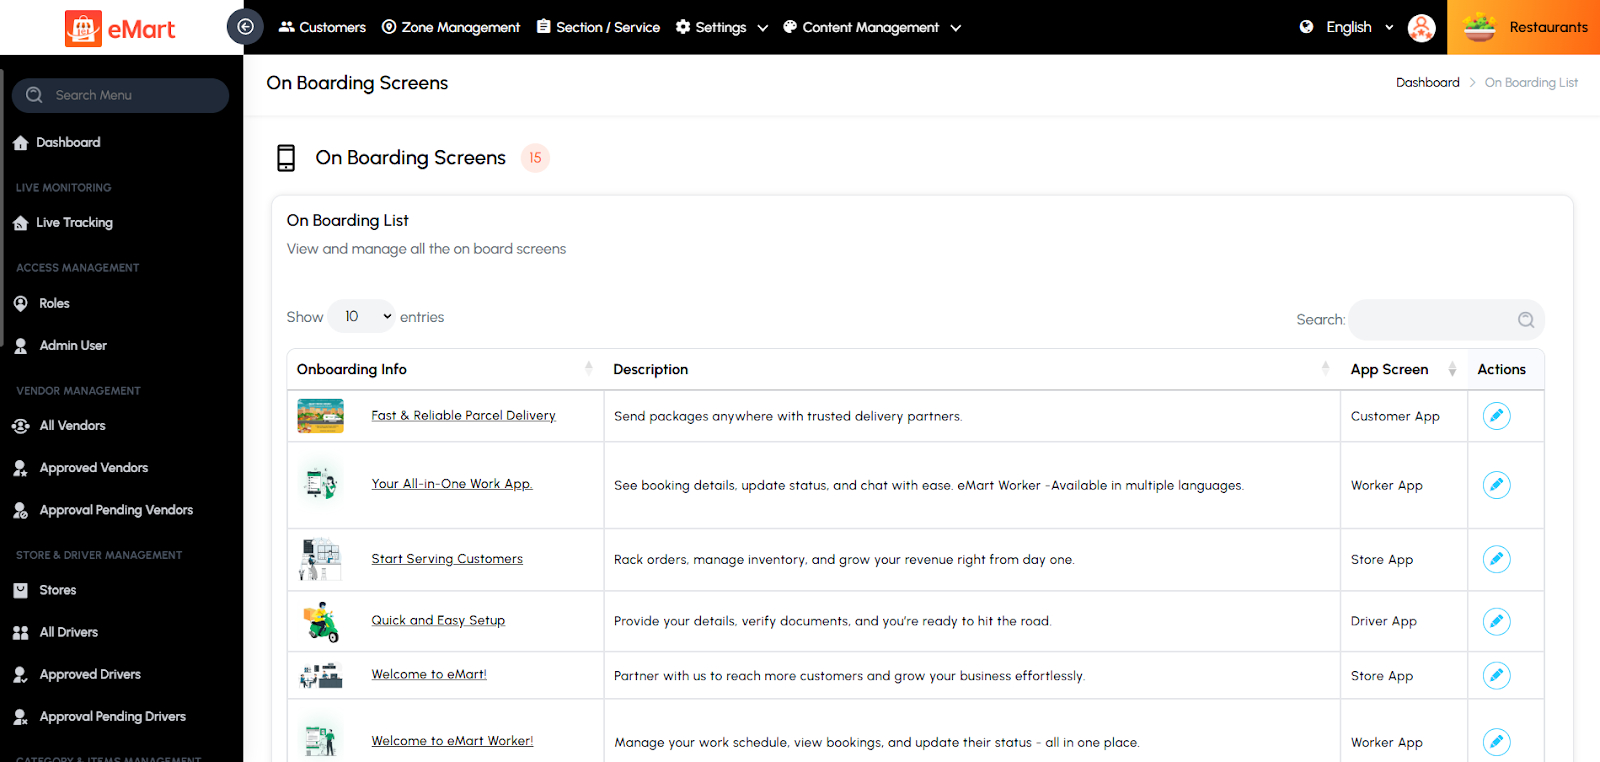
Onboarding Screens
Used to manage the introductory screens displayed when users first open the app. The admin can set up multiple slides with titles, descriptions, and images to guide new users through the platform’s key features and benefits.
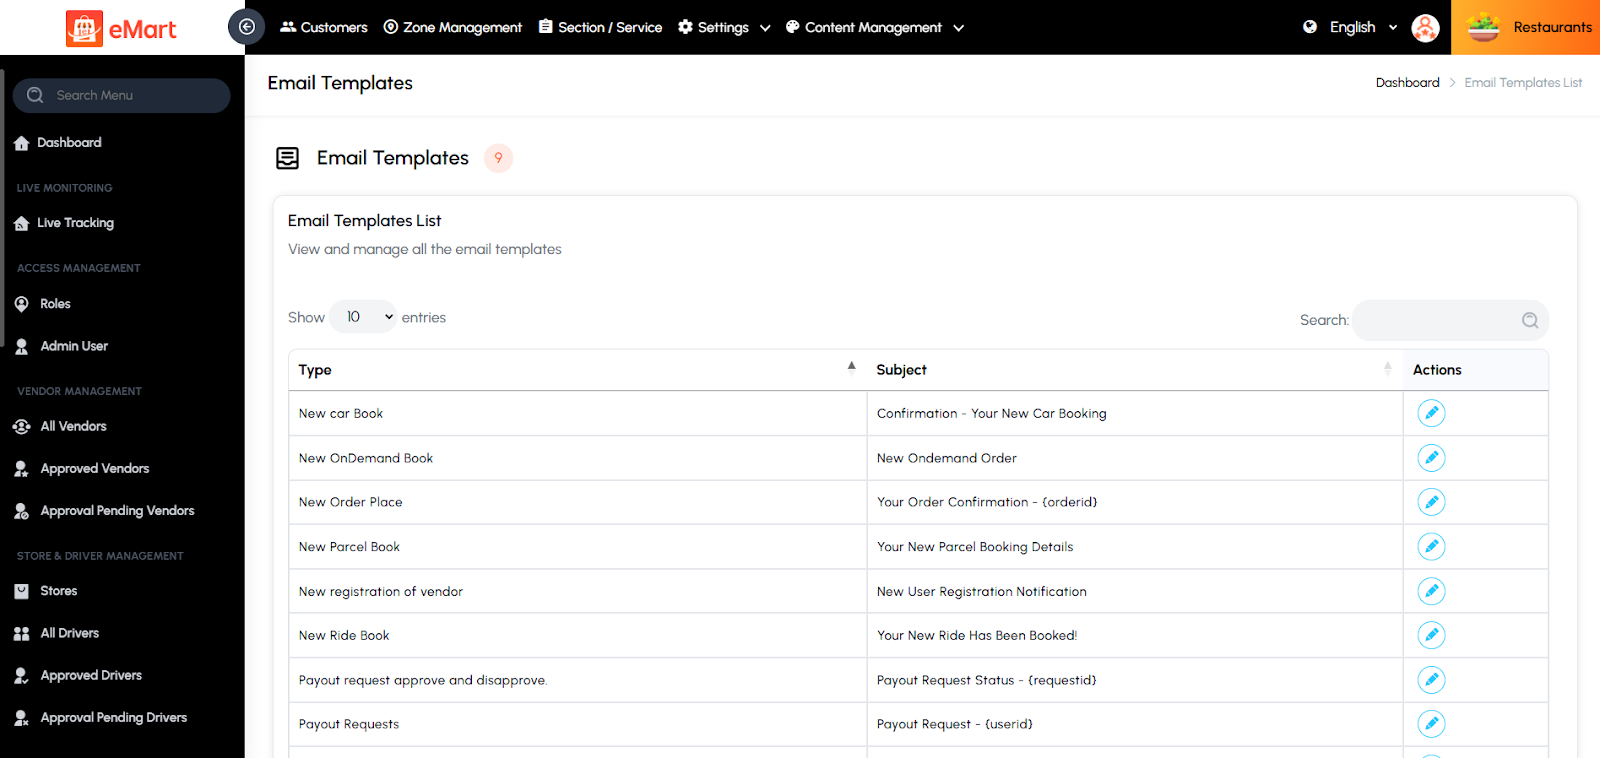
Email Templates
Used to create and customize automated email templates for system notifications, such as registration, order confirmation, password reset, or promotional campaigns. The admin can edit content, design, and placeholders to match the brand’s tone and style.
5.12. Category & Items Management
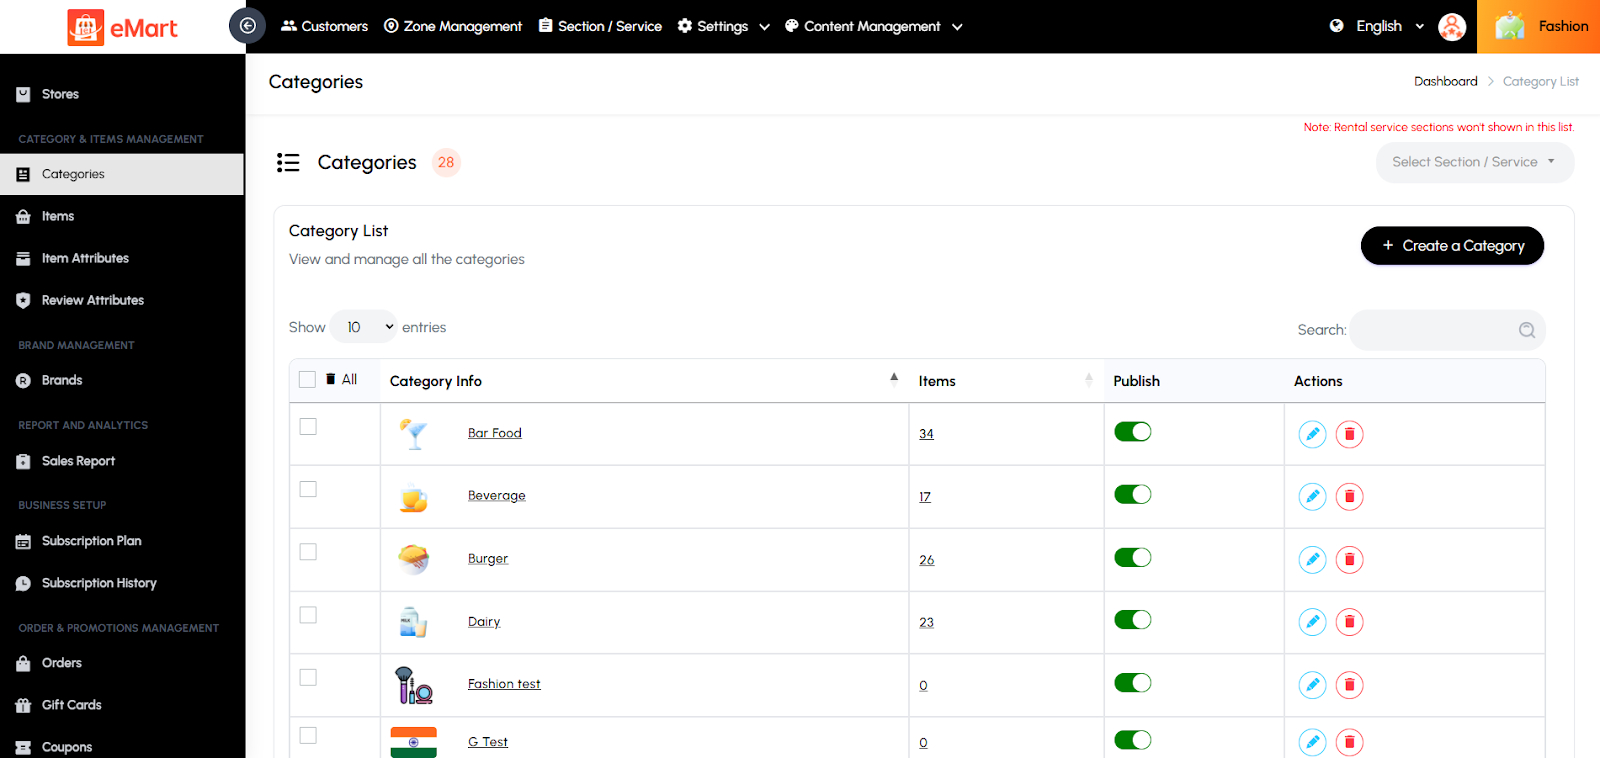
Used to manage all product or service categories and the items listed under them. From this section, the admin can create, edit, or delete categories, assign subcategories, and manage items with details like name, price, description, and images. It helps organize the platform’s catalog so users can easily browse and purchase or book products and services under the correct categories.
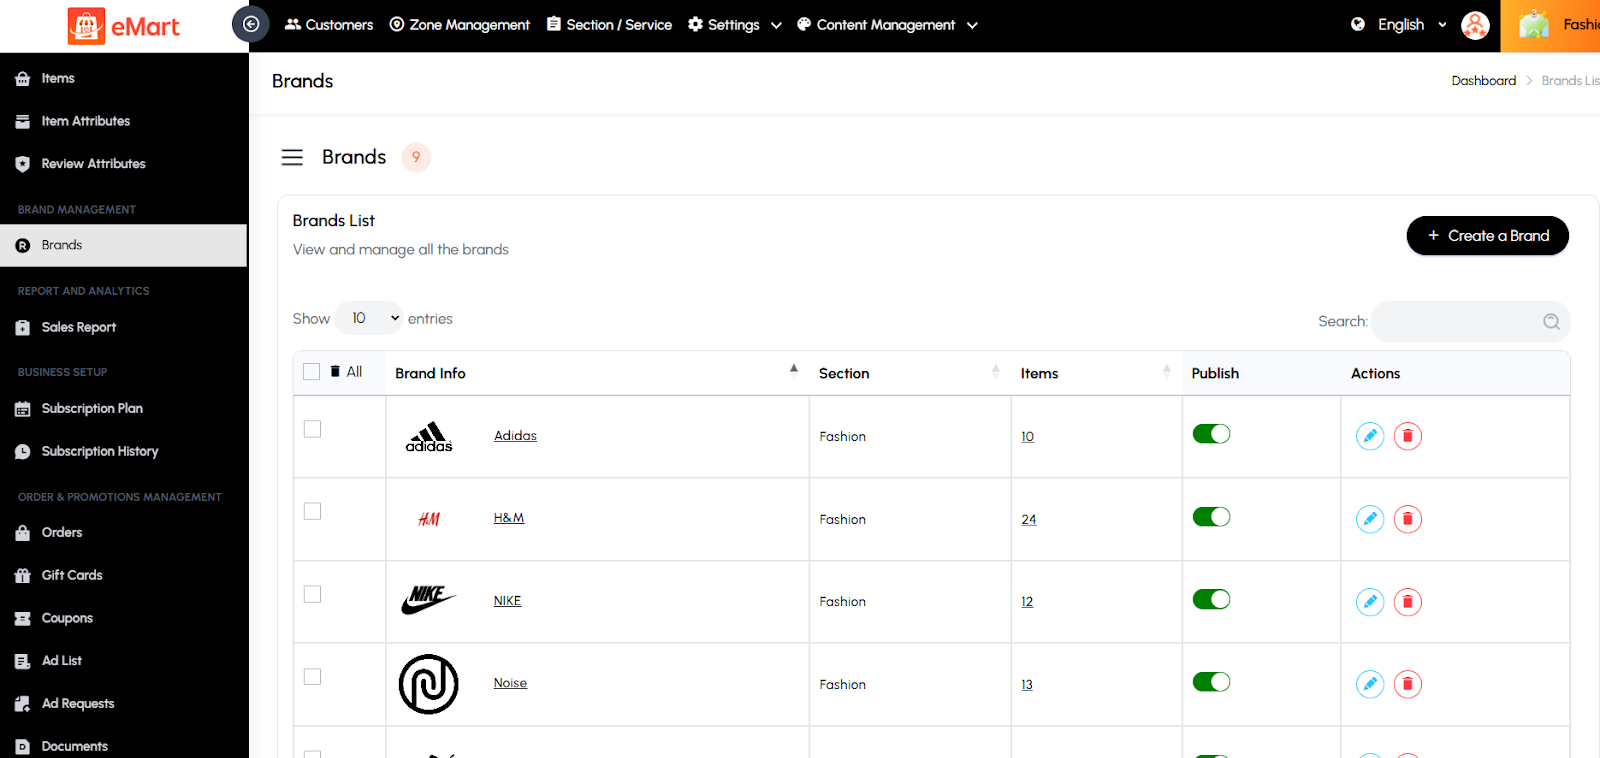
5.13. Brand Management
Used to manage all brands available on the platform. From this section, the admin can add new brands, update existing brand details such as name, logo, and description, and associate brands with relevant products or categories. It helps maintain a structured catalog and allows users to filter or search items by specific brands for a better shopping experience.
5.14. Report and Analytics
Reports
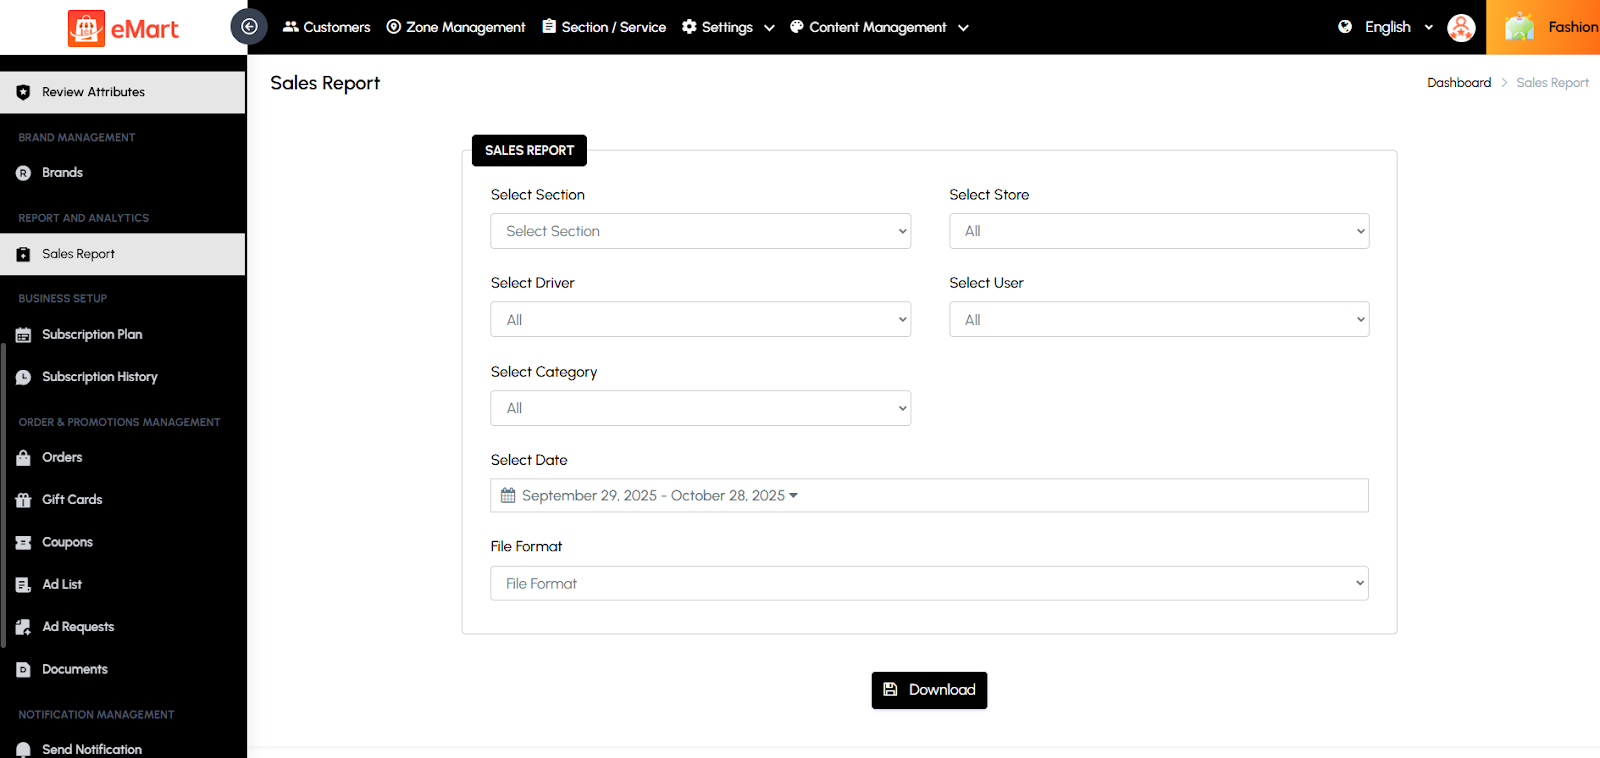
The Reporting and Analytics section in the admin panel provides comprehensive insights into platform activity, allowing administrators to monitor performance, make data-driven decisions, and identify trends. Reports can be customized using various filters and options to generate precise and actionable information. Key options include:
Store: Filter reports by the store.
Driver: Filter reports by the driver.
Date Options: Quickly generate reports based on preset time frames like Today, This Week, This Month, or This Year.
File Format: Export reports in multiple formats such as CSV, or PDF for offline analysis, record-keeping, or sharing with stakeholders.
Sales Reports
This section provides a detailed overview of the platform’s sales performance and transaction history. Administrators can track total orders, revenue, commissions, and payment summaries over specific date ranges. Reports can be filtered by vendor, customer, or delivery type for deeper insights. It helps analyze business trends, monitor growth, and identify top-performing vendors or menu items. The data can also be exported for accounting or financial analysis, ensuring complete transparency and accurate record-keeping.
Tax Reports
This section provides a comprehensive overview of all taxes collected across the platform. Administrators can track taxes on orders, products, delivery fees, packing charges, platform fees, admin commissions, and vendor subscriptions over specific date ranges. Reports can be filtered by tax type for more detailed insights. It helps analyze tax liabilities, monitor compliance, and ensure accurate calculation of taxes owed for admin income. The data can also be exported for accounting or regulatory reporting, providing complete transparency and precise record-keeping.
5.15. Business Setup
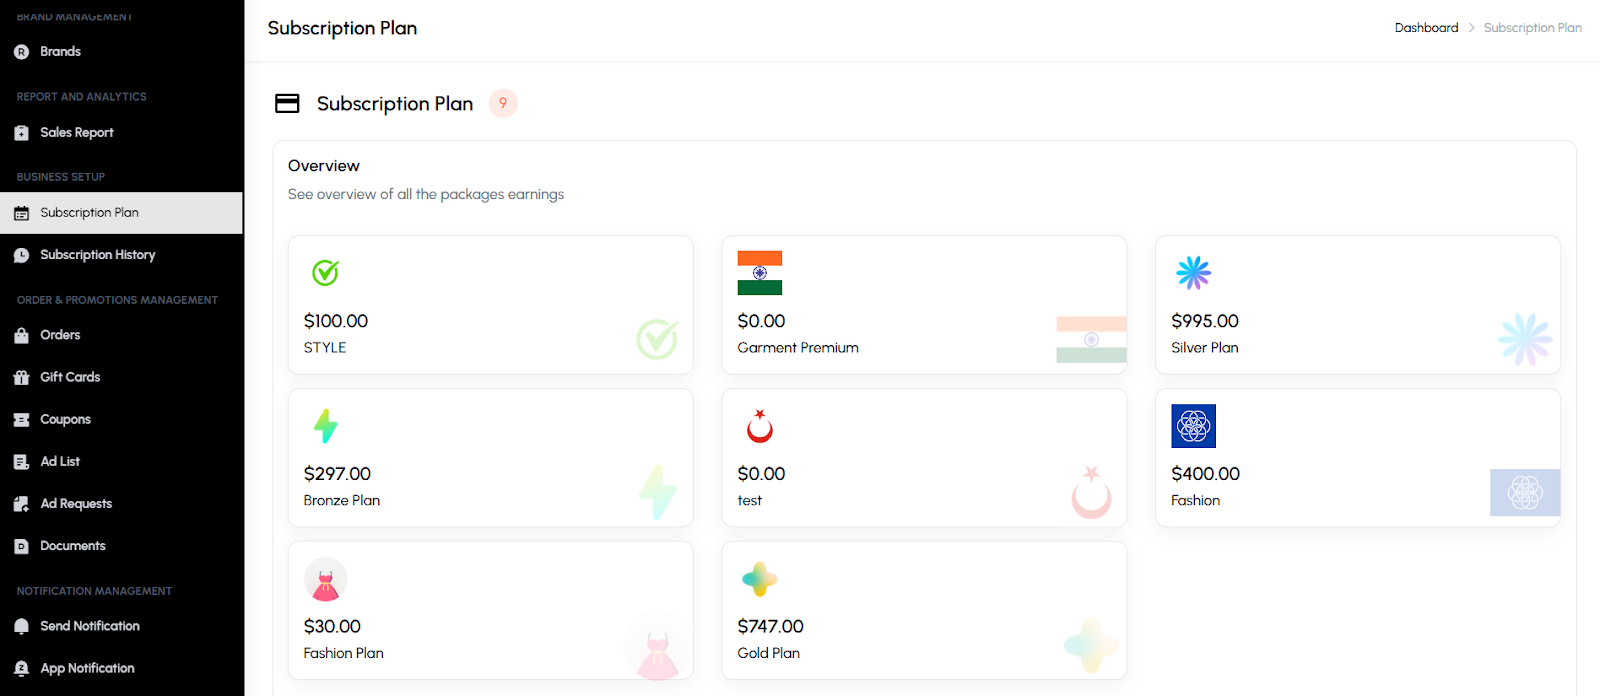
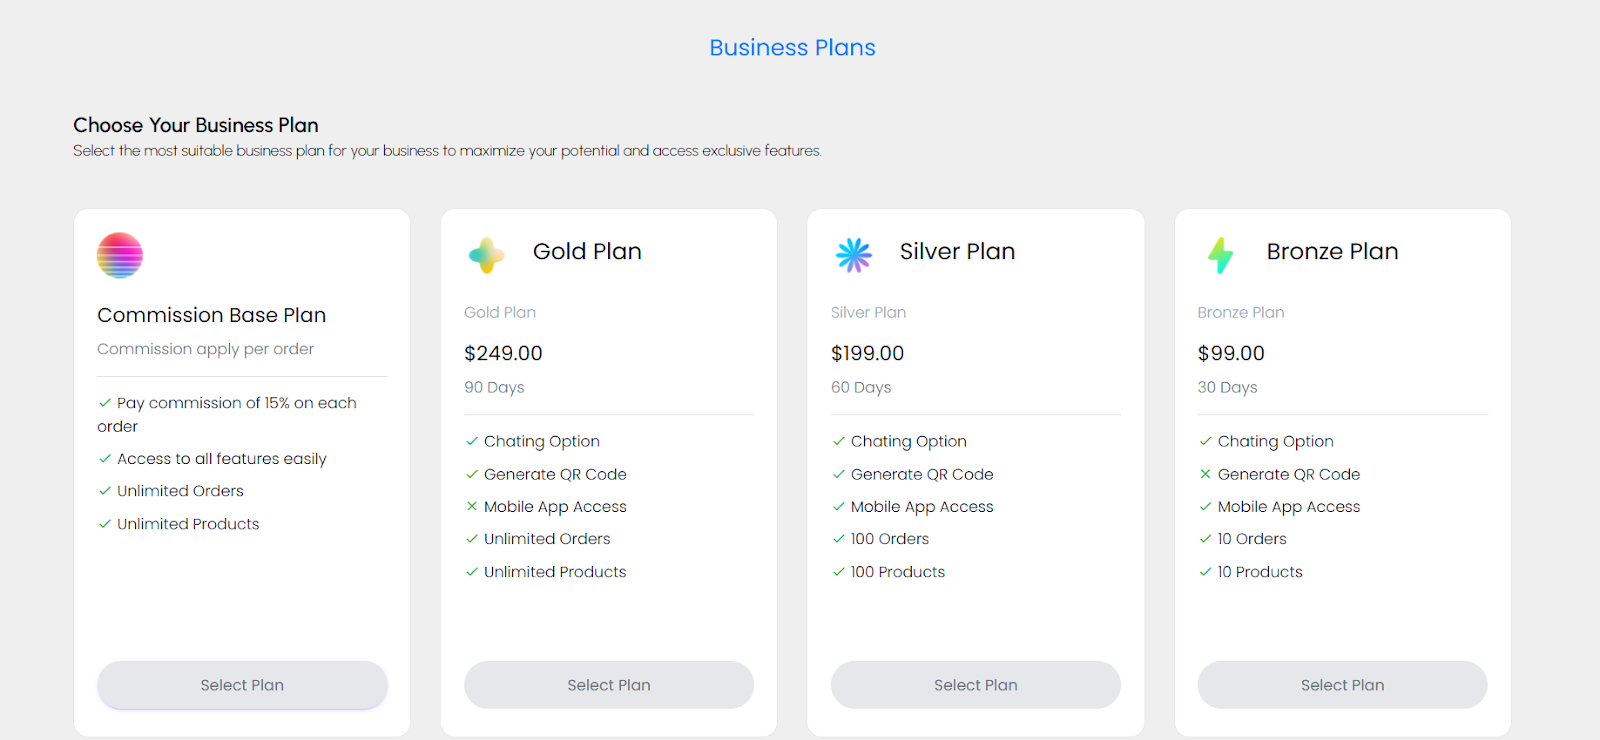
Used to manage the platform’s subscription system for vendors or service providers. From this section, the admin can create and configure various subscription plans by defining their duration, price, and included features. It also allows tracking of all subscription activities, including active, expired, or cancelled plans, payment history, and renewals. This helps ensure smooth monetization management and clear visibility of each vendor’s subscription status.
5.16. Order & Promotions Management
Used to manage all customer orders and promotional activities across the platform. From this section, the admin can track, update, and manage orders along with handling promotional tools like gift cards, coupons, and advertisements. It also includes document verification features for user approvals, ensuring compliance and authenticity.
Orders
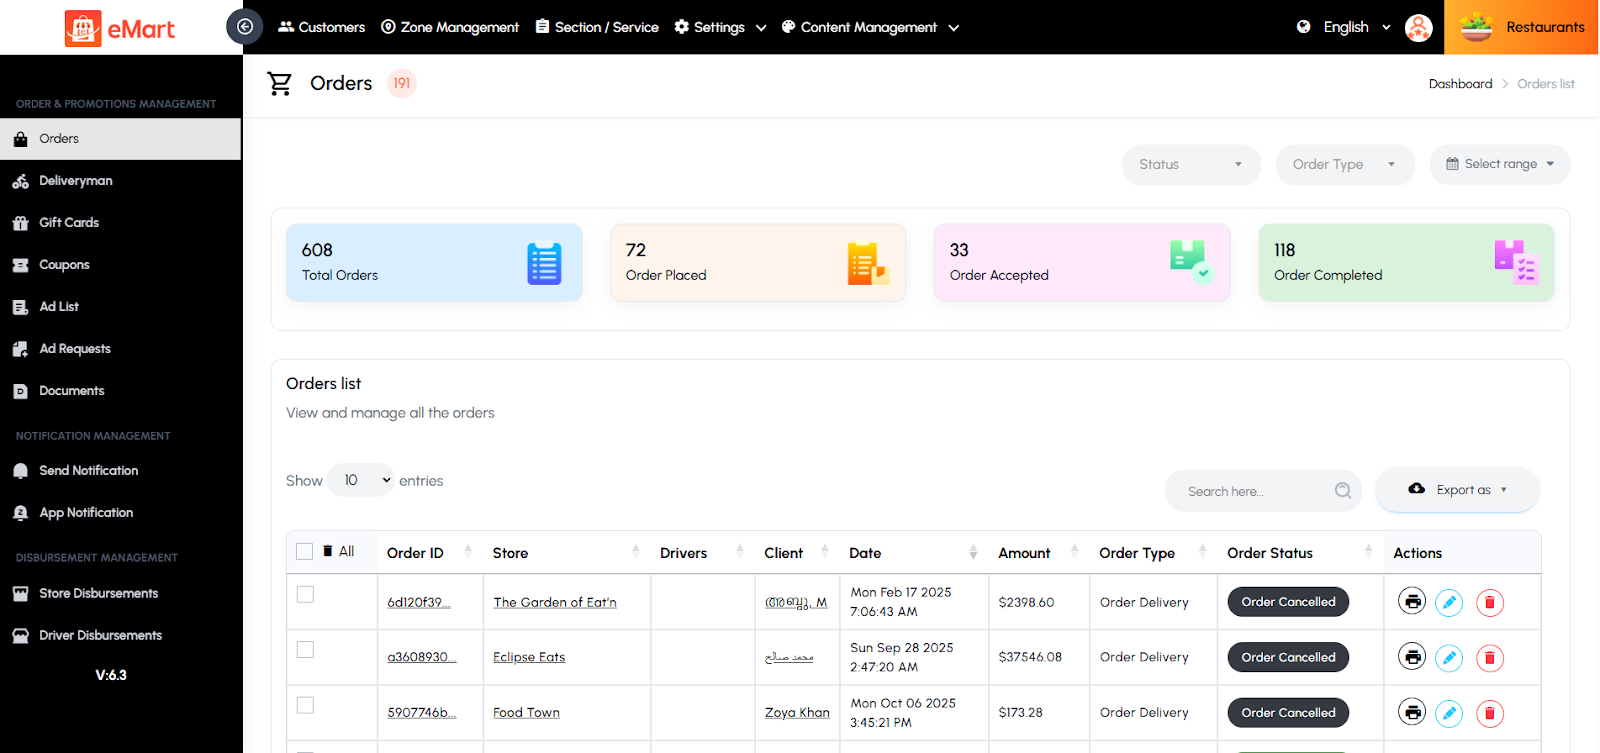
Used to view and manage all orders placed on the platform. The admin can check order details, update statuses (pending, confirmed, delivered, cancelled), and monitor payment and delivery progress across different service types.
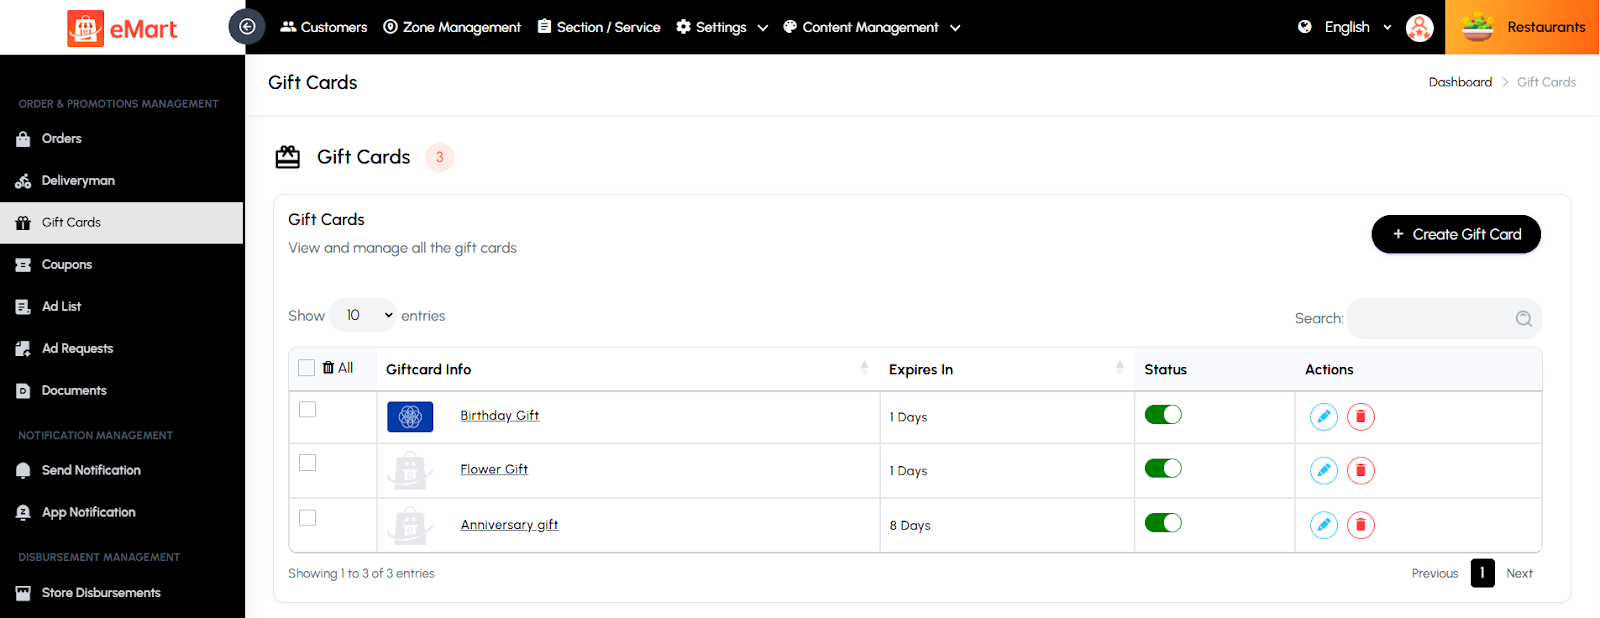
Giftcard
Used to create and manage digital gift cards that customers can purchase or redeem. The admin can define card values, usage limits, and validity periods to boost customer engagement and sales.
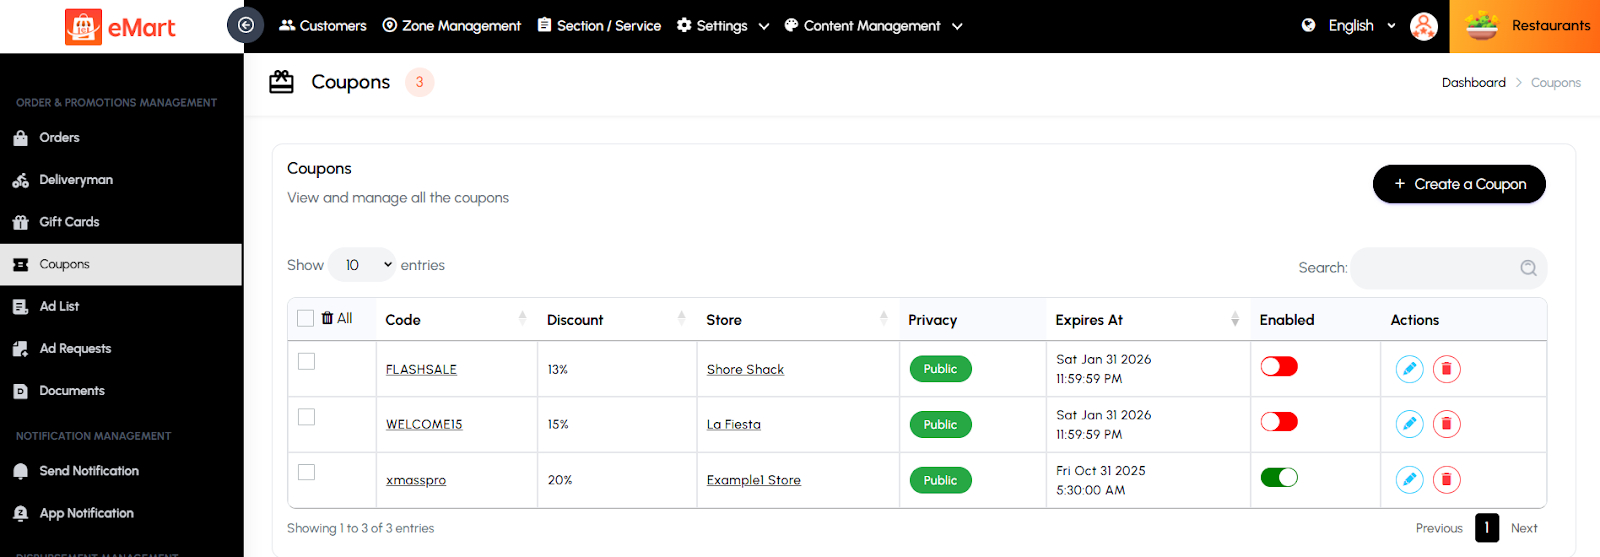
Coupons
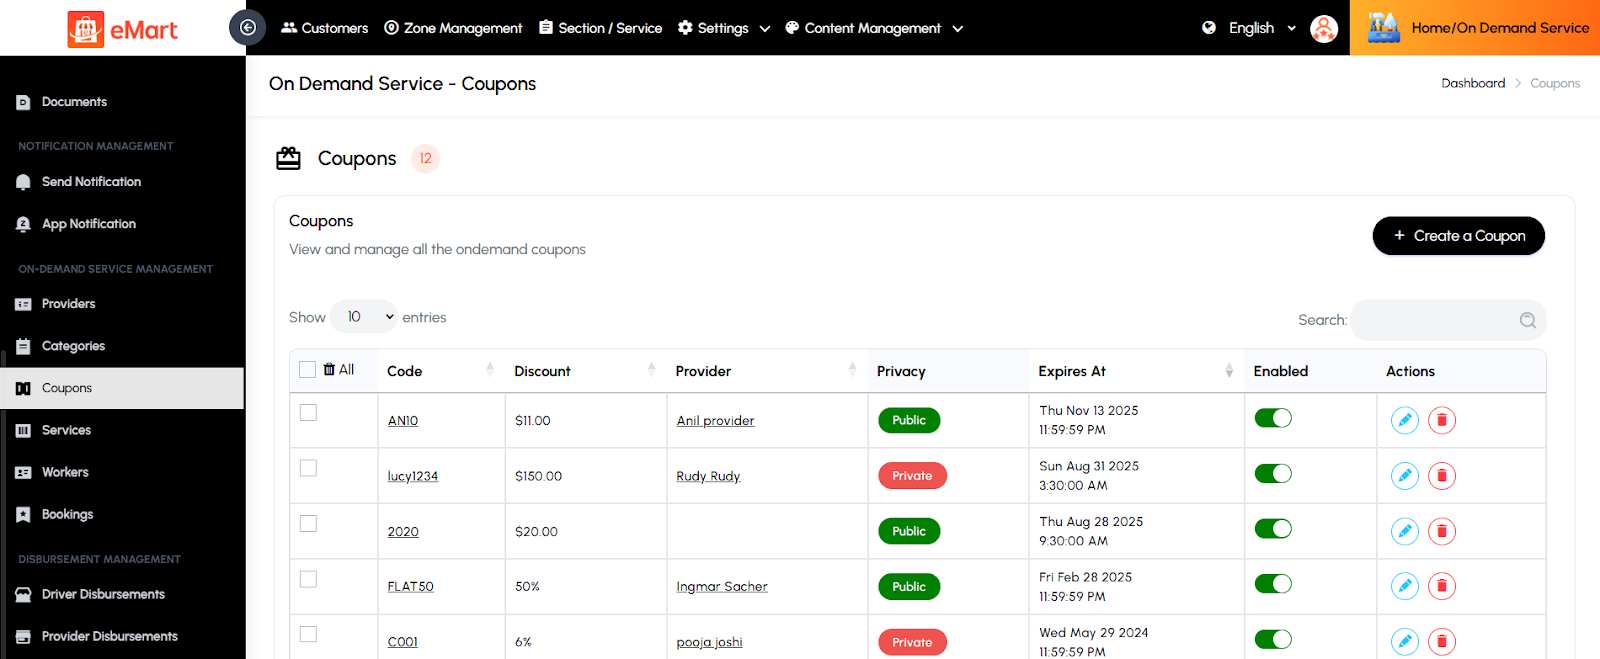
Used to manage discount coupons available on the platform. The admin can create, edit, or disable coupons, set discount types (percentage or fixed), and apply usage conditions like minimum order value or category restrictions.
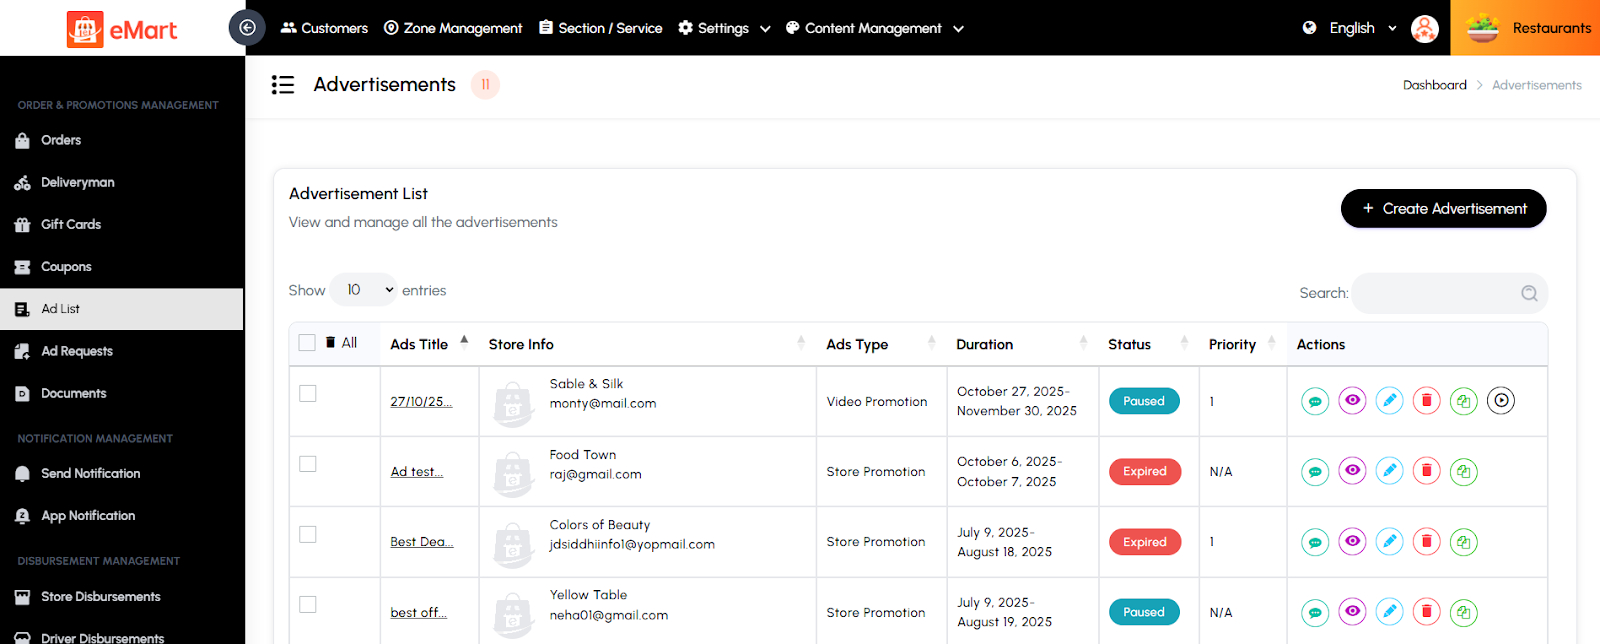
Ad List
Used to manage all active and past advertisements displayed on the platform. The admin can view, edit, or remove ads and monitor their performance or expiration status.
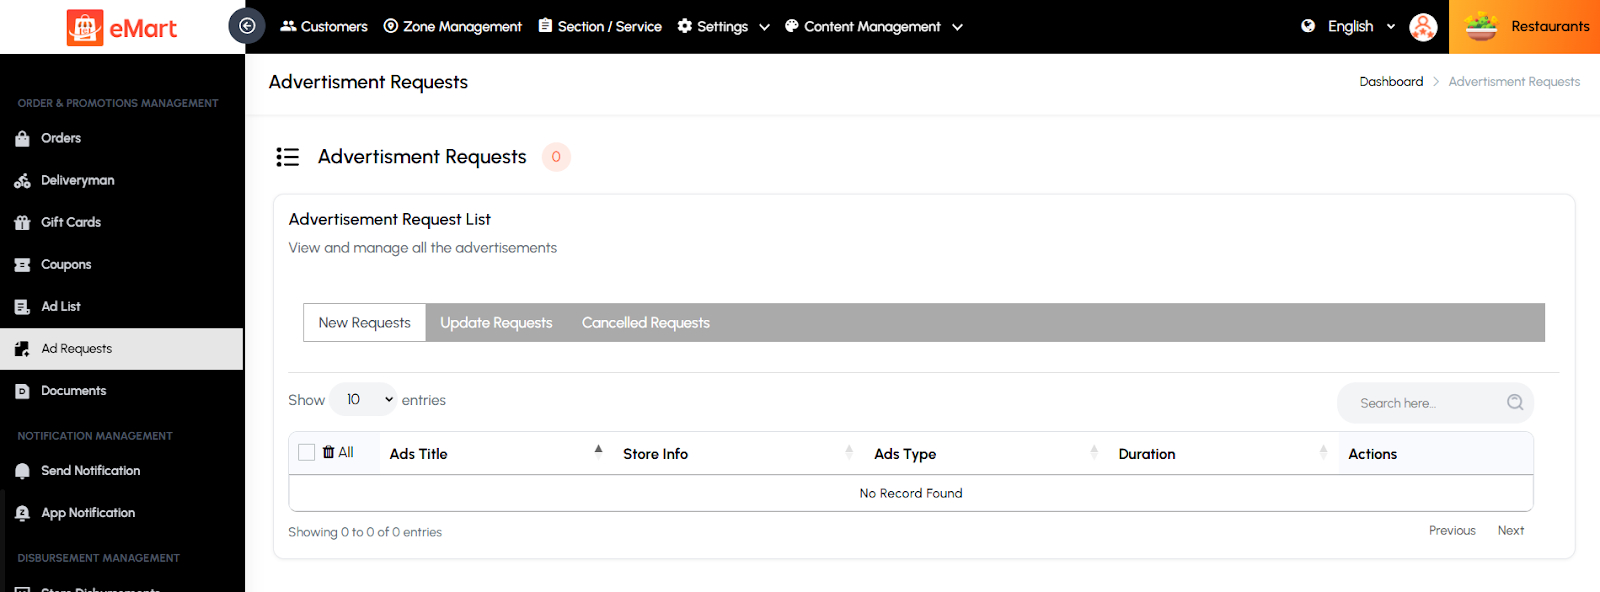
Ad Request
Used to handle advertisement requests submitted by vendors or businesses. The admin can review, approve, or reject these ad requests based on compliance, duration, and payment.
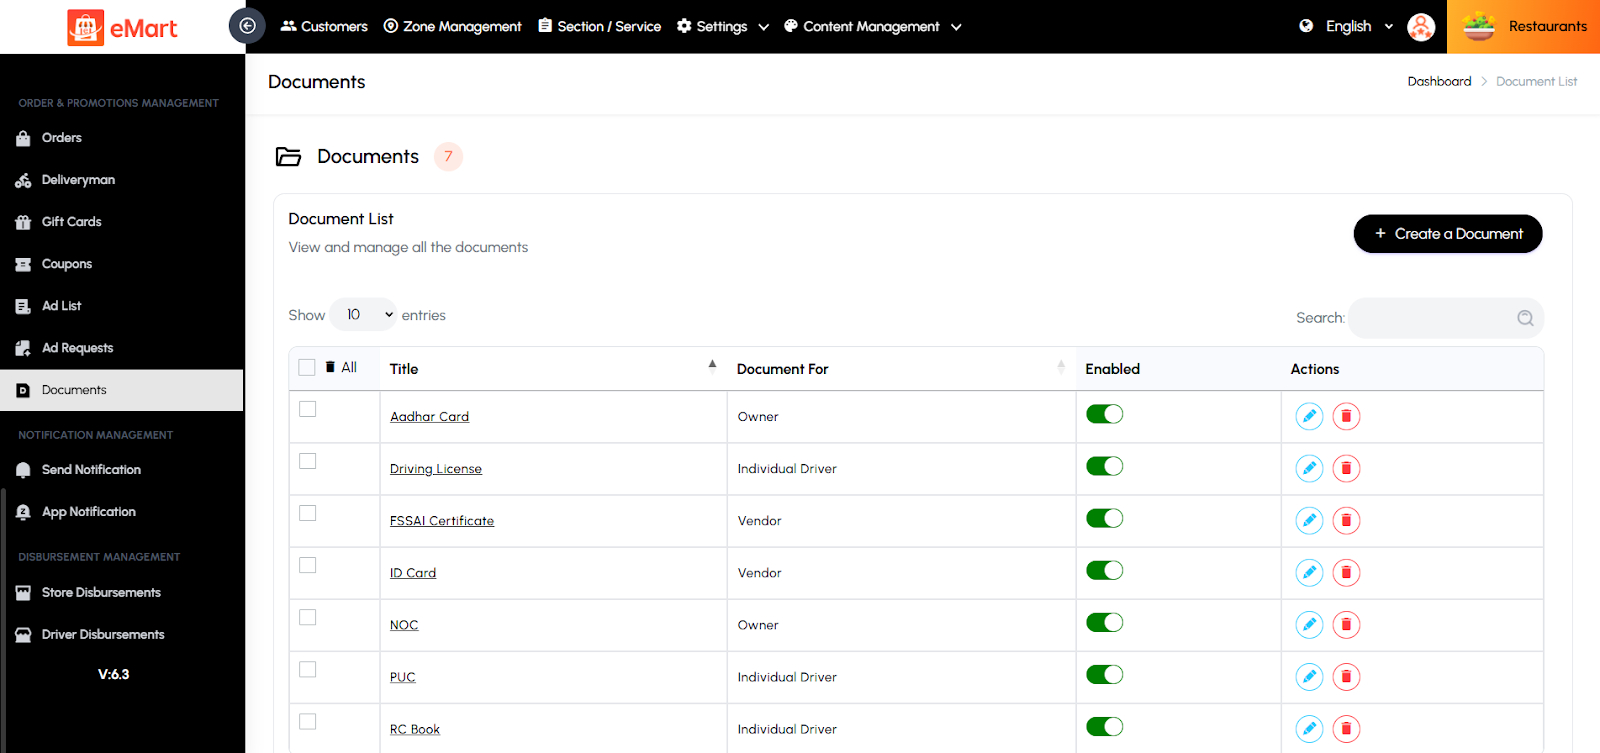
Documents
Used to manage and verify required documents submitted by owners, drivers, and vendors. The admin reviews and approves identity, business, or vehicle documents to ensure all users meet platform verification and safety standards.
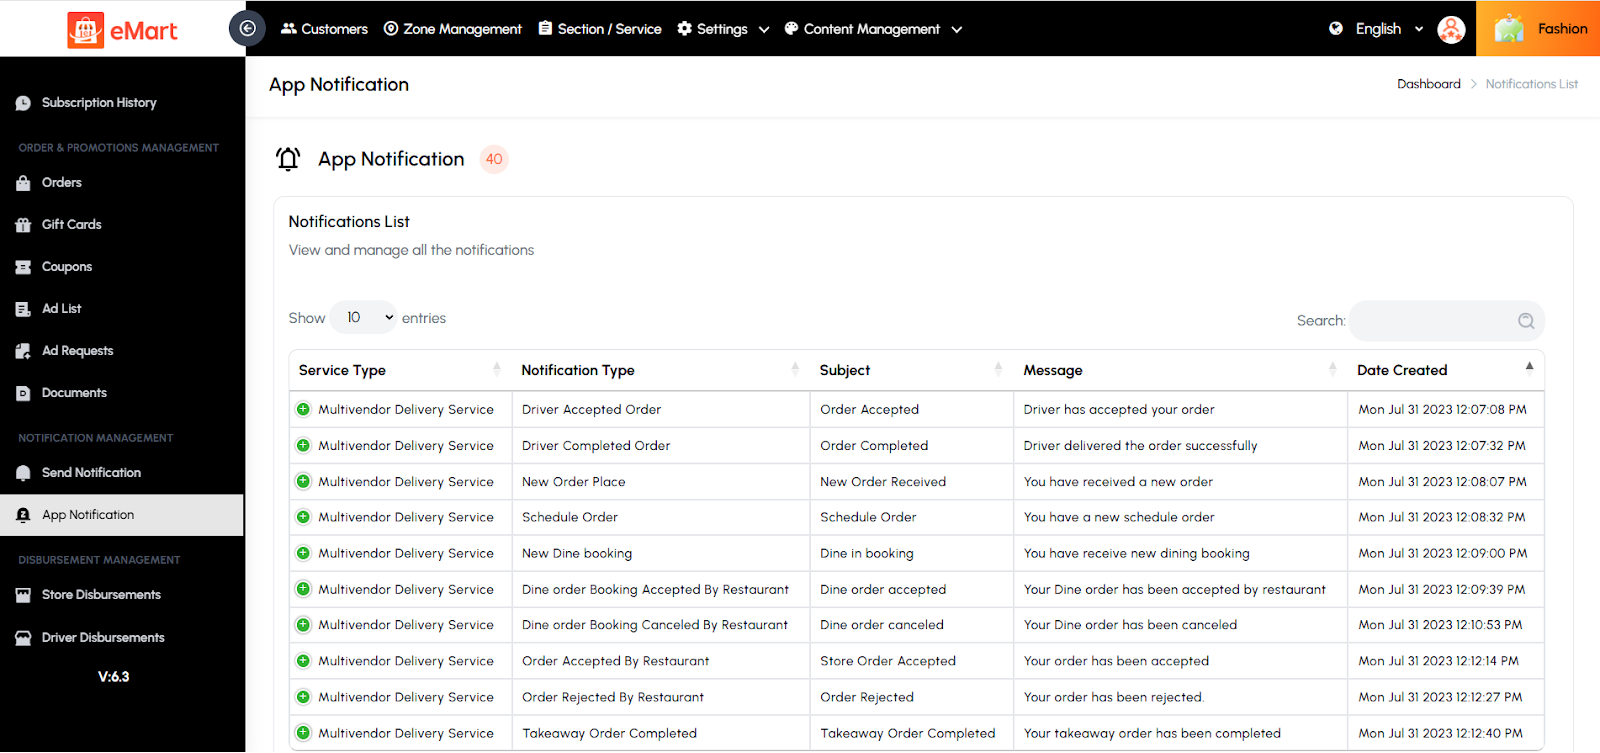
5.17. Notification Management
Used to manage all types of notifications sent through the platform. From this section, the admin can create, schedule, and send push notifications or in-app alerts to users, vendors, or drivers. It allows customizing notification titles, messages, and target audiences based on service type or user group. This helps in sharing important updates, promotions, or alerts to keep users informed and engaged.
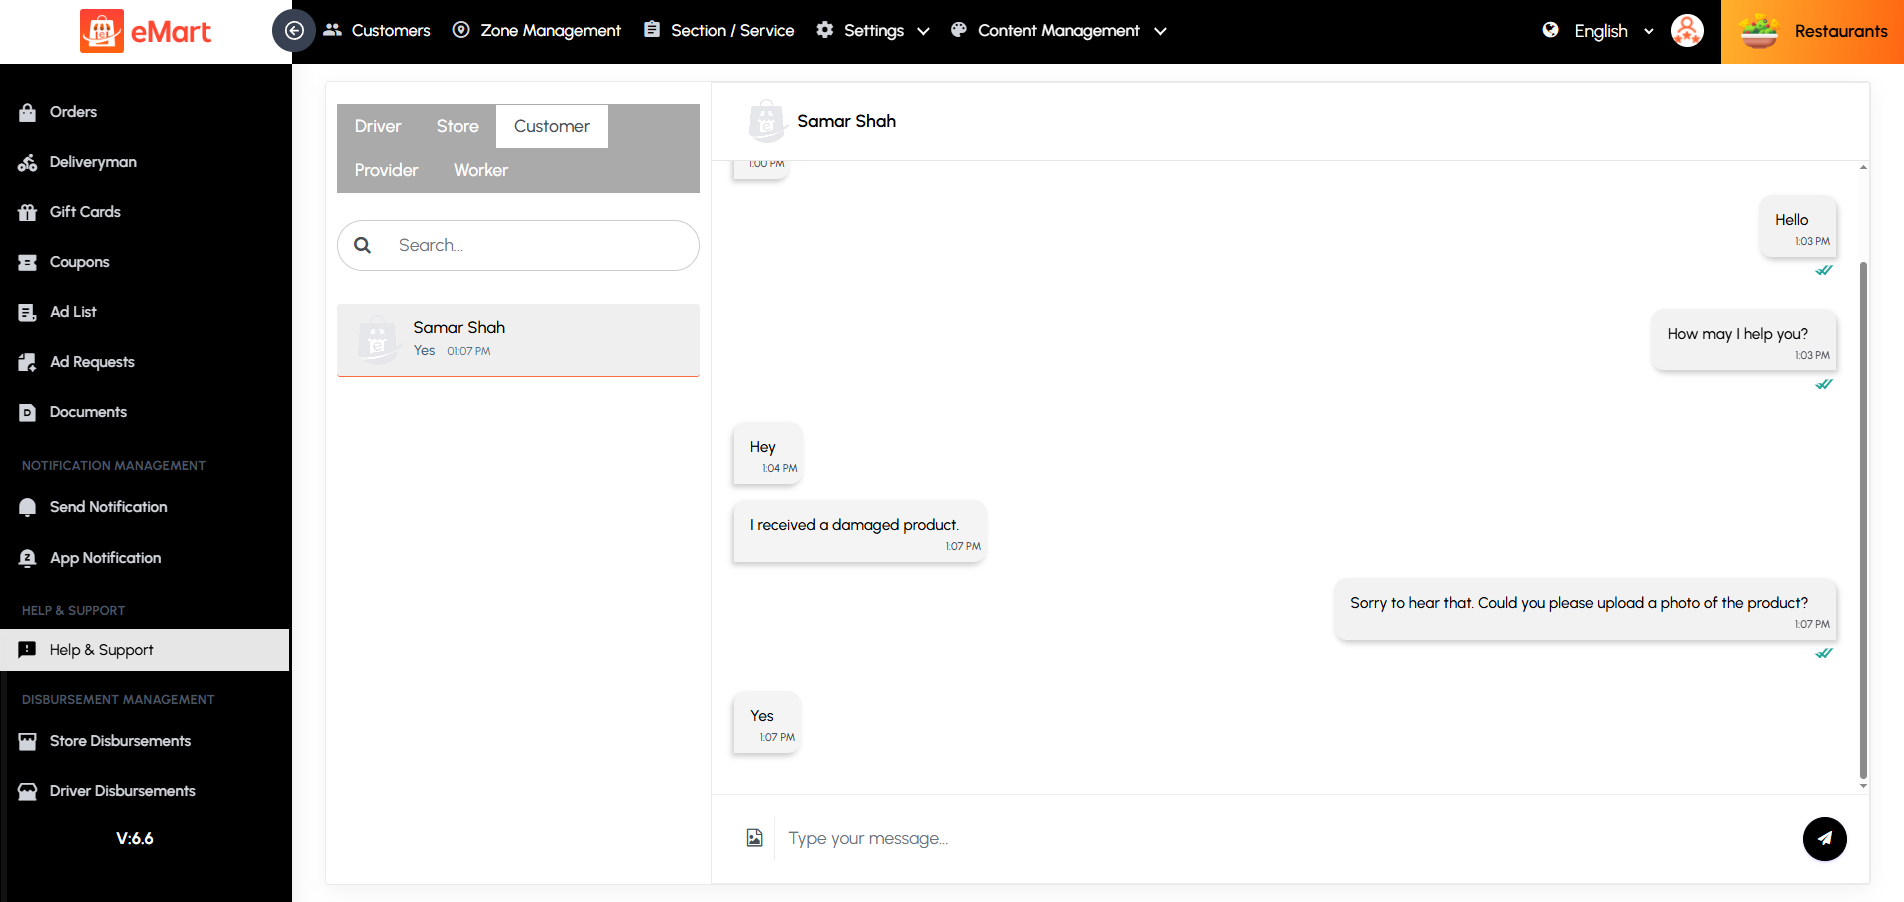
5.18. Help & Support
This section provides a centralized space for managing user inquiries, complaints, and support requests. Admins can view, respond to, and resolve tickets submitted by customers, vendors, drivers, providers & workers. It may include categories such as general queries, order issues, payments, or technical assistance. The system helps track the status of each request to ensure timely resolutions. This feature enhances user satisfaction by maintaining effective communication and reliable customer support across the platform.
5.19. Disbursement Management
Used to manage all payout and commission settlements across the platform. From this section, the admin can track and release payments to vendors, store owners, and drivers based on completed orders or services. It ensures transparent and accurate financial transactions between the platform and its partners.
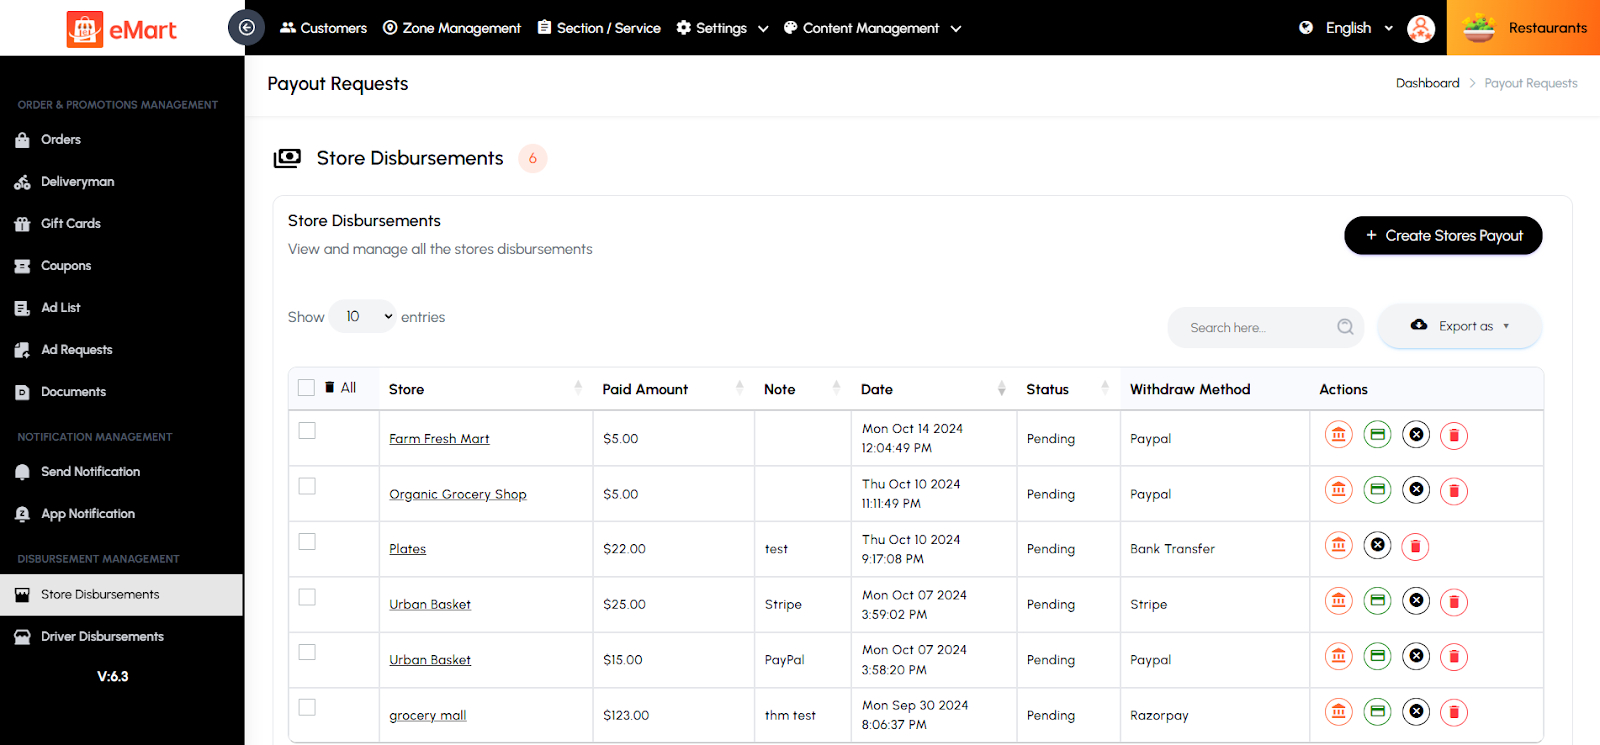
Store Disbursement
Used to view and process payouts related to individual stores. The admin can review earnings, commissions, and pending payments, and manually or automatically release funds to store accounts.
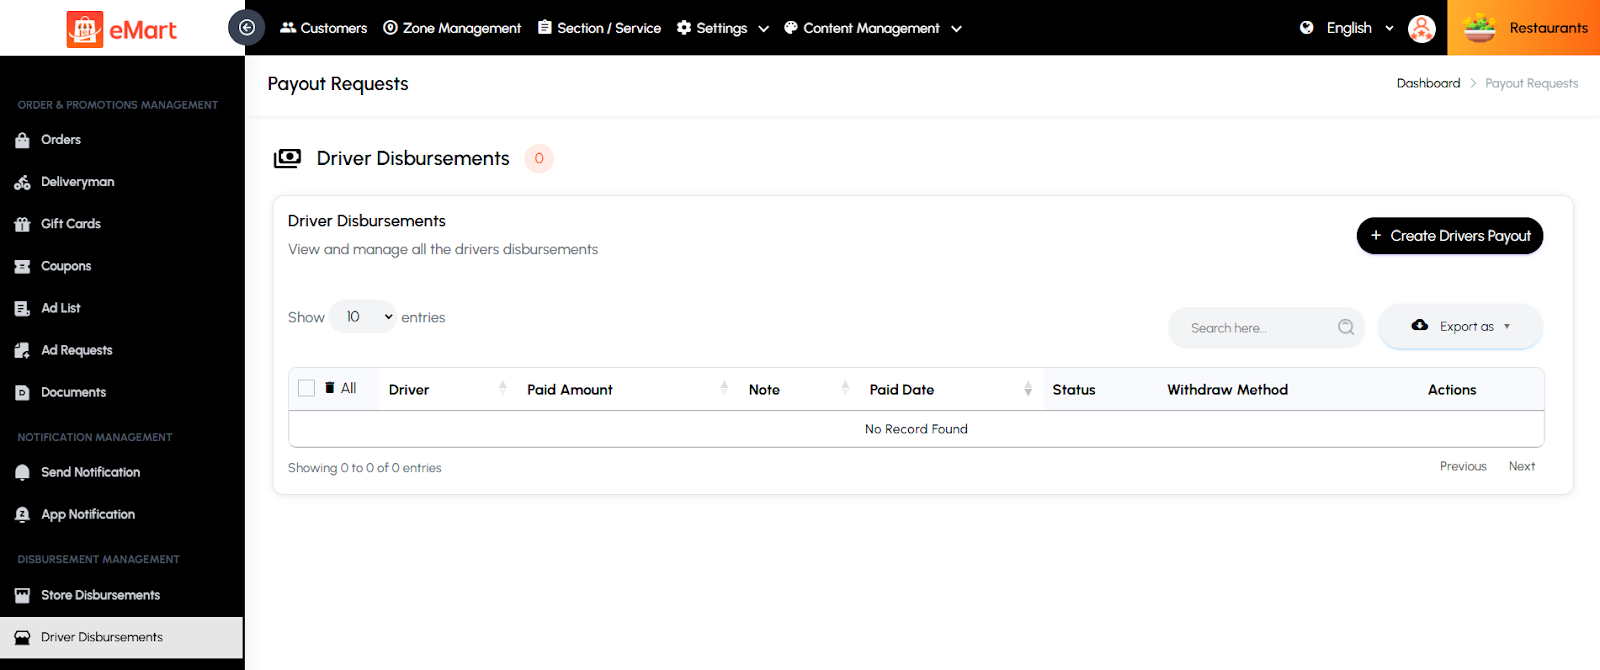
Driver Disbursement
Used to manage payments to drivers for completed deliveries or rides. The admin can verify trip earnings, adjust commissions, and process driver payouts efficiently.
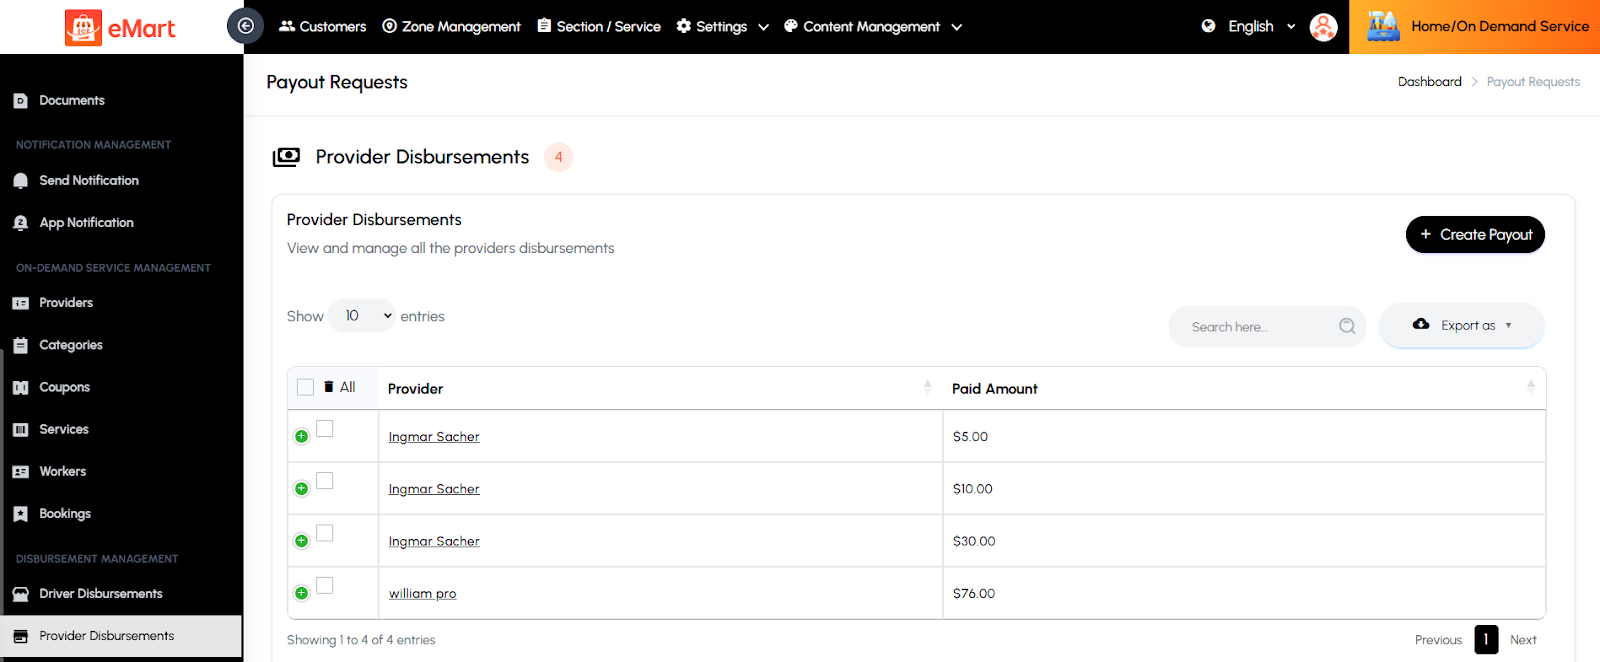
Provider Disbursement
Used to handle payouts for service providers. The admin can track total earnings, deduct applicable fees or commissions, and disburse the remaining balance to ensure timely and accurate settlements.
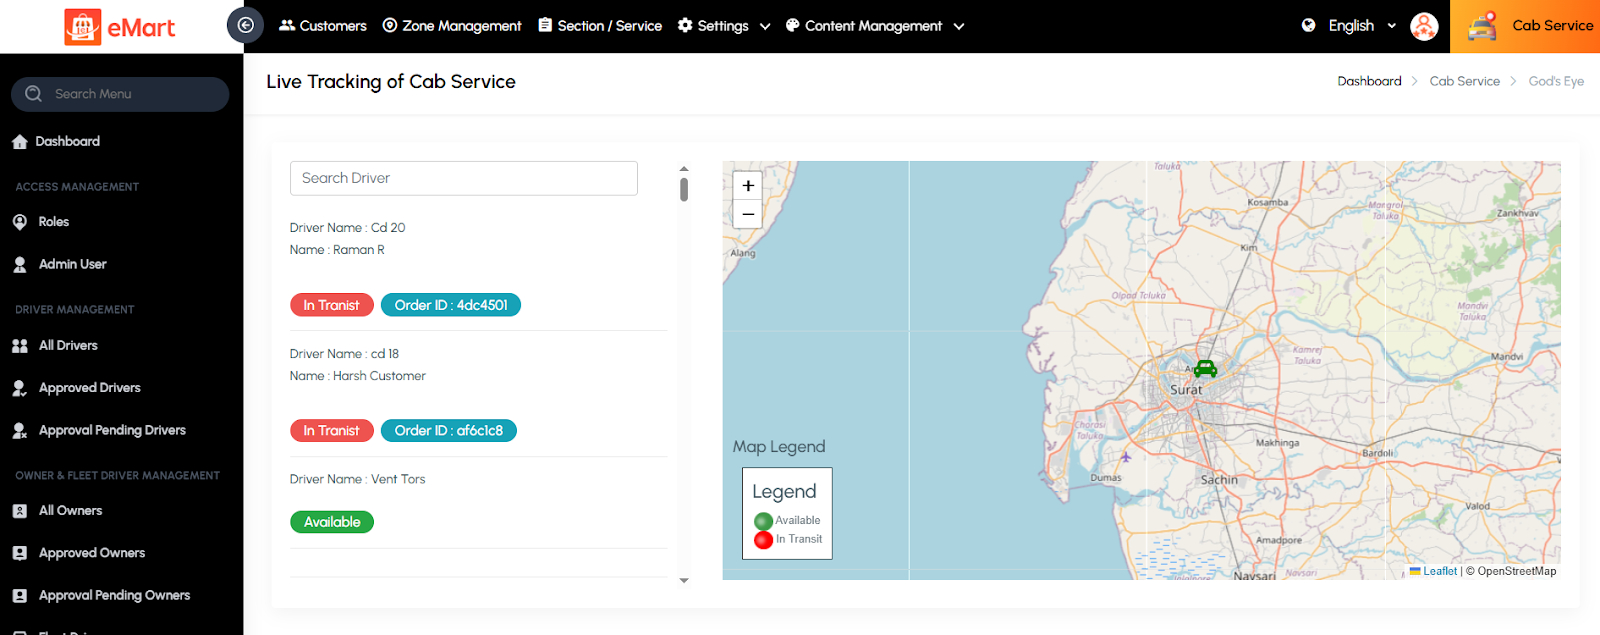
5.20. Live Tracking
Used to monitor active delivery orders in real time. The admin can view the live locations of drivers, check delivery progress, and track the status of orders from pickup to drop-off. This feature ensures timely deliveries, improves customer satisfaction, and allows quick intervention in case of delays or issues.
5.21. Cab Service Management
Used to manage all operations related to the cab or ride-hailing service within the platform. This section allows the admin to monitor rides in real time, manage vehicles and drivers, handle user safety alerts, and configure promotions and vehicle details for smooth and secure transportation services.
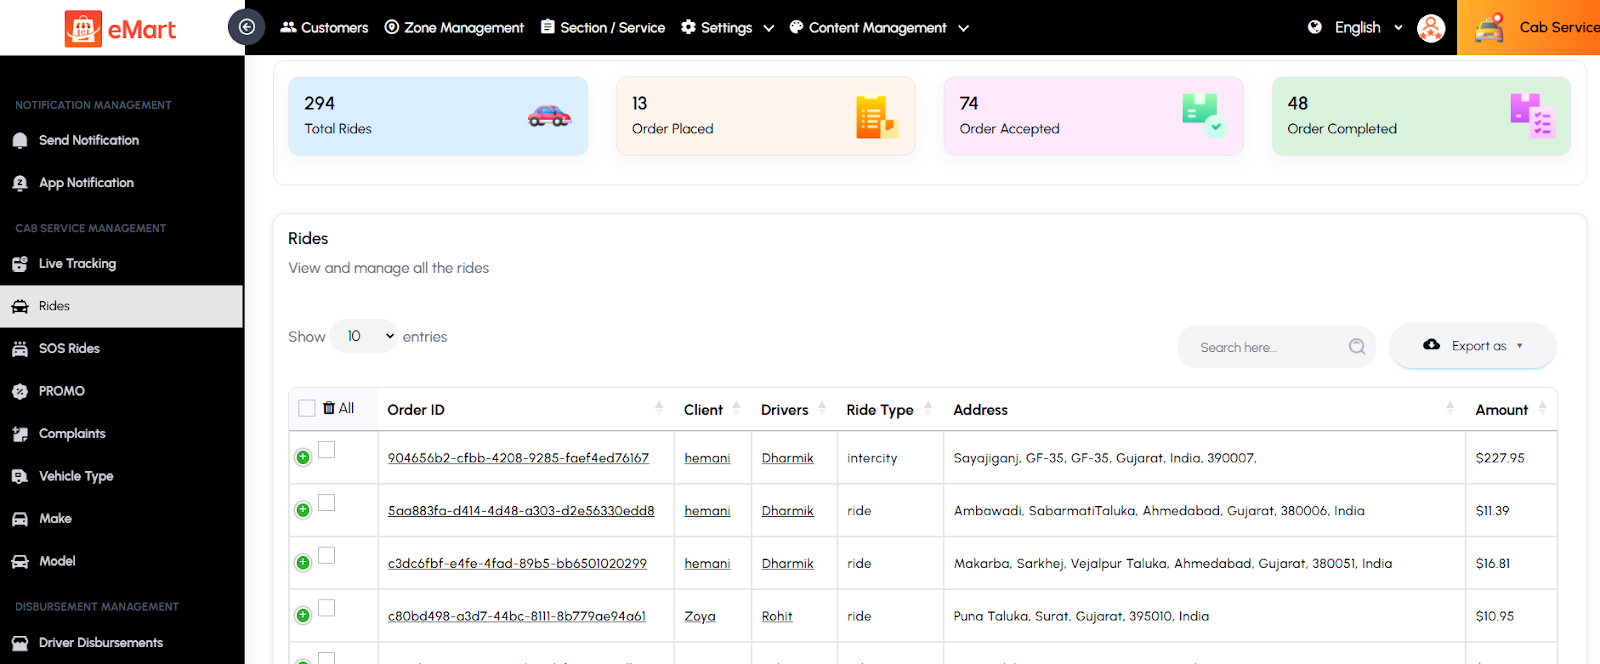
Rides
Used to manage all cab ride records on the platform. The admin can view ride details, update statuses, check payments, assign drivers, and resolve ride-related issues.
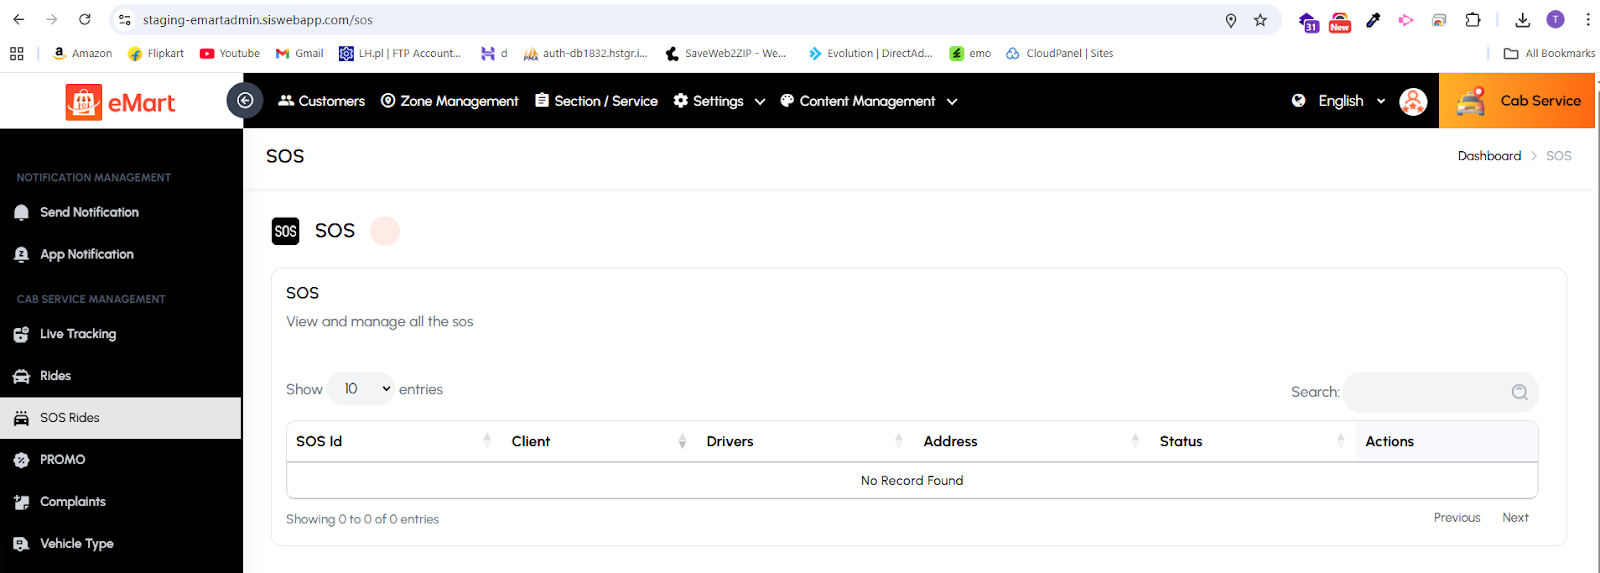
SOS Rides
Used to handle emergency alerts triggered by users or drivers during a ride. The admin can view SOS details, contact relevant users or authorities, and ensure safety actions are taken promptly.
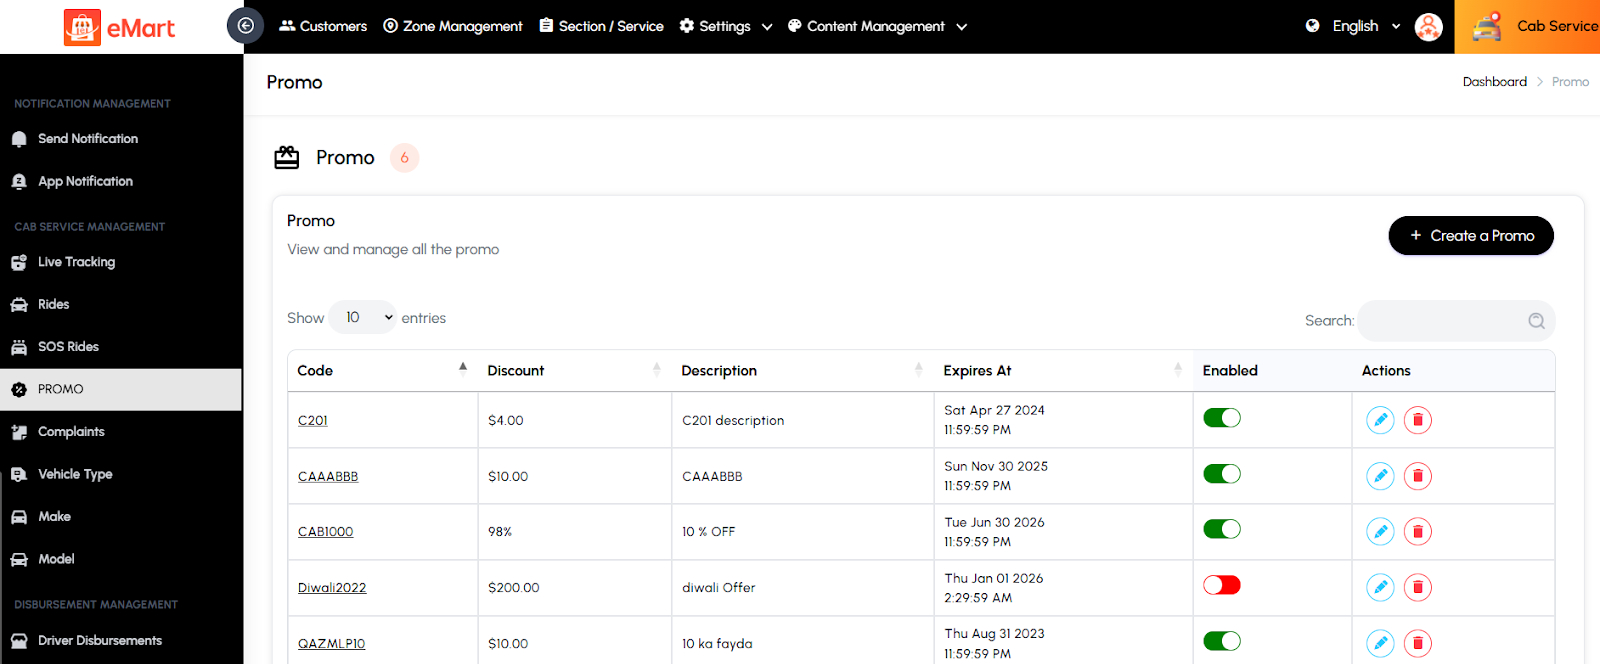
Promo
Used to create and manage promotional offers or discounts specific to cab rides. The admin can define promo codes, set validity periods, and monitor their usage to boost bookings.
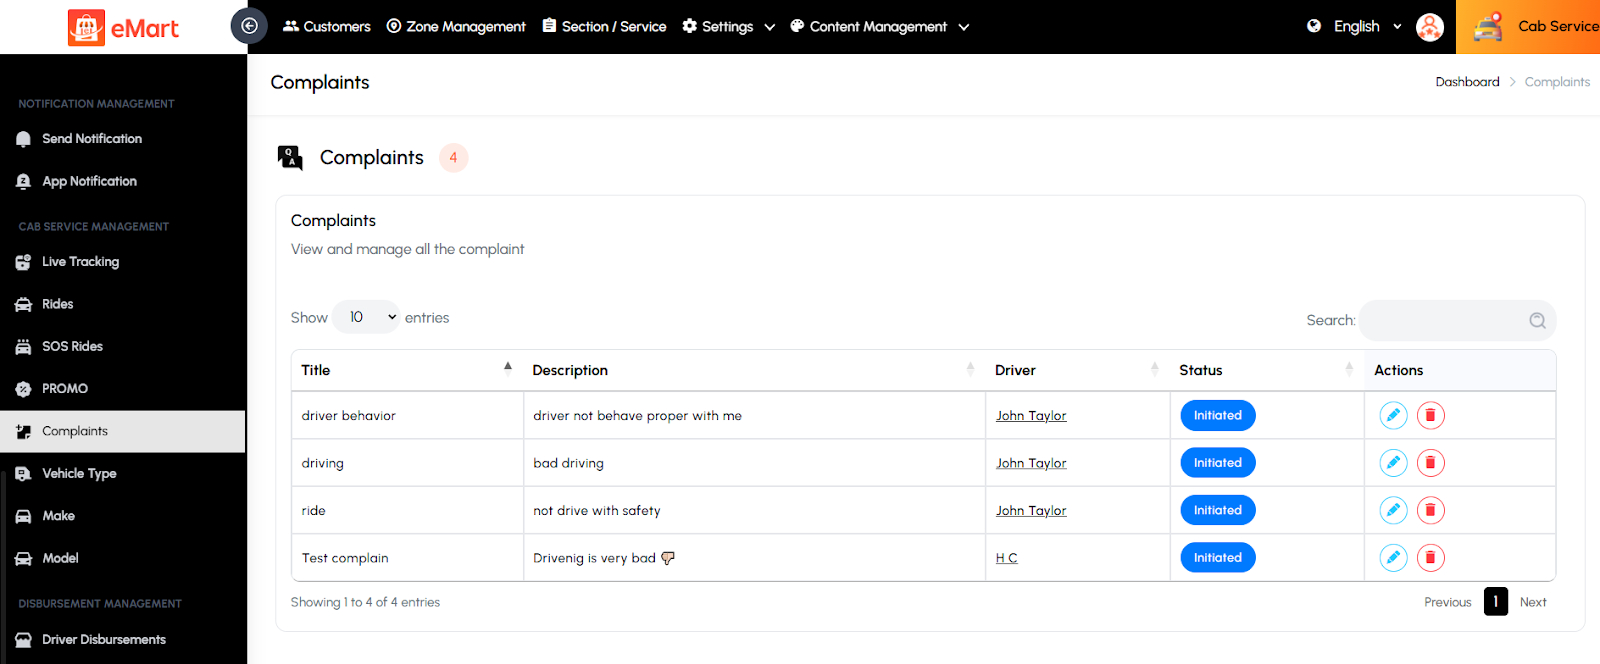
Complaints
Used to review and resolve complaints raised by customers or drivers related to cab rides. The admin can track issue types, communicate with involved parties, and take necessary action to maintain service quality.
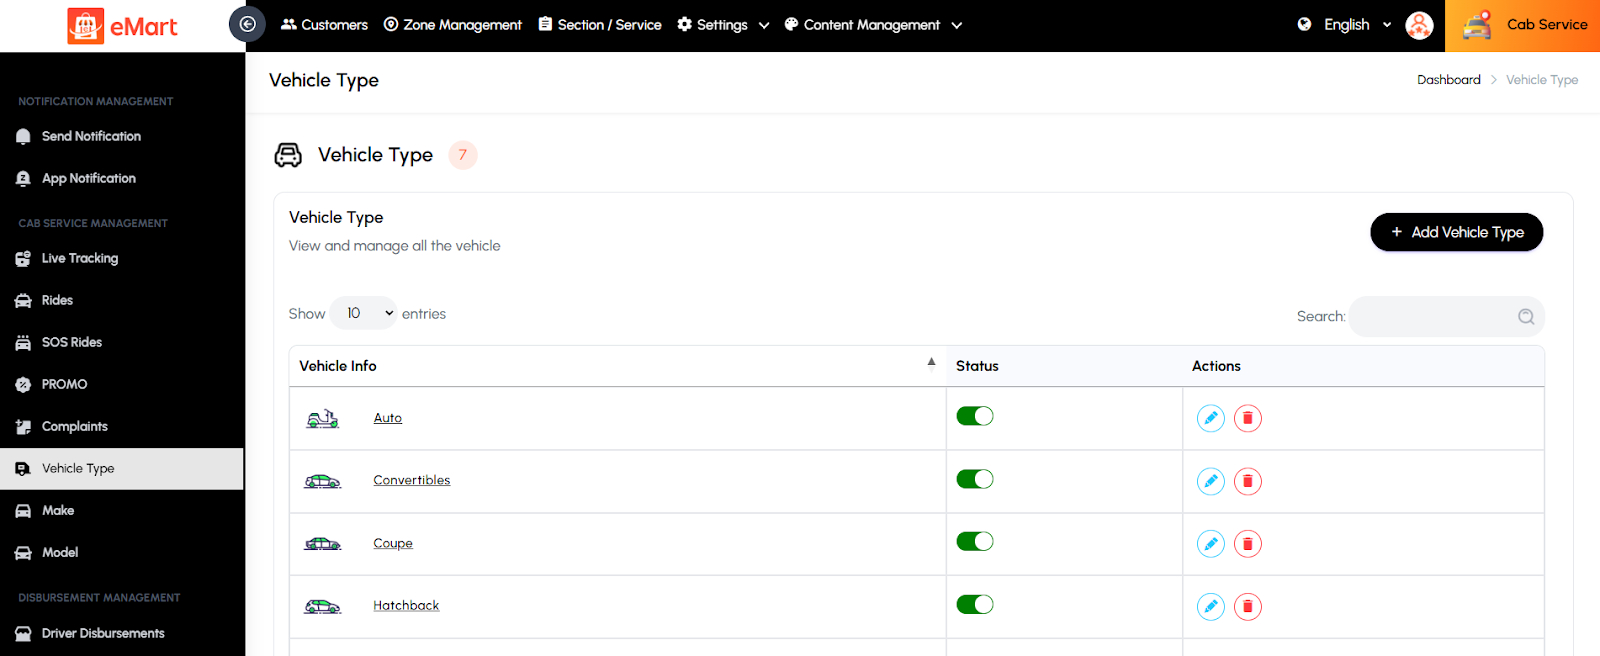
Vehicle Type
Used to define and manage various vehicle categories such as Sedan, SUV, Mini, or Luxury. Each type can have its own pricing structure and capacity.
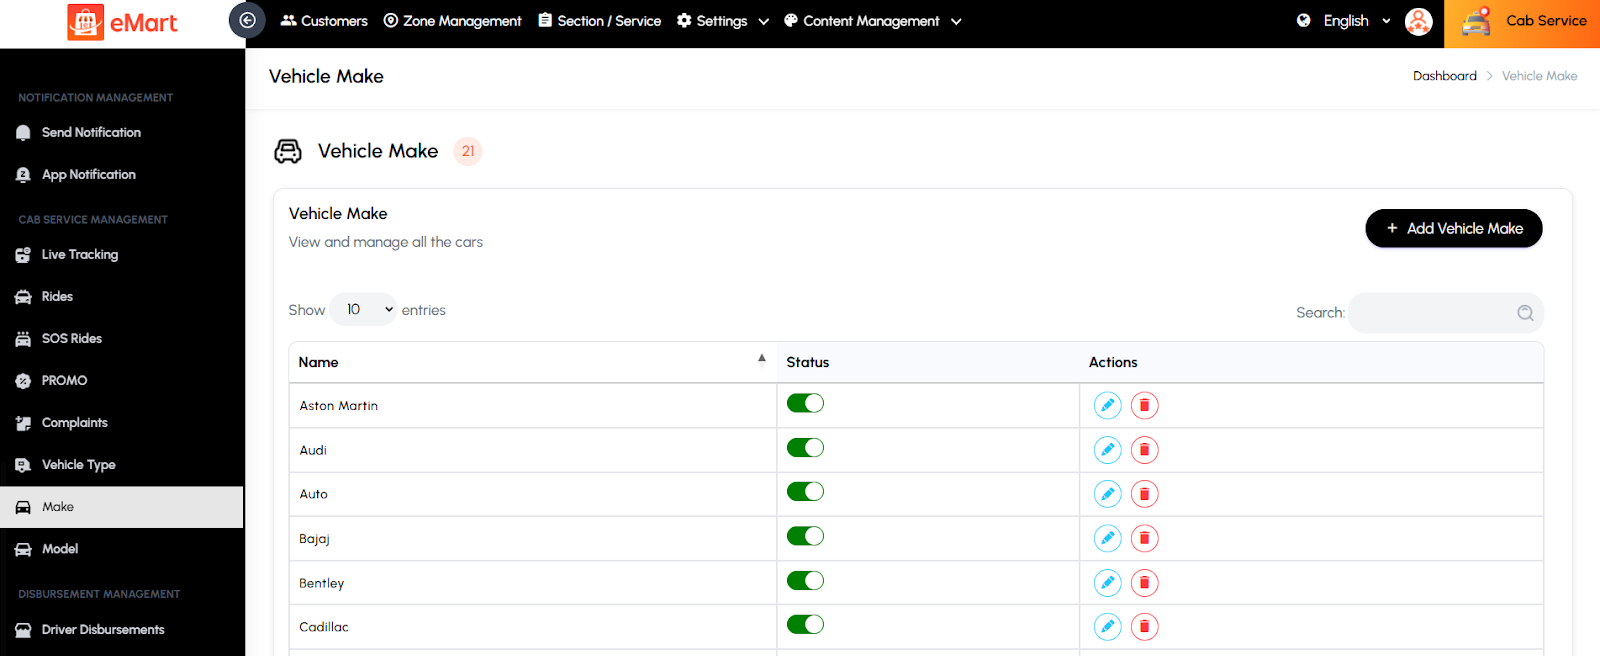
Make
Used to manage the list of vehicle manufacturers (e.g., Toyota, Honda, Tesla) available for cab registration. It helps standardize vehicle data across the system.
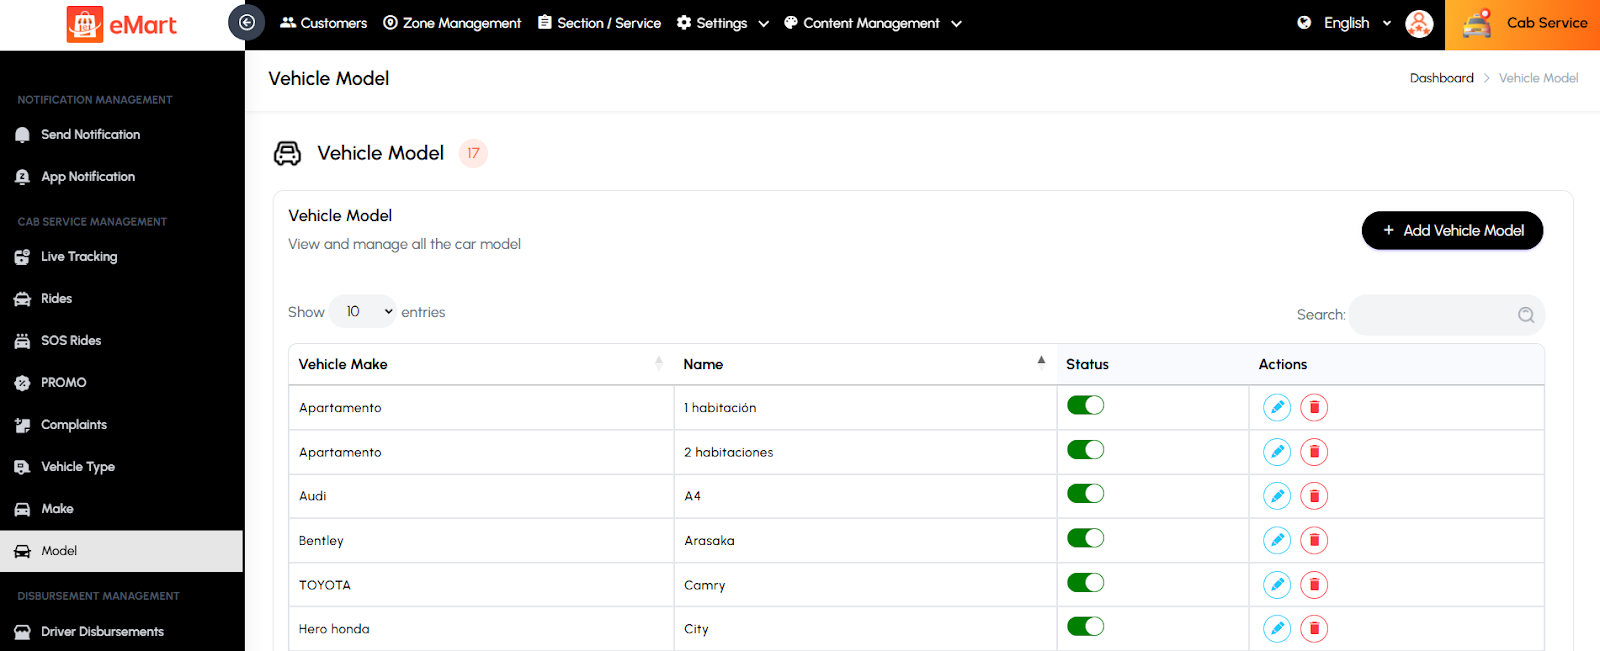
Model
Used to manage specific vehicle models under each make (e.g., Toyota Corolla, Honda City). This ensures accurate identification and classification of vehicles in the fleet.
5.22. On-Demand Service Management
Used to manage all operations related to on-demand services such as home cleaning, beauty, repair, or other professional services. This section helps the admin oversee service providers, service listings, workers, and bookings to ensure efficient service delivery and customer satisfaction.
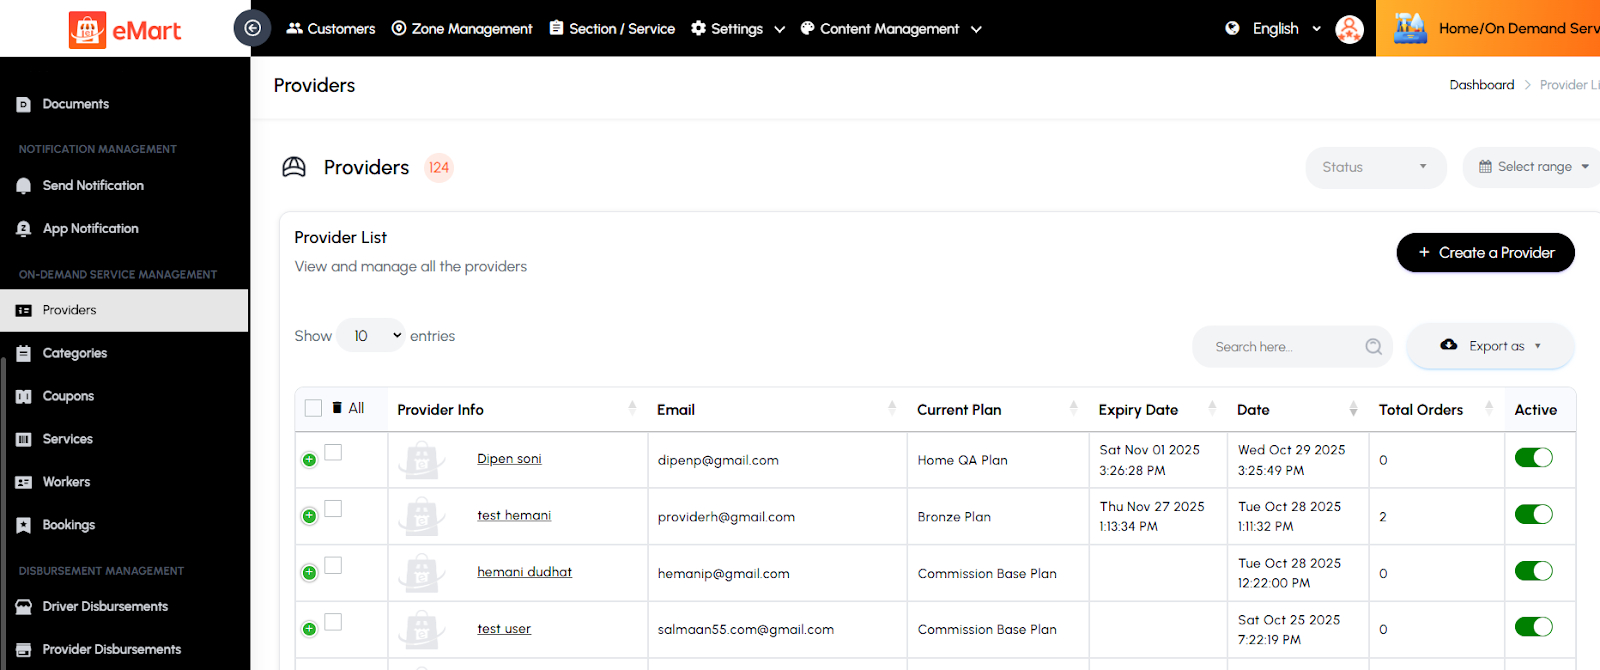
Providers
Used to manage all service providers registered on the platform. The admin can view provider profiles, verify documents, approve or reject applications, and monitor their performance and earnings.
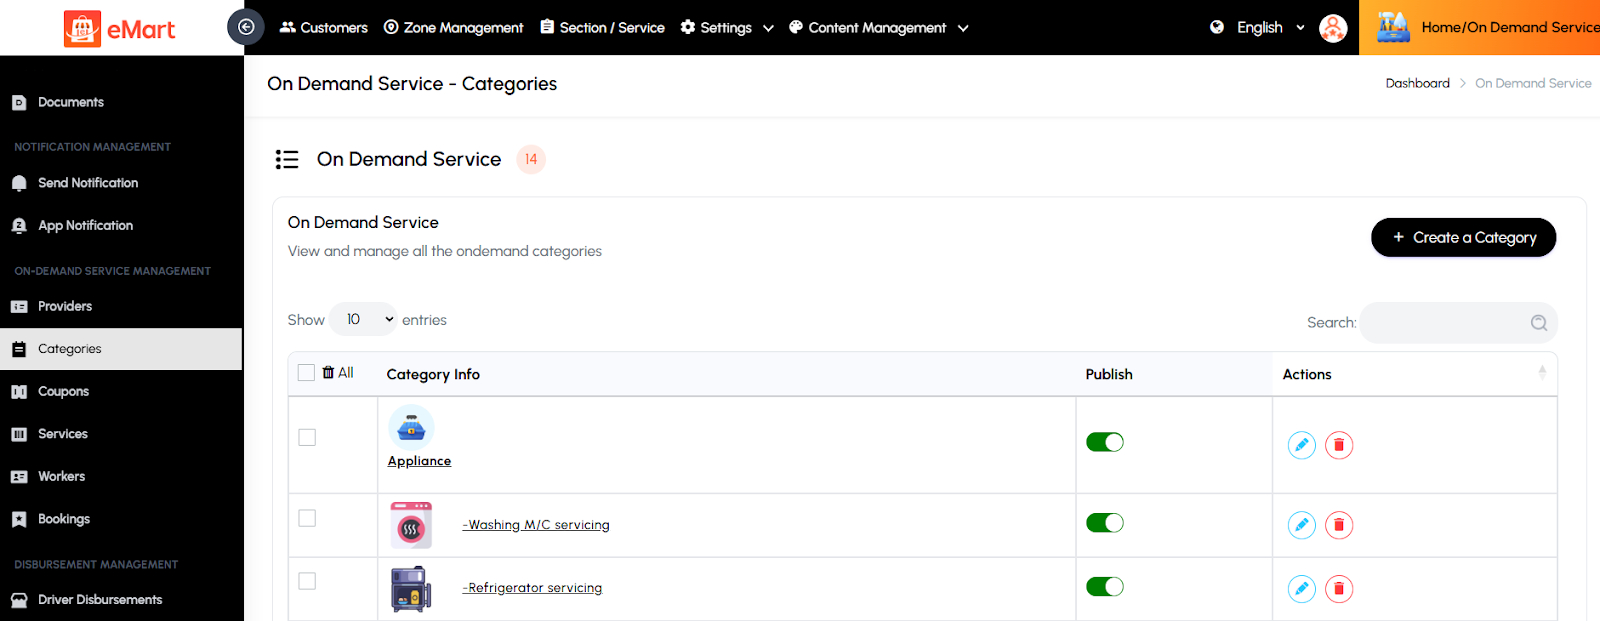
Categories
Used to organize and manage various service categories (e.g., Cleaning, Plumbing, Beauty). The admin can create, edit, or delete categories to structure the service catalog effectively.
Coupons
Used to create and manage discount coupons specific to on-demand services. The admin can define coupon codes, discount amounts, usage limits, and validity periods to attract and retain customers.
Services
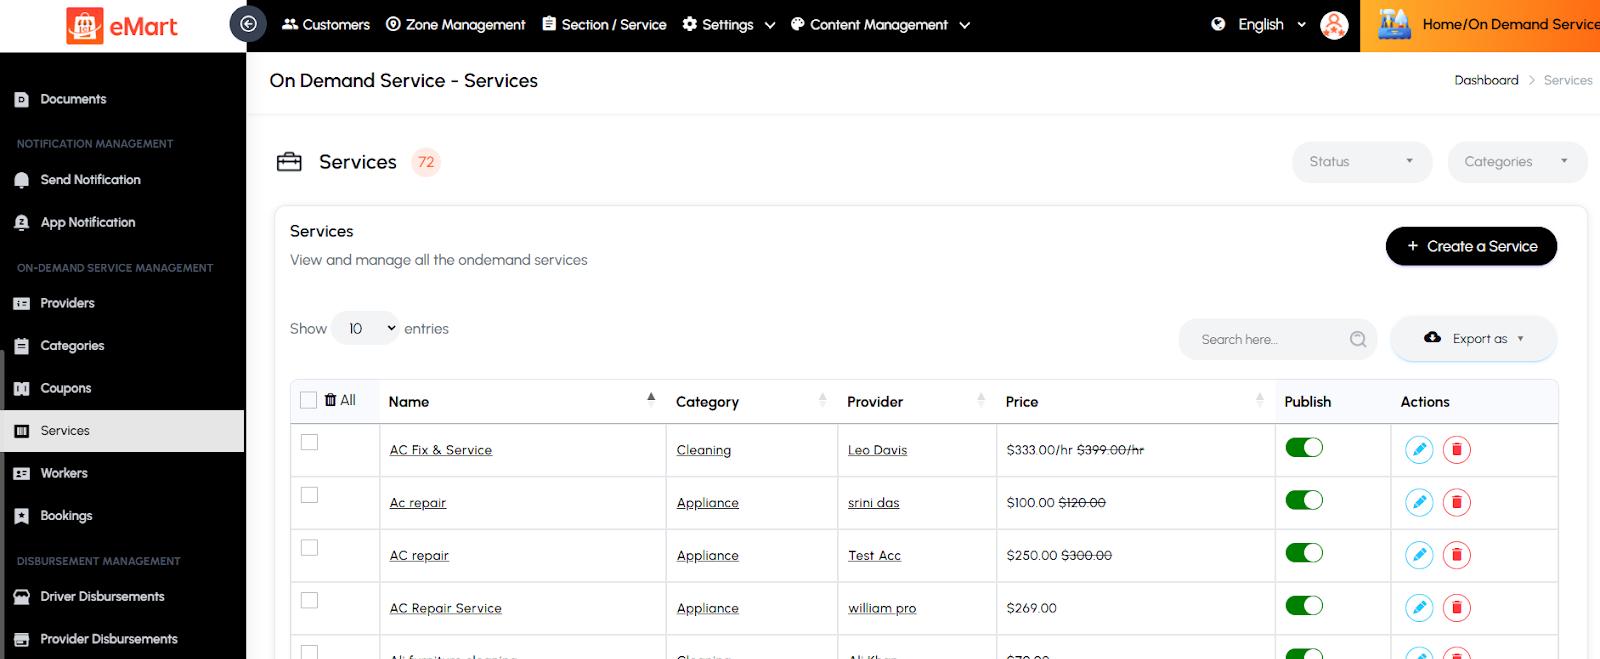
Used to manage individual service listings under each category. The admin can add or edit service details such as name, description, pricing, duration, and availability.
Workers
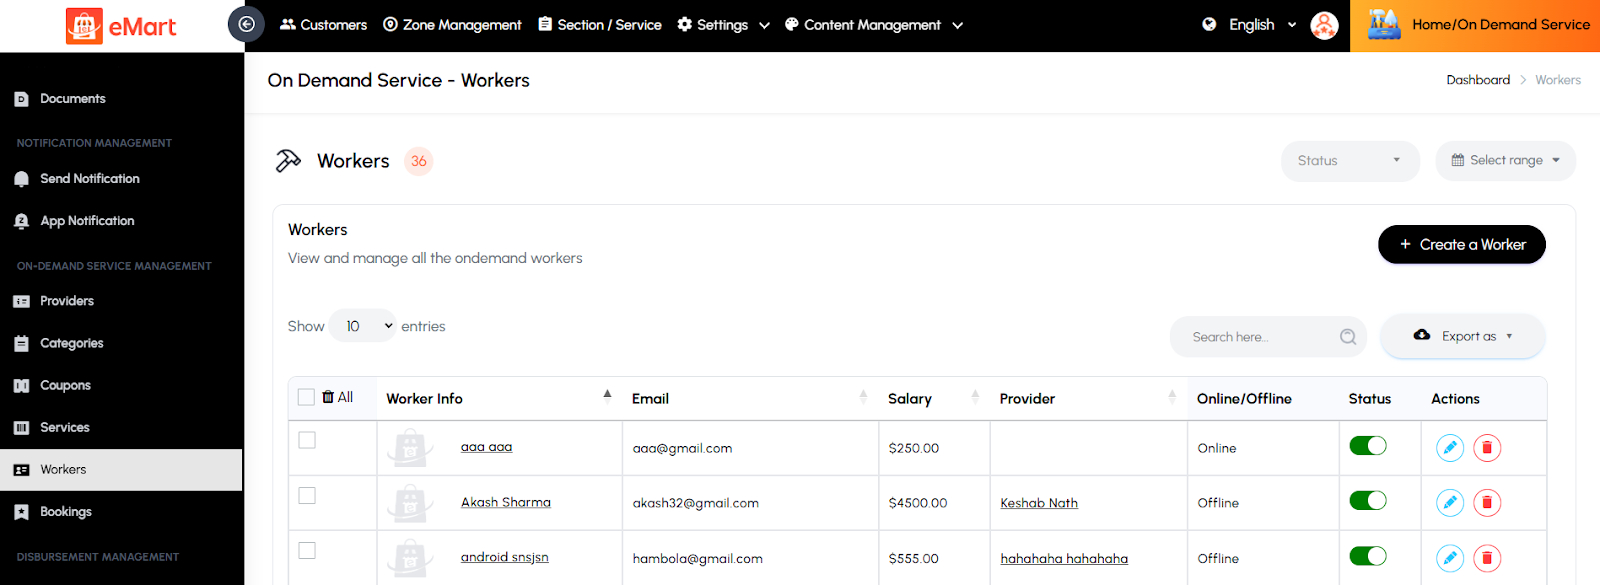
Used to manage workers associated with service providers. The admin can view worker details, assign them to providers, verify their documents, and track their service performance and availability.
Bookings
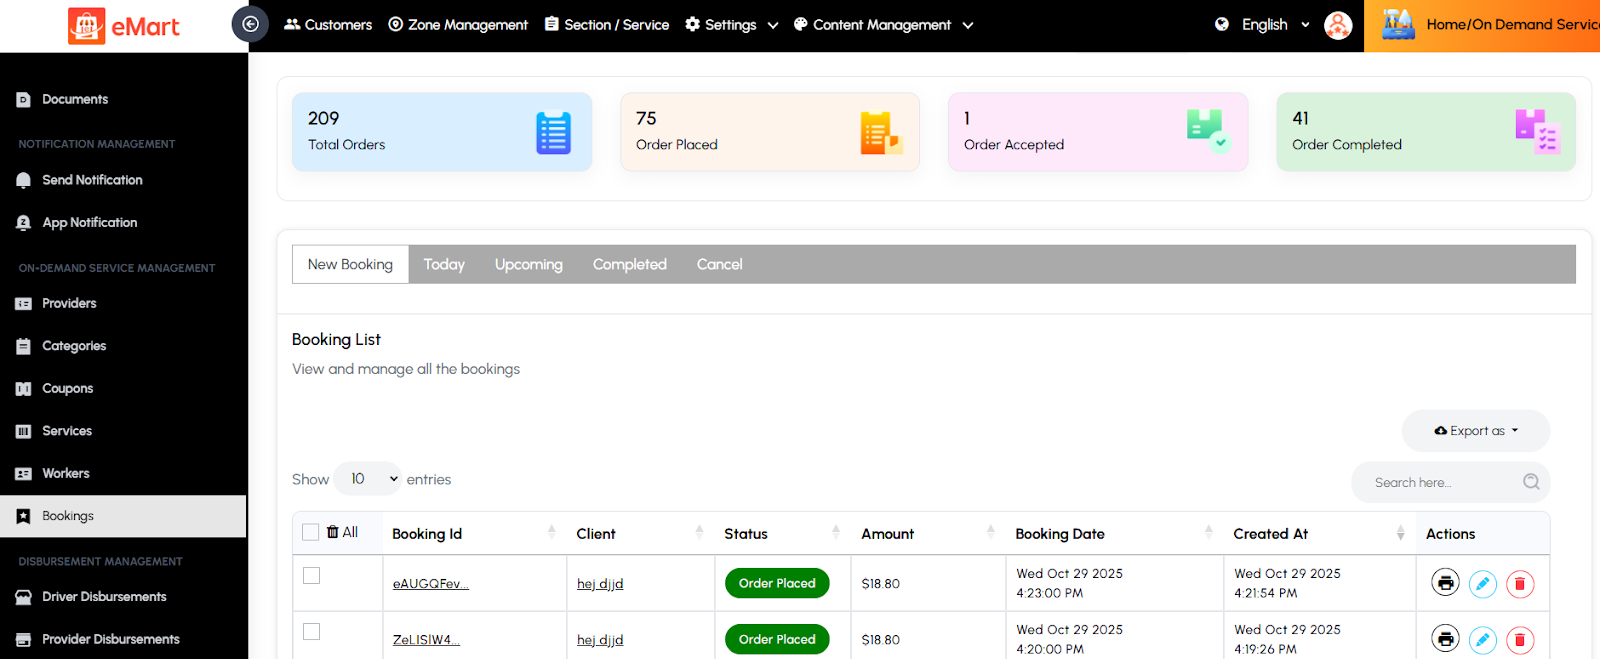
Used to view and manage all service bookings made by customers. The admin can track booking statuses, assign providers or workers, update schedules, and handle cancellations or customer issues.
5.23. Parcel Service Management
Used to manage all operations related to parcel pickup and delivery services. This section allows the admin to monitor active parcel deliveries, manage parcel types and weights, handle discount coupons, and track order statuses to ensure smooth and timely deliveries.
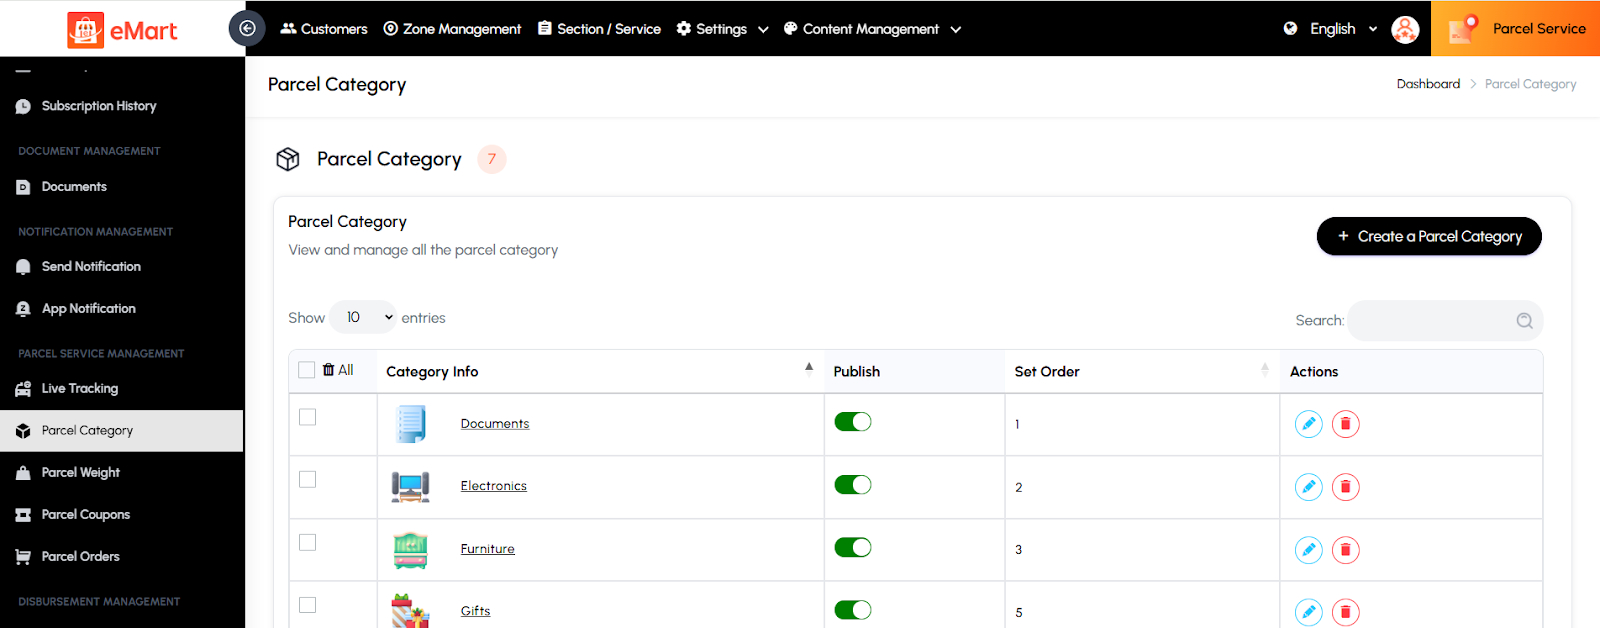
Parcel Category
Used to create and manage parcel categories based on the type or size of items (e.g., Documents, Electronics, Fragile Items). This helps in applying appropriate delivery charges and handling requirements.
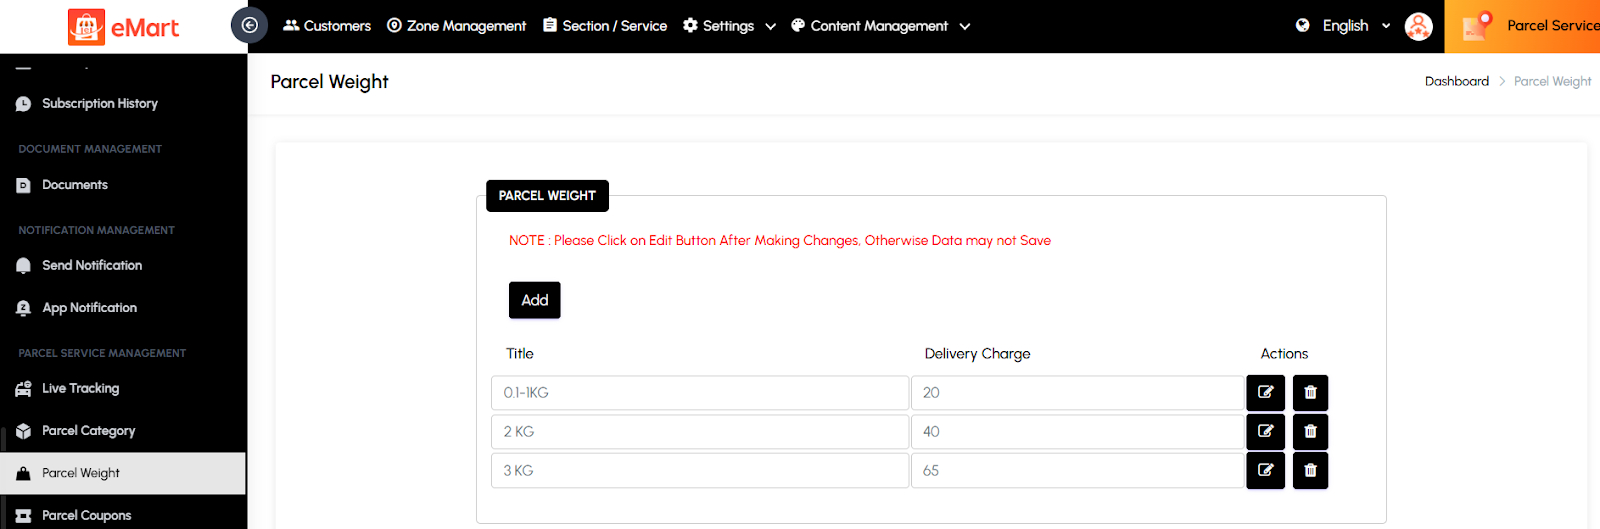
Parcel Weight
Used to define and manage different weight ranges for parcels. The admin can set pricing rules and delivery fees based on parcel weight to maintain accurate billing.
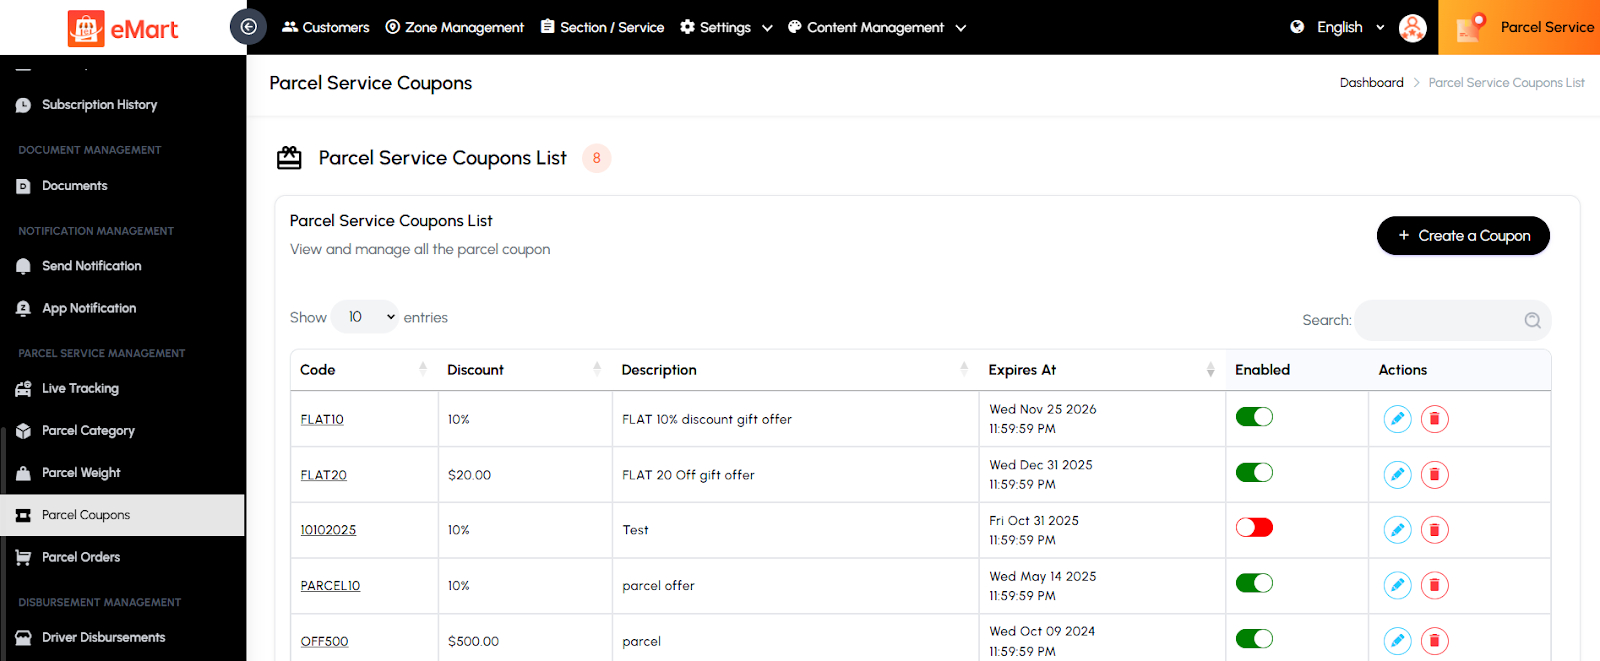
Parcel Coupons
Used to create and manage discount coupons specific to parcel delivery services. The admin can set coupon details such as code, discount amount, usage limit, and validity period.
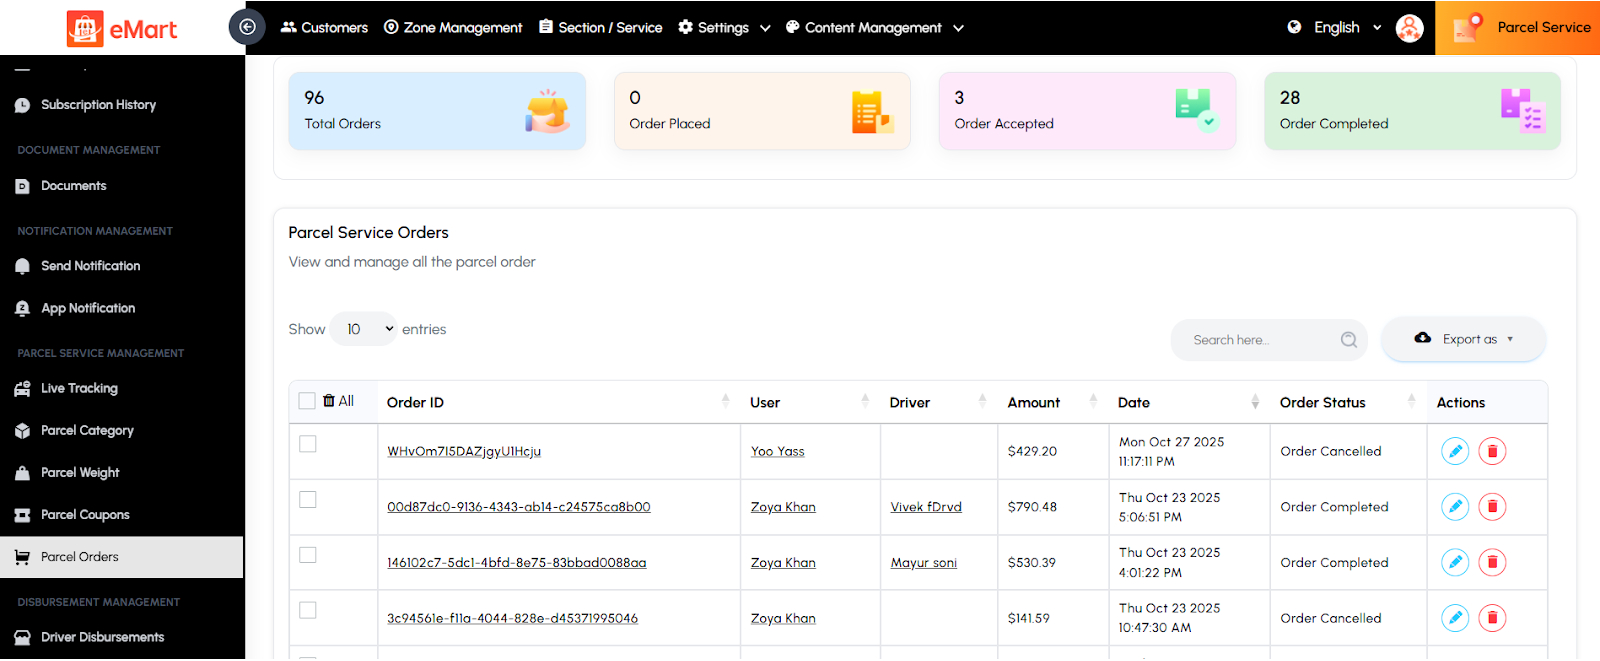
Parcel Orders
Used to view and manage all parcel delivery orders. The admin can monitor order details, pickup and drop-off locations, driver assignments, payment status, and delivery progress.
5.24. Rental Service Management
Used to manage all activities related to the vehicle rental services on the platform. This section helps the admin oversee vehicle listings, rental orders, discounts, and packages to ensure a smooth and efficient rental experience for users and vendors.
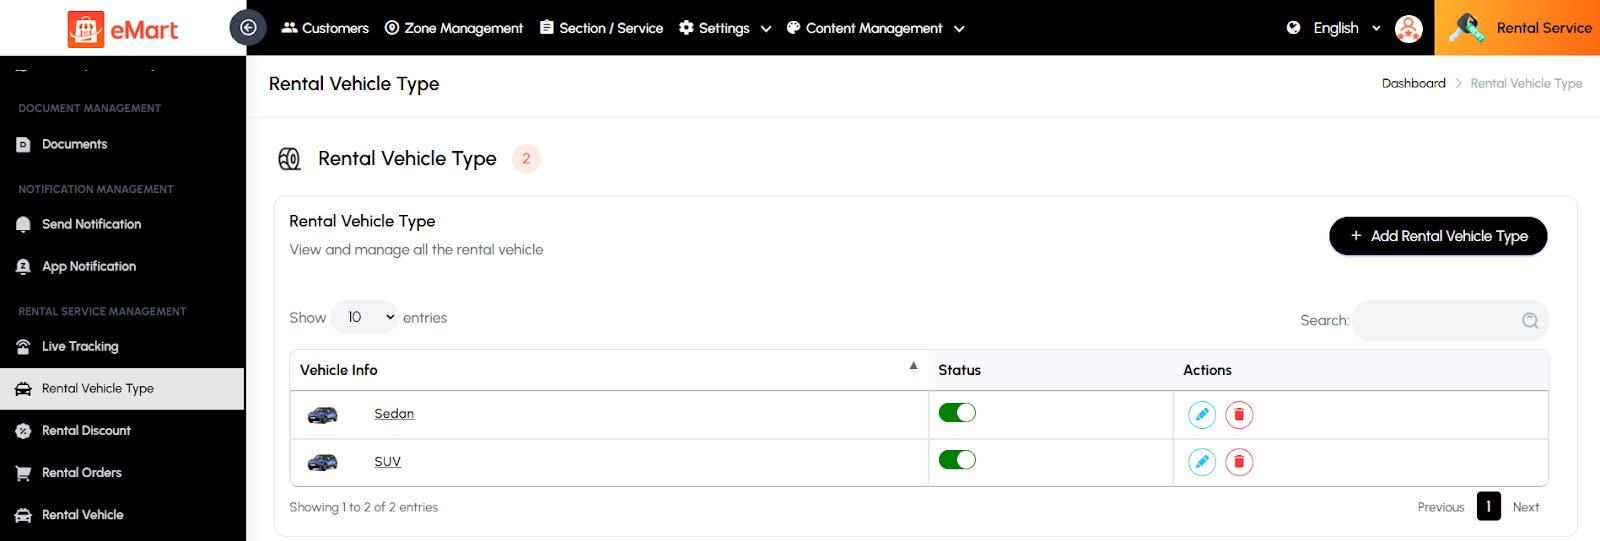
Rental Vehicle Type
Used to define and manage various types of vehicles available for rent (e.g., Cars, Bikes, Scooters, Vans). Each type can have its own pricing, features, and capacity settings.
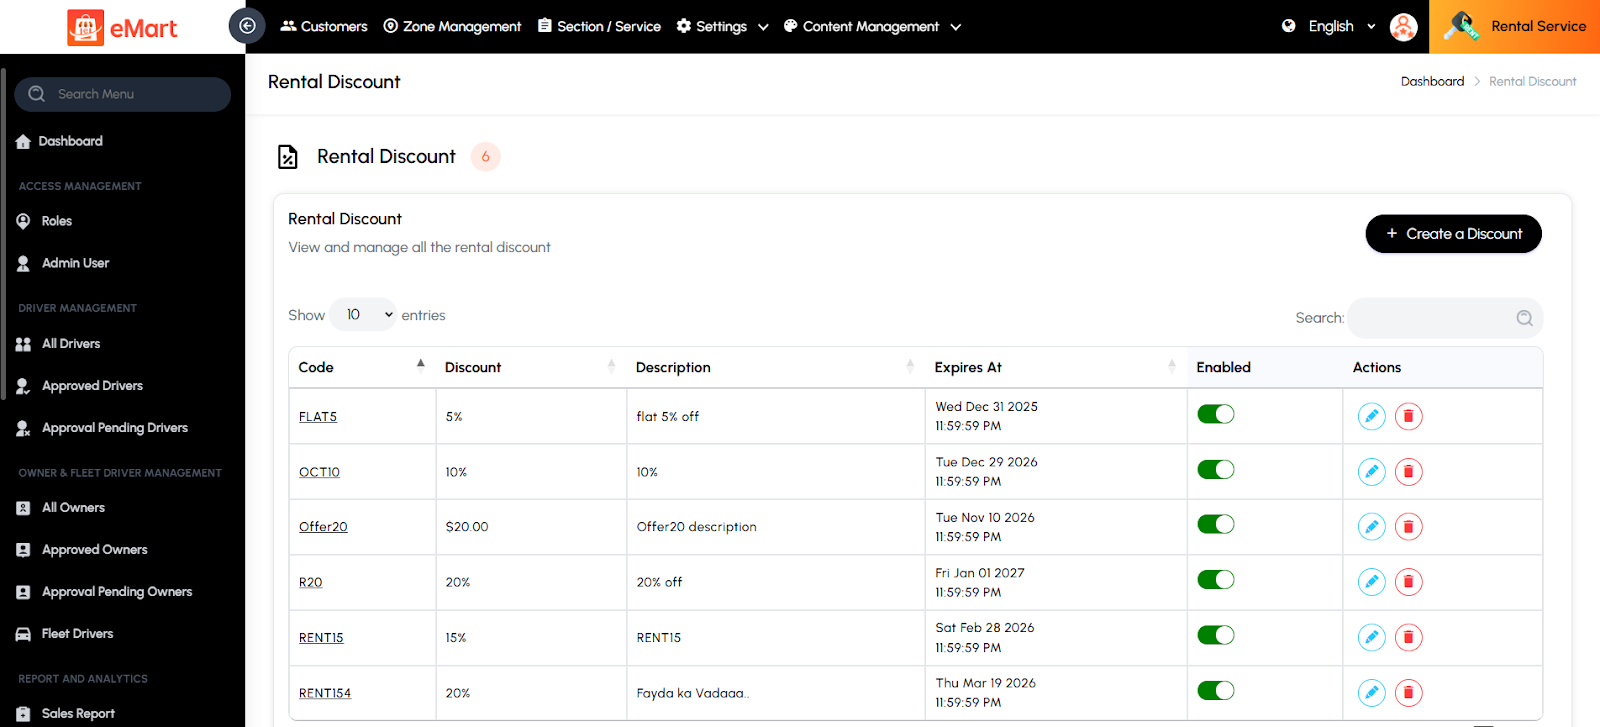
Rental Discount
Used to create and manage promotional discounts or special offers specific to rental services. The admin can define discount codes, percentage or fixed value discounts, and their validity period to attract more users.
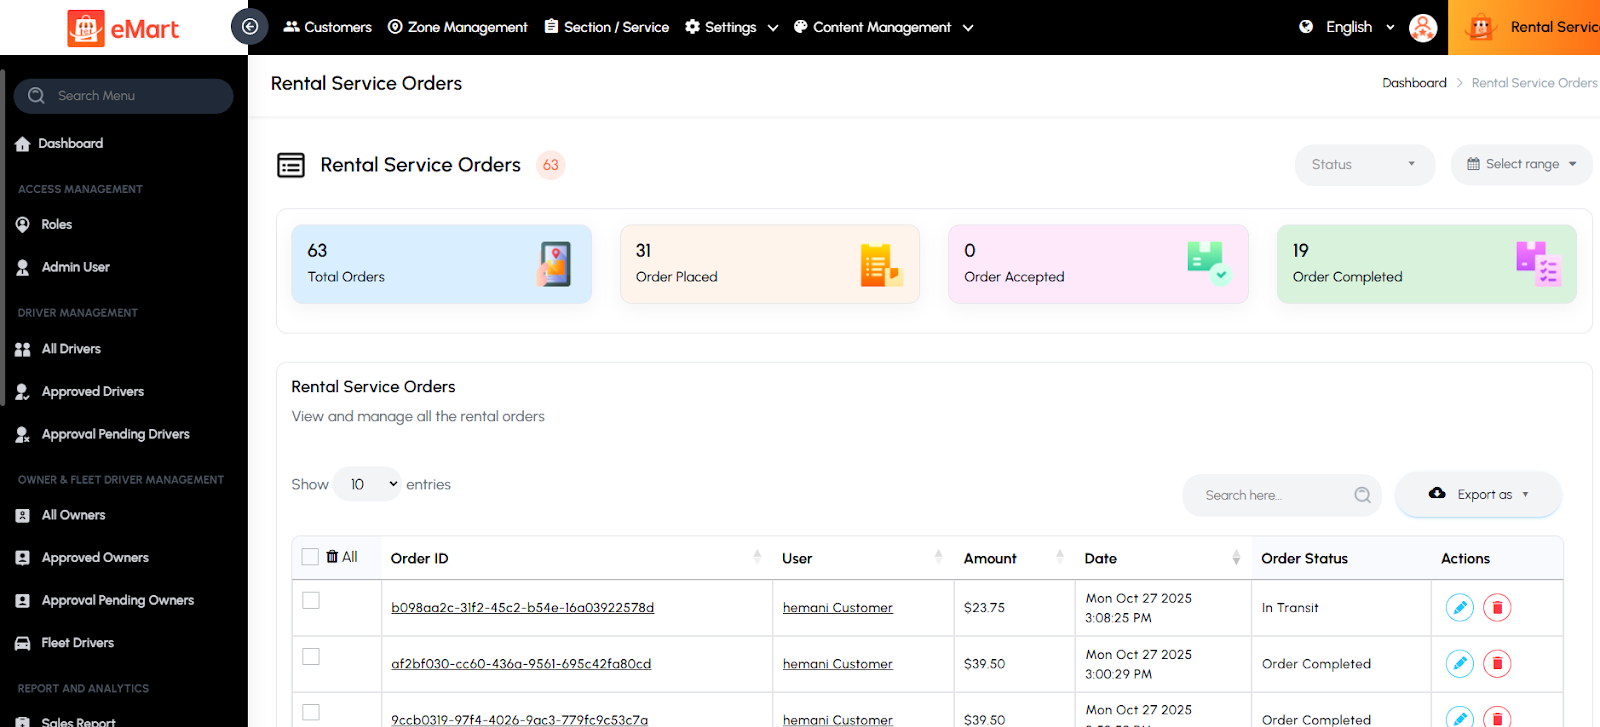
Rental Orders
Used to view and manage all rental bookings made by customers. The admin can check booking details, vehicle availability, payment status, and track rental durations or extensions.
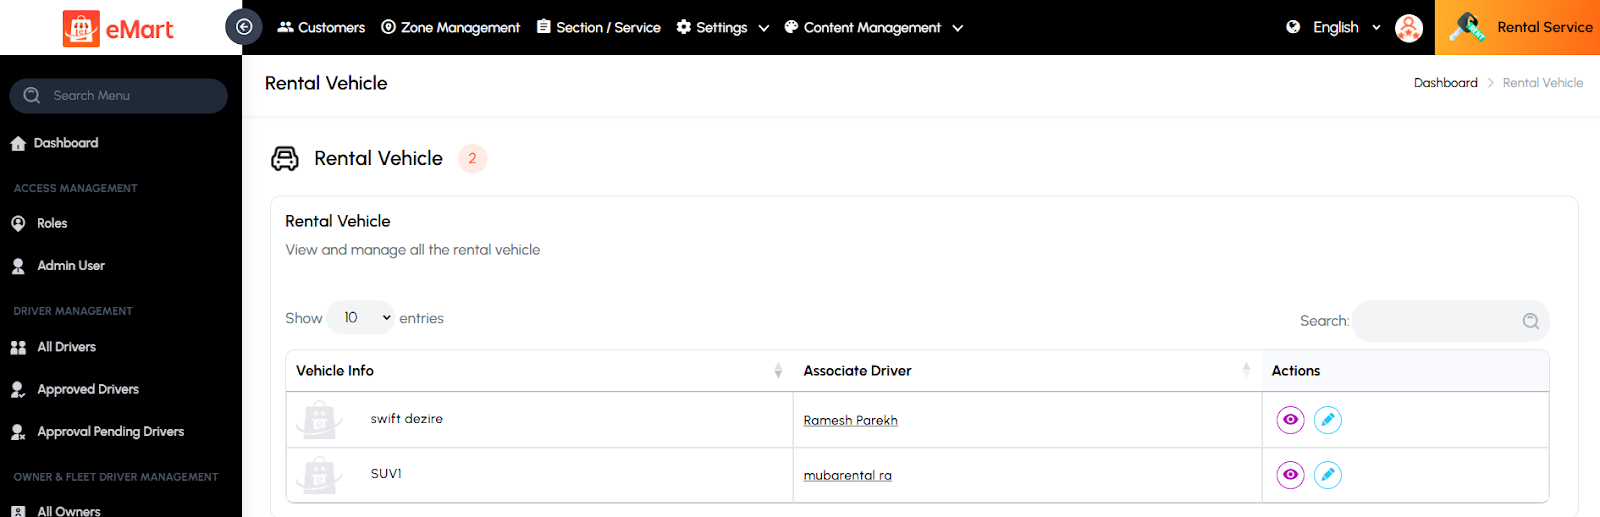
Rental Vehicle
Used to manage all vehicles listed for rent on the platform. The admin can add or update vehicle details such as model, registration number, condition, pricing, and availability status.
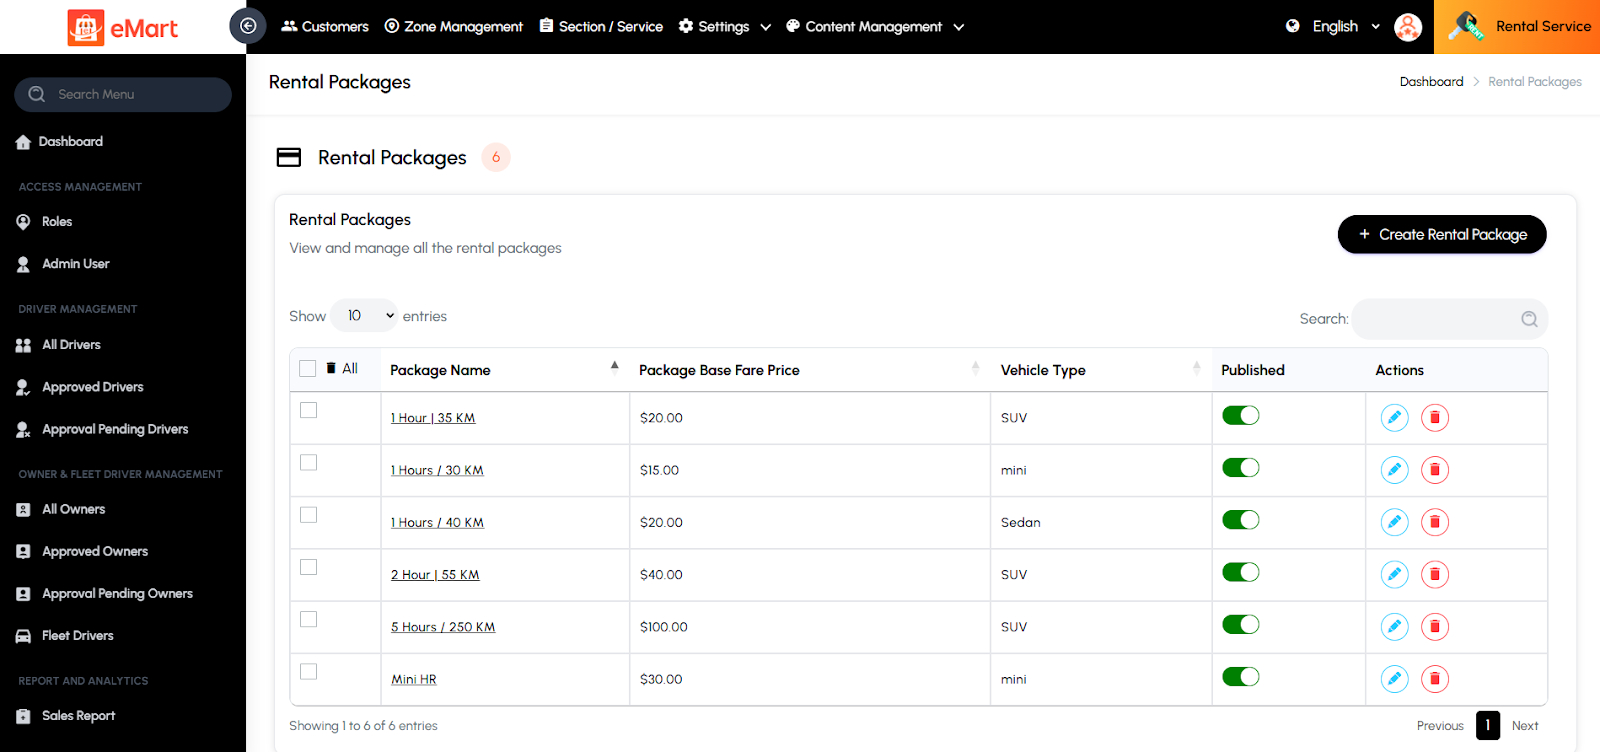
Rental Packages
Used to create and manage predefined rental plans or packages (e.g., hourly, daily, weekly). The admin can set rates, duration, mileage limits, and terms for each package to offer flexible rental options to customers.
Firestore Database Collection Import / Export#
Firestore Database Collection Import / Export
To perform Firebase Collection Import Export, follow these straightforward steps:
6.1. To set up NPM on your computer, download Node.js from the following link: https://nodejs.org/en/download/ Node.js Download Page.
6.2. Unzip the source code file named “Firebase Import Export Collections.zip”
6.3. If you haven’t already created a Firebase project, set it up now.
6.4. Configure the credentials.json file, which you can obtain from your Firebase Project settings. Then navigate to the Service account, then select Node.js. Generate a new private key and wait until the key is created. It will automatically download and replace the current credentials.json file.
6.5. Navigate to the extracted Firebase Import Export Collections zip file path and then press and hold the Ctrl+Shift buttons. While holding them, right-click the mouse button, and select “Open PowerShell window here” from the context menu. This will open a PowerShell window where you can run the import/export command.
6.6. Execute the following commands to perform import/export operations for collections:
To import all collections, execute the following command:
To export all collections, execute the following command:
Once the export command is executed, the collections.json file will be downloaded.
Important Notes:
Prior to executing the above command, ensure that you have correctly updated your Firebase credentials in the credentials.json file.
See Video
Deploy Firebase Cloud Functions#
7. Deploy Firebase Cloud Functions
7.1 Order Tracking & Delivery Dispatching
1. The customer initiates a new order
2. The store approves/rejects the new order
3. If the store accepts the order, it is assigned to a nearby available driver.
4. The driver can choose to either accept or decline the order. If the driver accepts the order, they are assigned to pick up and deliver the items.
5. The driver arrives at the store to collect the order. Once picked up, the driver updates the order status in the app for the customer. After delivery, the driver can mark the order as completed in the driver app.
6. If the driver rejects the order, the dispatch process restarts to find another available driver nearby.
7. Customers can track the delivery status of all their orders on their delivery app. The app utilizes Flutter code to handle most order updates. However, the backend system, which manages access to all available nearby drivers and stores, facilitates the delivery process.
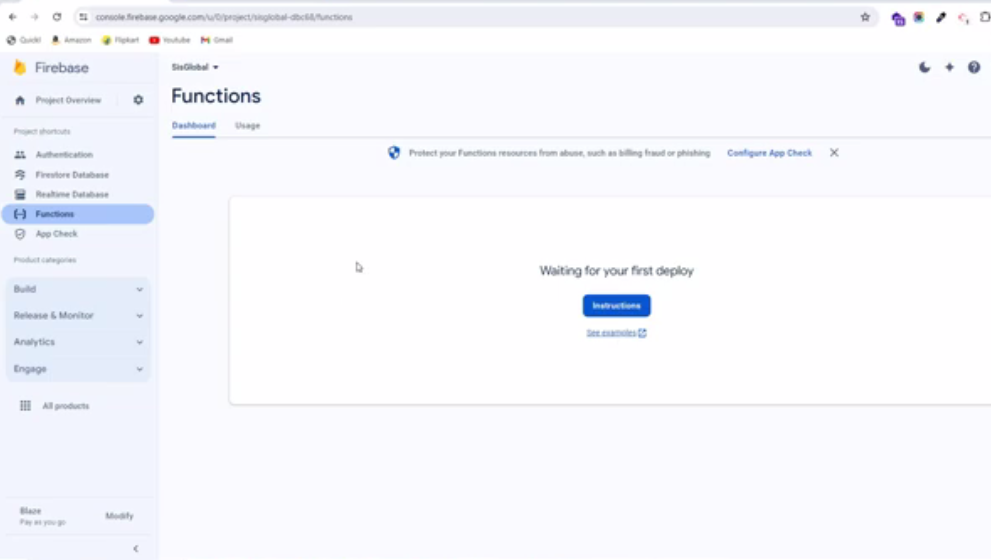
All the necessary Firebase Functions have been initially coded by us, you just need to deploy these functions to your own Firebase account. This means that you need to upload the source code inside the Firebase Functions folder to your account. If a Firebase account has been created, find a Firebase project, and 2 apps (iOS and Android)
7.2. Setting up Node.js and the Firebase CLI
For comprehensive guidance, refer to the official Firebase documentation on getting started: “Write, test, and deploy your first functions” in Cloud Functions for Firebase.
You’ll need Node.js and the Firebase CLI to write functions and deploy them to Cloud Functions.
To set up NPM on your computer, download Node.js from the following link: Node.js download. Once Node.js is installed, proceed to install the Firebase CLI.
Use the following command to install the CLI via npm:
npm install -g firebase-tools
If you’ve already set up the Firebase tools, you can simply run the following command:
npm install
These steps will ensure you’re ready to start writing and deploying functions with Firebase. If you encounter any issues, consult the Firebase documentation for troubleshooting assistance.
7.3. Initialize your project
To initialize the project, authenticate the Firebase tool by running the following command. You’ll be prompted to log in to your account via your web browser:
firebase login
7.4. Implementing Cloud Functions
Since we’re providing the complete source code for your Firebase Cloud Functions:
Extract the zip file Order Tracking Firebase Function folder.zip.
Fill in the necessary credentials in the following files located within the zip:
.firebaserc (Add your Firestore Project ID)
index.js (Add your Firestore database URL)
serviceAccountKey.json (Add your Firebase service account credentials)
With these steps, you’ve successfully set up the required credentials.
7.5. Deploy Firebase Functions
Simply run the following command in the Order Tracking Firebase Function > functions directory.
firebase deploy --only functions
Now you can go to your Firebase Console and check, as the functions have been deployed. It is possible to see the logs for each function, understand the output, and know when it gets called.
8.2 : Unzip the source code file named “Firebase Indexing.zip” here.
8.3 : Navigate to the extracted directory of “Firebase Indexing” zip file. Press and hold the ctrl+shift buttons, then right-click the mouse button. From the context menu, select “Open PowerShell window here” to launch Windows PowerShell and execute import/export commands.
8.4 : Execute the command firebase login to log in to Firebase, if you haven’t already done so.
8.5 : Execute the command firebase init
8.6 : Proceed with Y and press the enter button.
8.7 : Choose the Option > Firestore: Configure security rules and index files for Firestore.
Important Notes:
Please Note: Choose the arrow down key to navigate and select options, and press the space button to confirm your selection.
8.8 : Choose the Option > Use an existing project
8.9 : Choose your project
8.10 : Press Enter > ? What file should be used for Firestore Rules? firestore.rules
8.11 : Press Enter > ? What file should be used for Firestore indexes? (firestore.indexes.json)
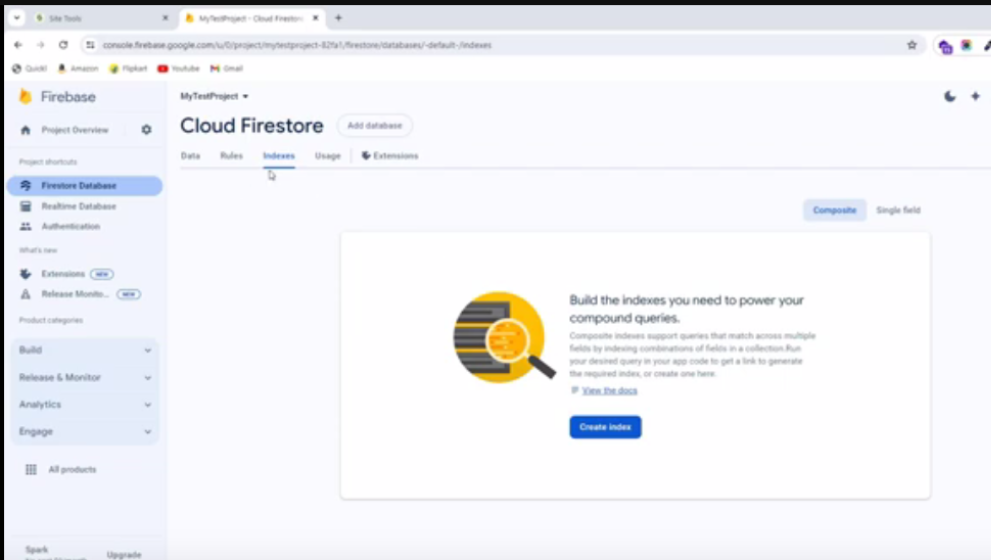
8.12 : Now, the firestore.indexes.json file will be downloaded. Open this file and copy all the code from firestore_indexes.json file, then paste it into firestore.indexes.json file.
8.13 : Now execute the command firebase deploy --only firestore:indexes to import indexing in firestore.
See video
Website Panel#
9. Web Panel Setup
9.1 Connect to FTP and Setup
Follow these instructions to connect to your server using FTP and complete the application setup:
9.1.1. Connect to the server using FTP: Use an FTP client like FileZilla to connect to your server. Enter the server’s IP address, username, and password. Use port 21 for FTP or port 22 for SFTP.
9.1.2. Transfer the ZIP file: Upload your web panel’s ZIP file to the server’s local path (e.g., /var/www/html).
9.1.3. Unzip the file: Navigate to the file’s location on the server and run the following command to extract the ZIP file: “sudo unzip your-application.zip” or you can do it from cpanel directly.
9.1.4. Update the .env file with your configuration: Modify the database and application settings which are mentioned in the .env file. Below is an example configuration:
Important Notes:
Add Your Google Client ID for Google Login Functionality To enable Google login, you need to provide your Google Client ID.
Steps to find your Google Client ID:
Go to your Firebase Project in the Firebase Console.
Navigate to Authentication > Sign-in Method.
Click on Google under the list of providers.
Scroll down to Web SDK configuration.
Copy the Web Client ID.
Paste this Client ID in the env file of the web panel.
GOOGLE_CLIENT_ID=
Steps to Check/Add Authorized Domains for OAuth 2.0 Client ID
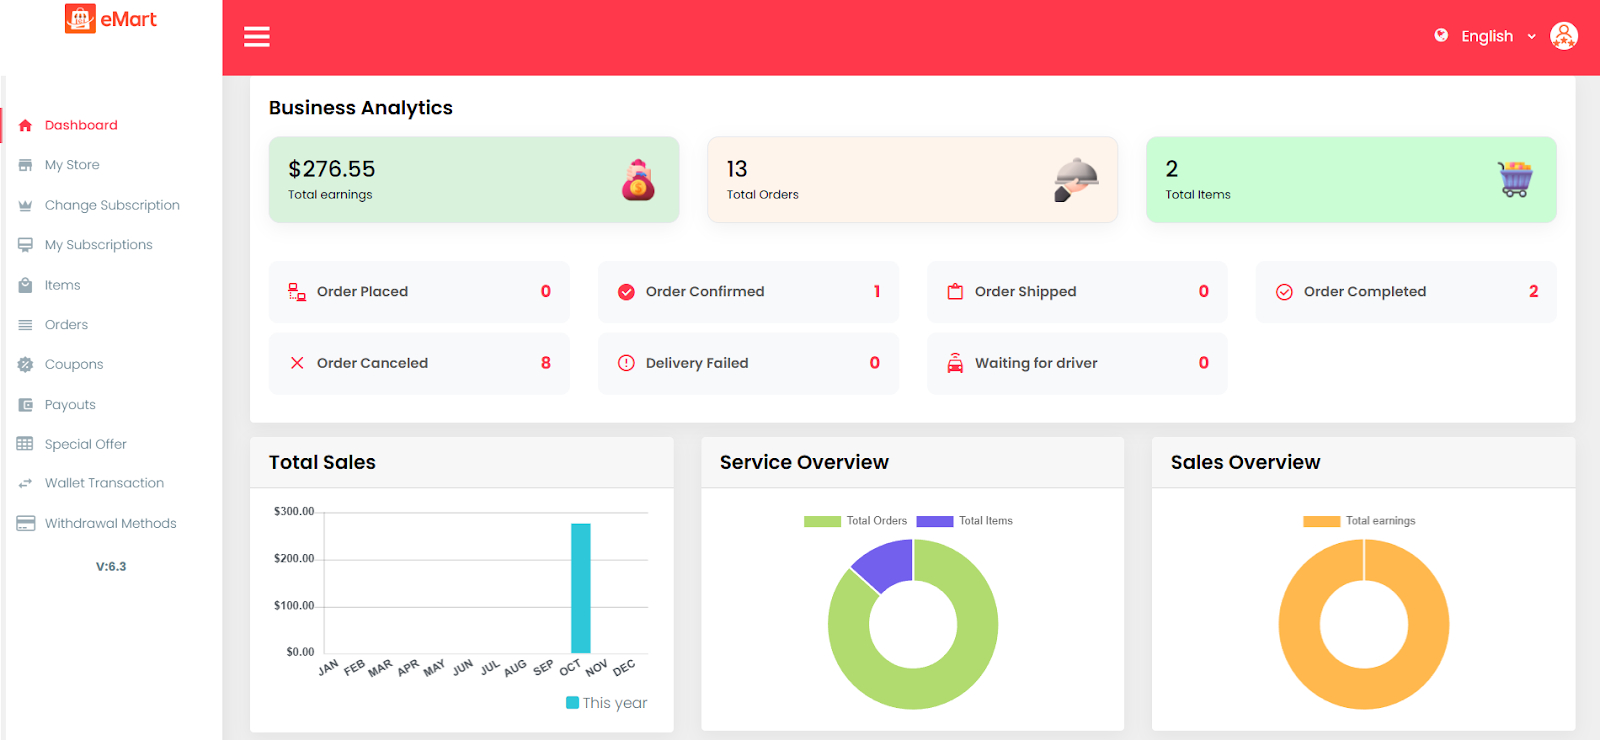
The Dashboard provides a summarized view of the platform’s key metrics and activities. It helps the vendor monitor business performance in real time.
11.2. My Store
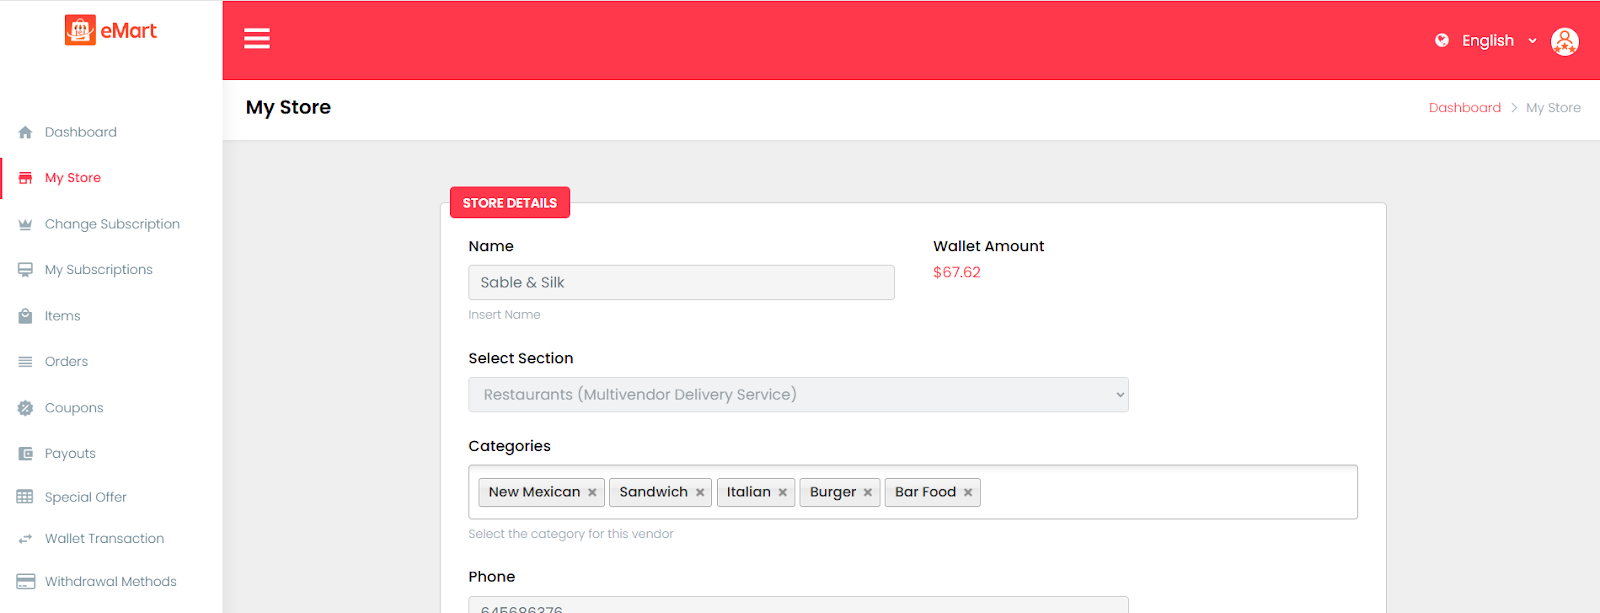
Used to manage the store’s profile and settings. The vendor can update business details such as name, address, contact info, operating hours, delivery settings, and logo or banner images. It helps keep the store’s information accurate and up to date on the platform.
11.3. Document Verification
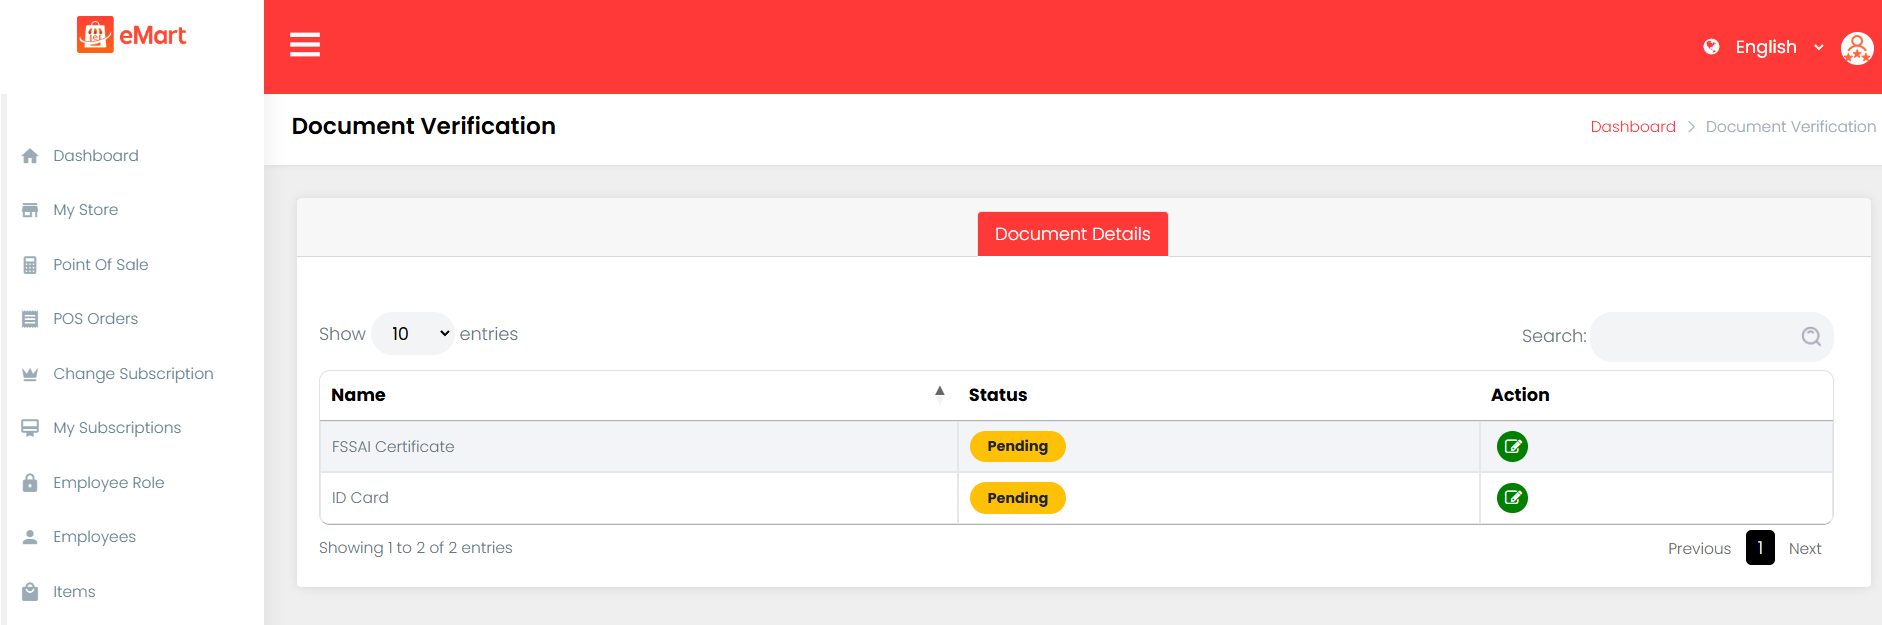
Document Verification allows vendors to securely upload and submit required documentation for approval. This can include identity proof, business licenses and other necessary certificates. The system ensures that all submitted documents are verified before activating the vendor’s account, helping maintain compliance, safety, and trust on the platform.
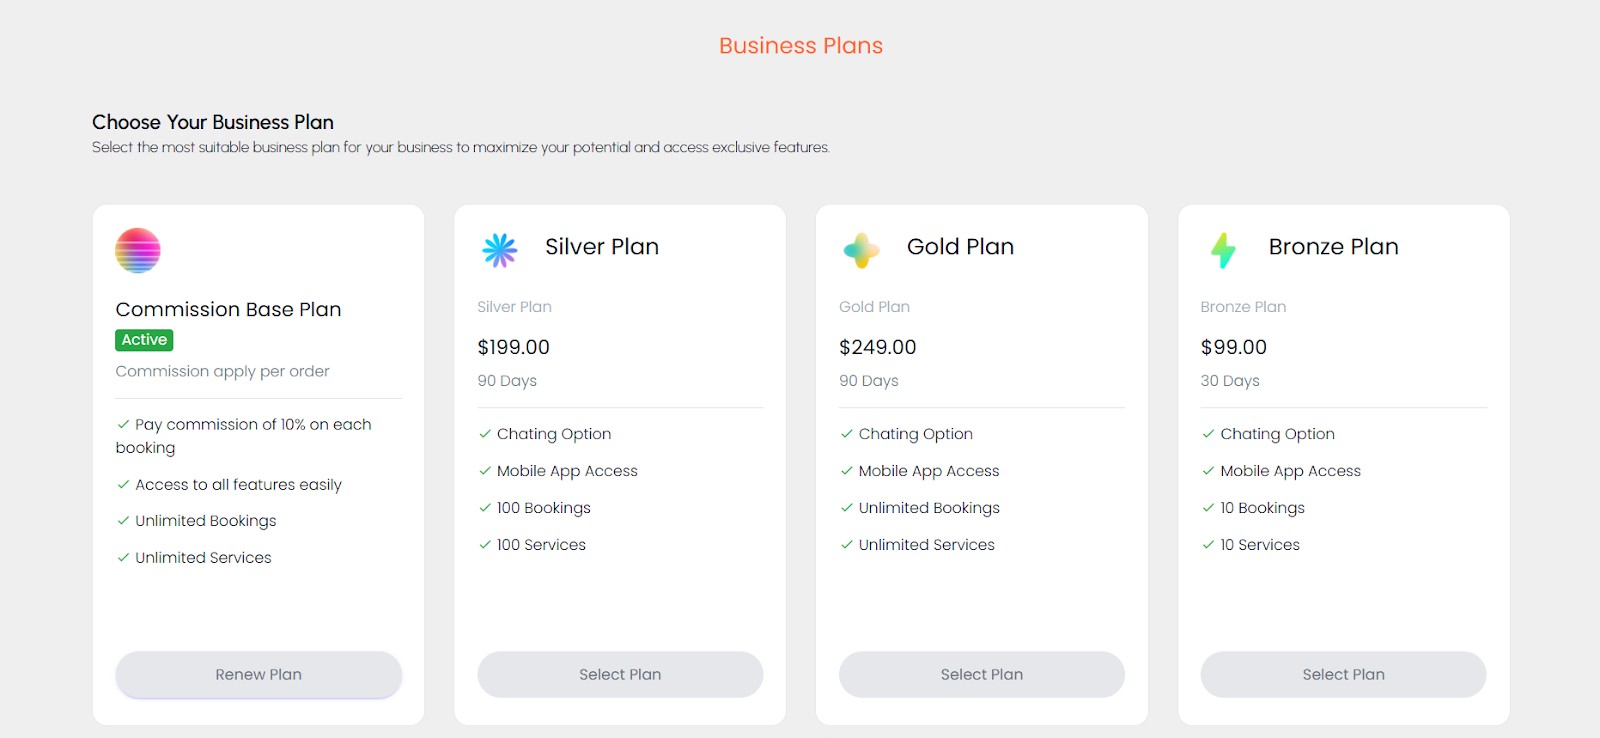
11.4. Change Subscription
Used to view available subscription plans and upgrade the current plan. The vendor can select a new plan based on features, duration, or pricing to continue offering services on the platform.
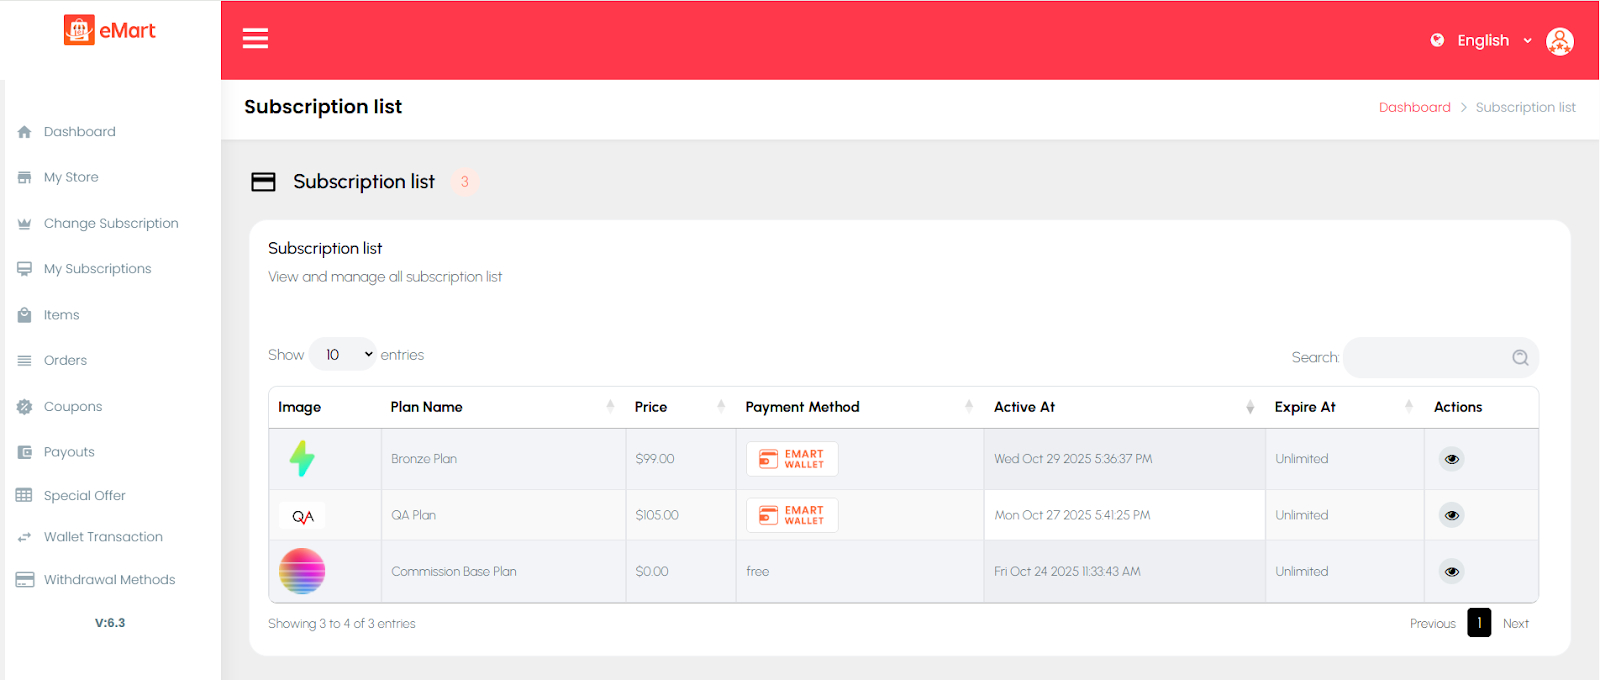
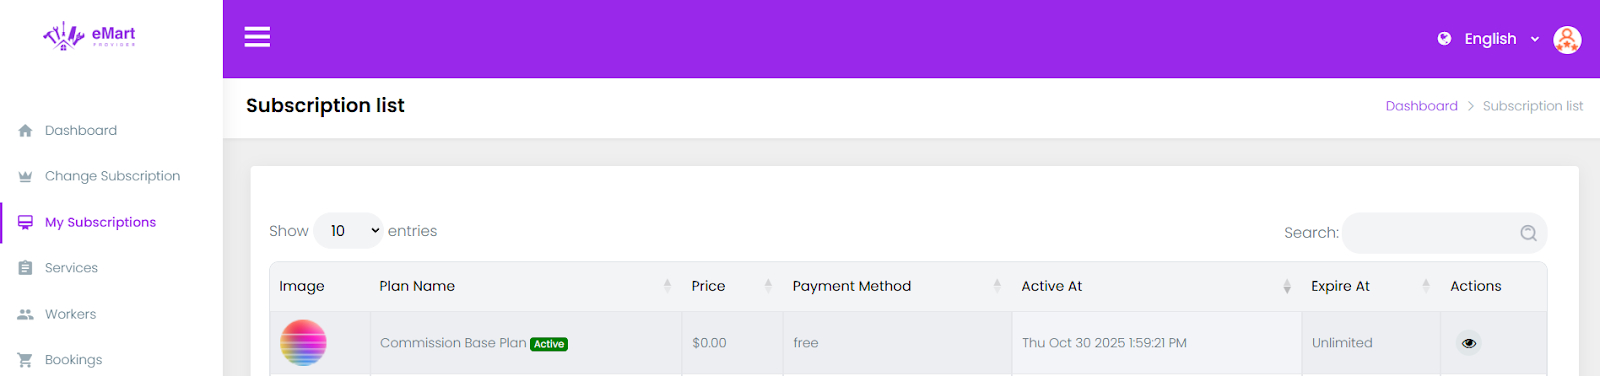
11.5. My Subscriptions
Used to view all current and past subscription details. The vendor can track plan validity, renewal dates, payment history, and active benefits associated with each subscription.
11.6. Items
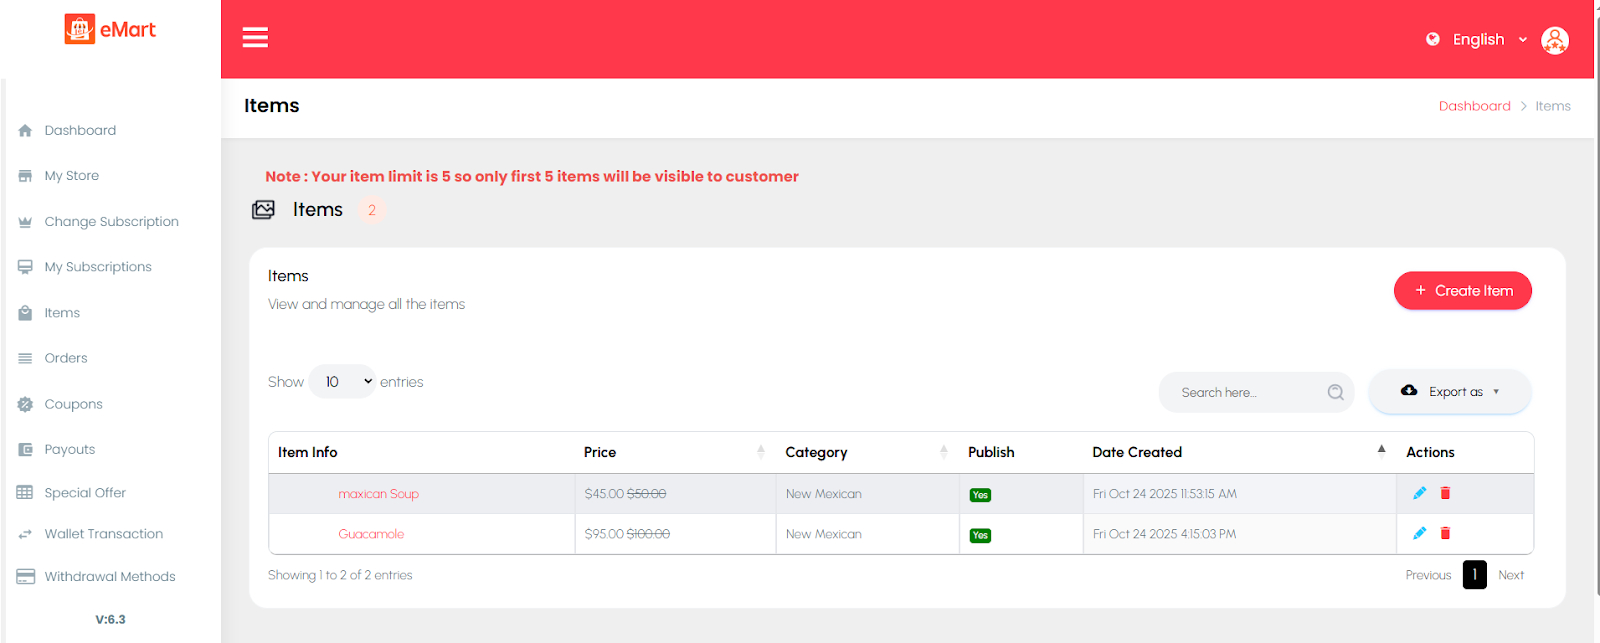
This section allows owners to manage all the items listed under their store. Vendors can add, edit, or delete menu items and define details such as name, category, price, description, image, and availability status. They can also manage add-ons or variations like size and flavor. This section helps stores keep their menus organized, accurate, and appealing to customers, ensuring that available dishes are always up to date for online ordering. Additionally, vendors can access and add items imported by the admin through the import items from Global Menu, allowing them to quickly populate their store with pre-created products.
11.7. Orders
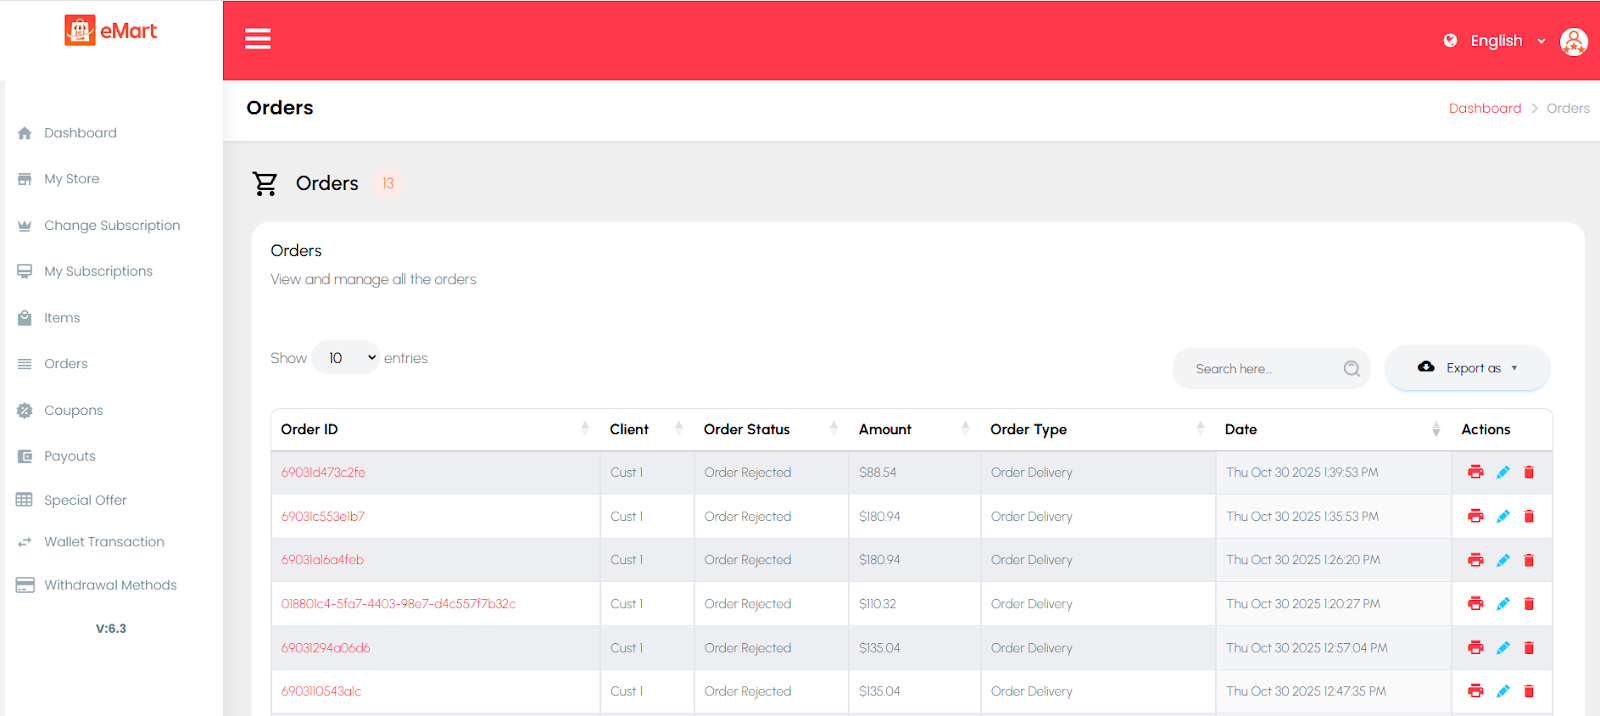
Used to view and manage all customer orders received by the store. The vendor can track order status (pending, confirmed, preparing, delivered, or cancelled), update progress, and view order details like items, customer info, and payments.
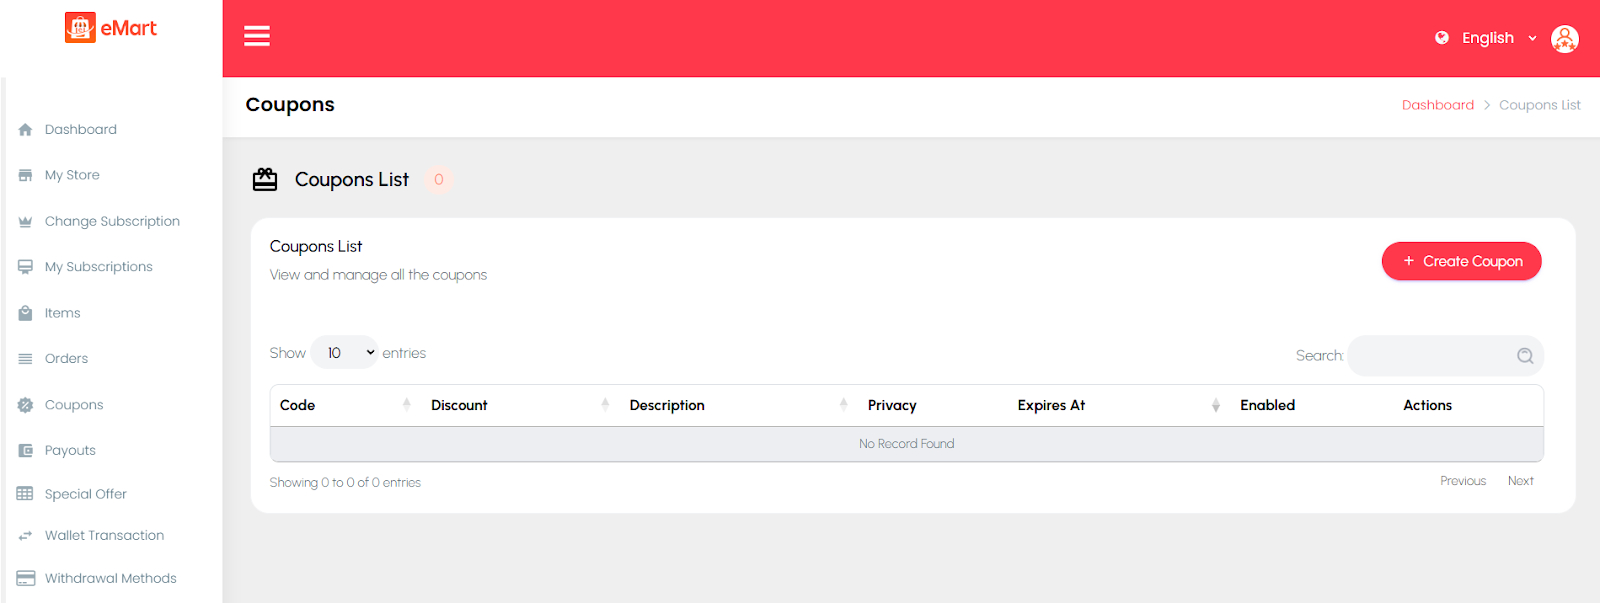
11.8. Coupons
Used to create and manage discount coupons specific to the store. The vendor can define coupon codes, set discount values, usage limits, and validity periods to attract more customers and boost sales.
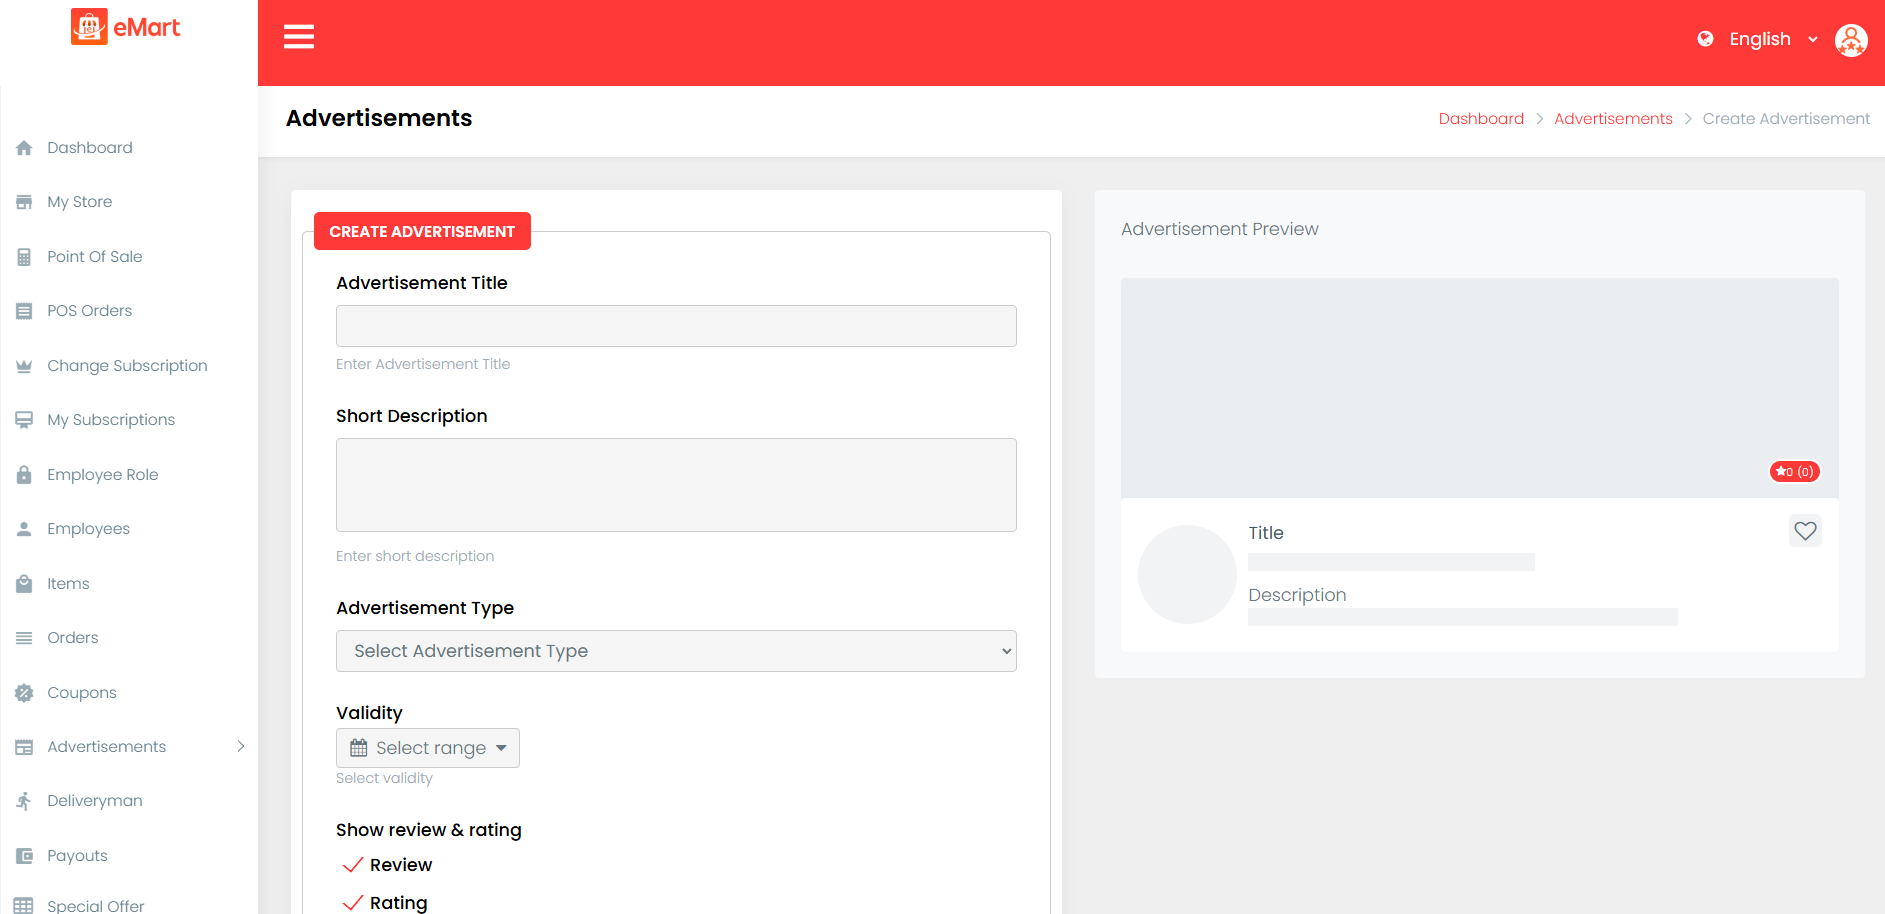
11.9. Advertisements
This section allows store owners to create and manage advertisements to promote their store or specific menu items. Vendors can upload banner images, set titles, add links, and choose where the ads will appear on the platform (such as homepage or category sections). They can also define the duration and visibility of each advertisement. This feature helps stores increase visibility, attract more customers, and highlight special offers or new dishes effectively.
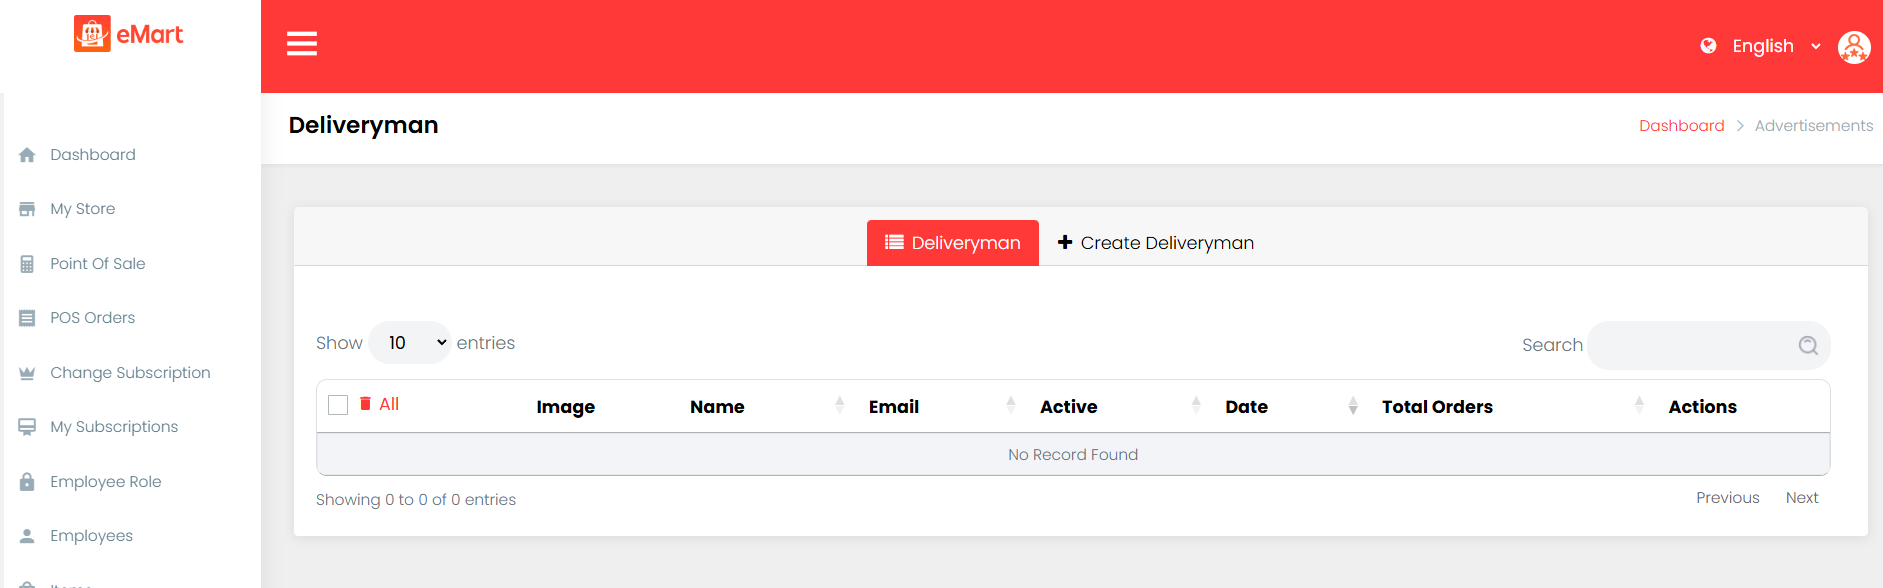
11.10. Deliveryman
This section allows store owners to manage their own delivery staff when using the self-delivery option. Vendors can add, edit, or remove deliverymen and assign them to specific orders. Each deliveryman profile includes details such as name, contact information, and current status (available, busy, or inactive). store owners can track delivery performance and ensure timely order completion. This feature provides flexibility for stores that prefer to handle deliveries independently rather than relying on the platform’s driver network.
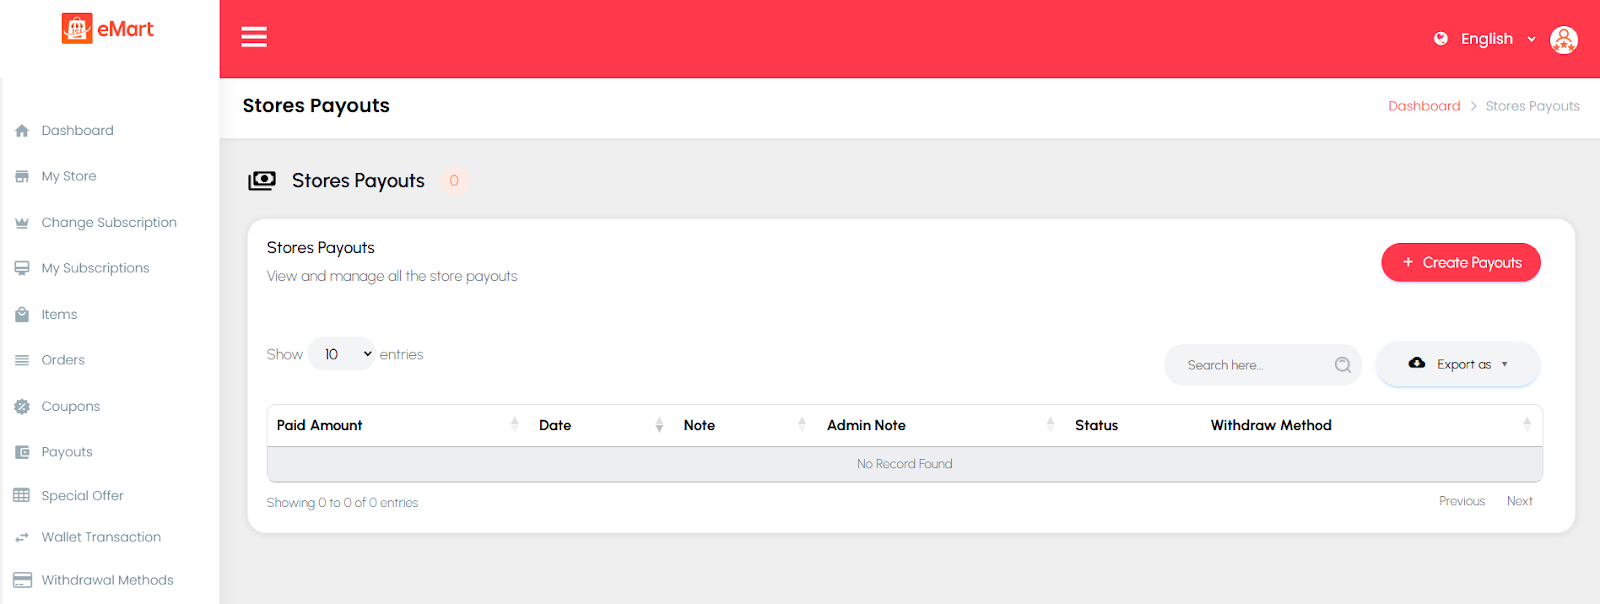
11.11. Payouts
Used to view the store’s earnings and payment disbursements from the platform. The vendor can check completed and pending payouts, commission details, and overall financial summaries.
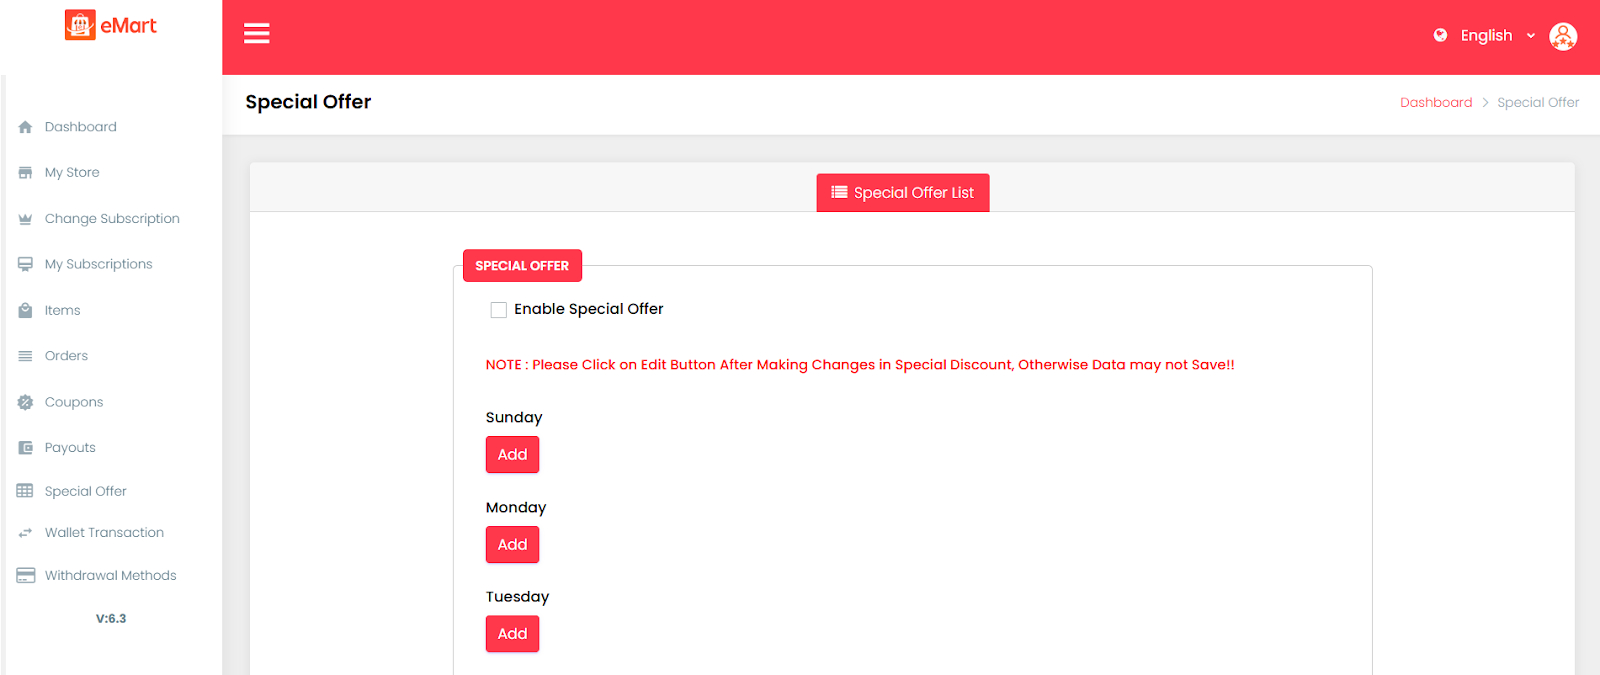
11.12. Special Offer
Used to create and manage limited-time offers or discounts on selected items. The vendor can set offer periods, discount percentages, and eligible products to increase visibility and sales.
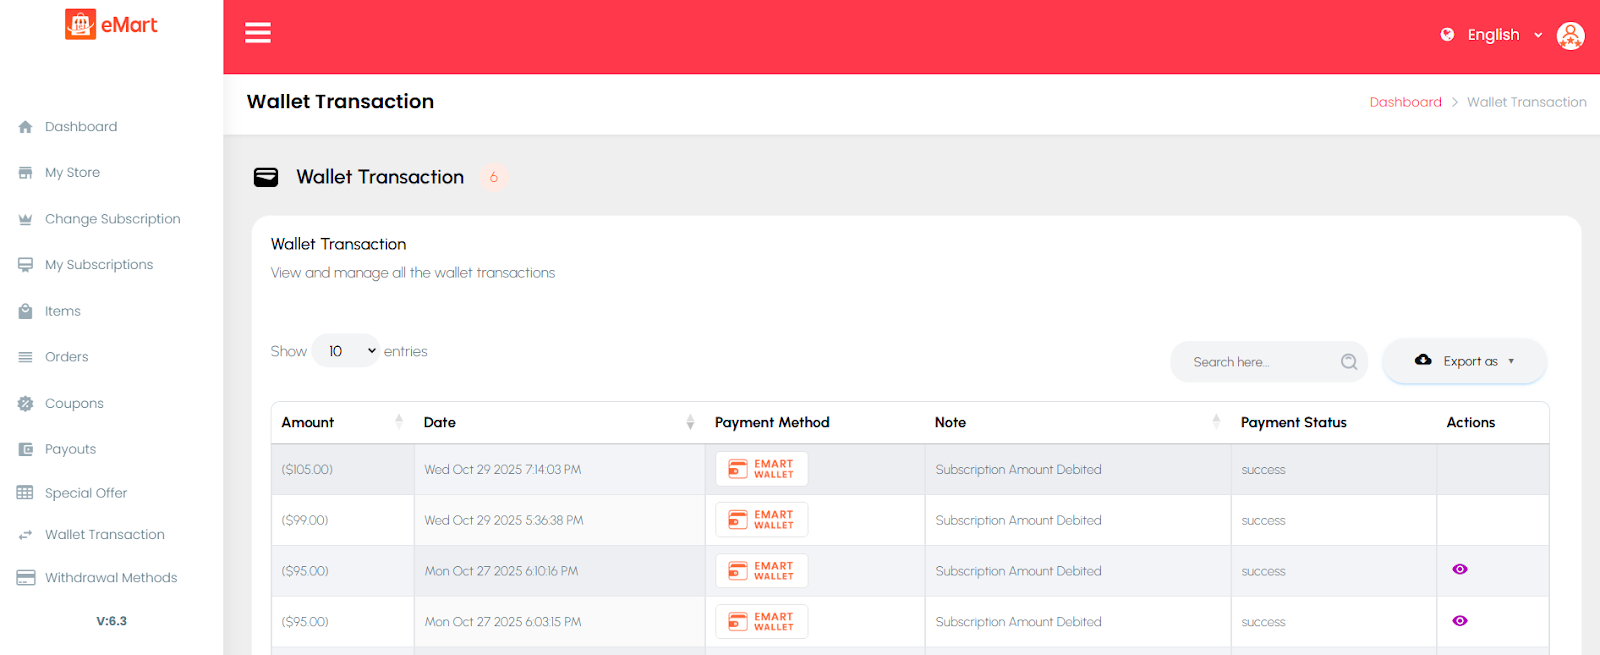
11.13. Wallet Transaction
Used to track all wallet-related transactions within the store account. The vendor can view credits, debits, refunds, and order-related adjustments for complete financial transparency.
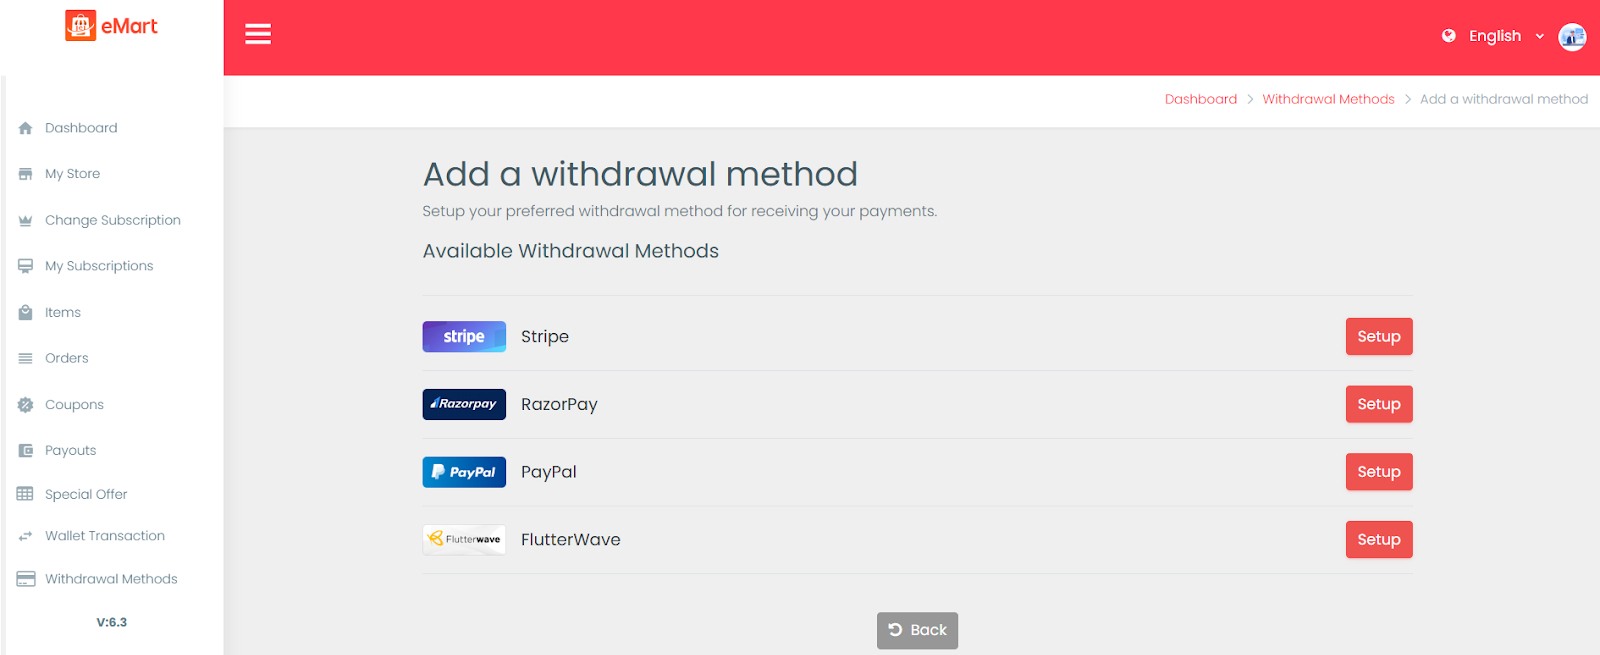
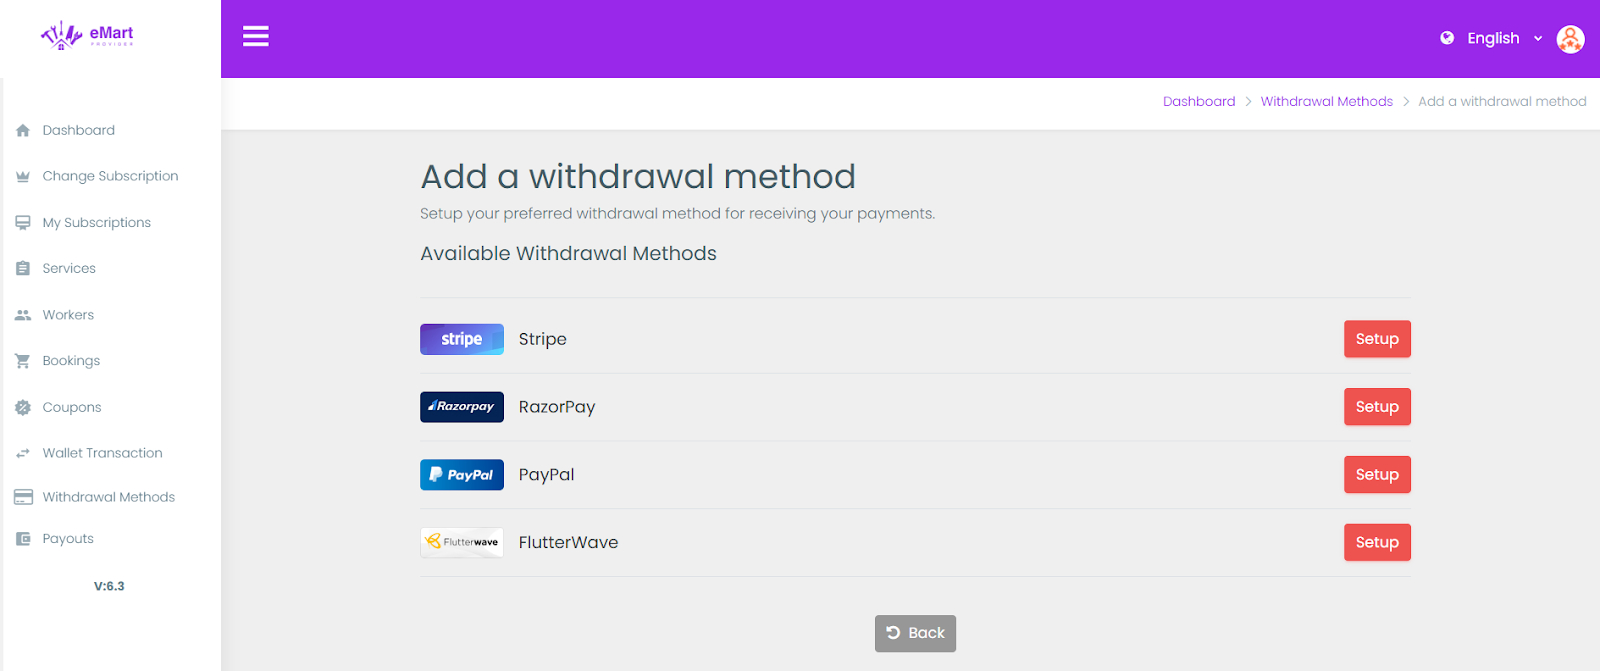
11.14. Withdrawal Methods
Used to manage payment methods for receiving payouts. The vendor can add or edit bank details, digital payment accounts, or other withdrawal options for smooth and secure fund transfers.
Provider Panel#
12. Provider Panel Setup (Addon Service)
12.1 Connect to FTP and Setup
Please follow the same instructions provided above for the web panel setup to connect to your server via FTP and complete the application setup.
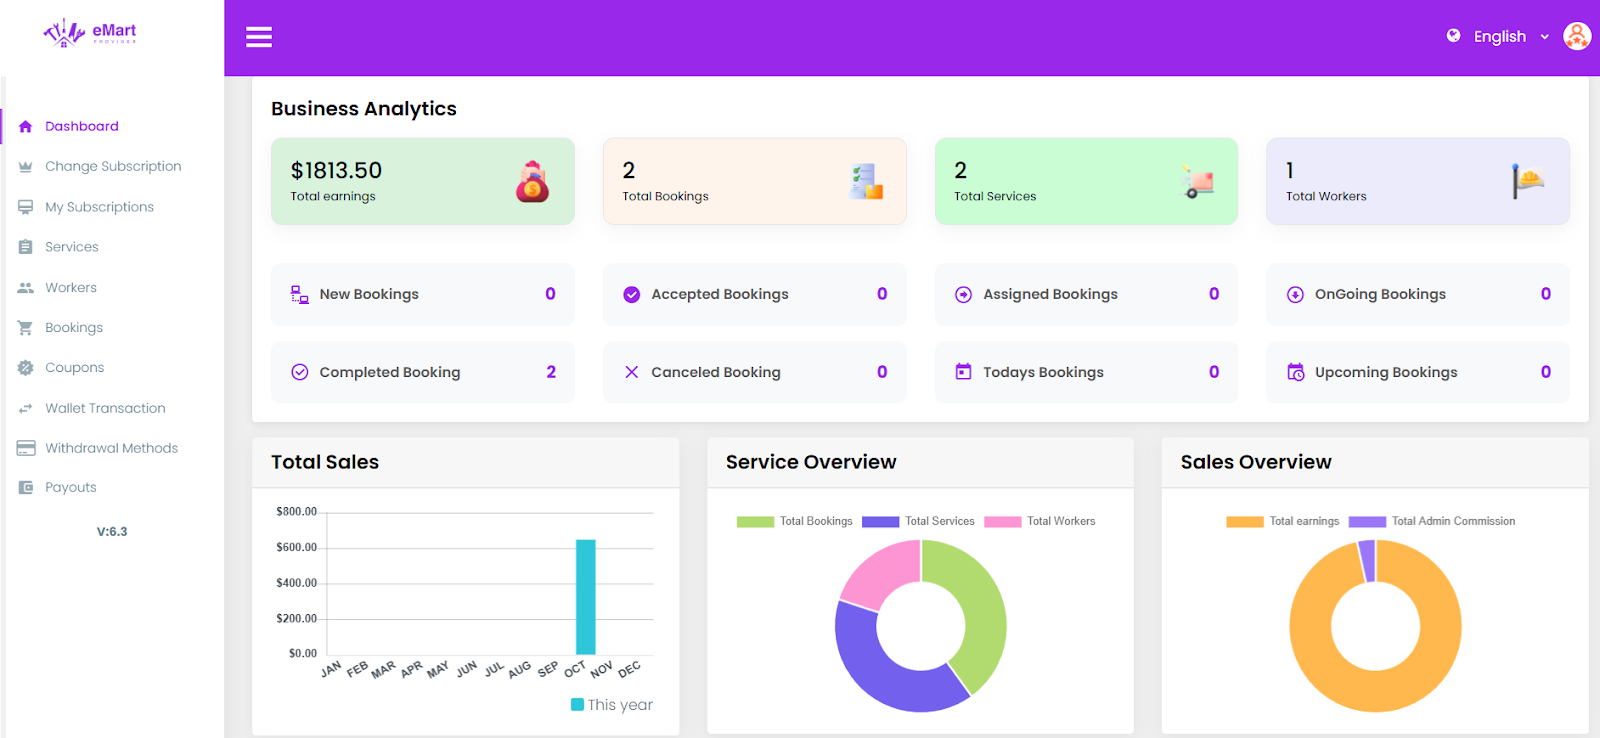
The Dashboard provides a summarized view of the platform’s key metrics and activities. It helps the provider monitor business performance in real time.
13.2. Change Subscription
Used to view available subscription plans and upgrade the current plan. The provider can select a new plan based on features, duration, or pricing to continue offering services on the platform.
13.3. My Subscriptions
Used to view all current and past subscription details. The provider can track plan validity, renewal dates, payment history, and active benefits associated with each subscription.
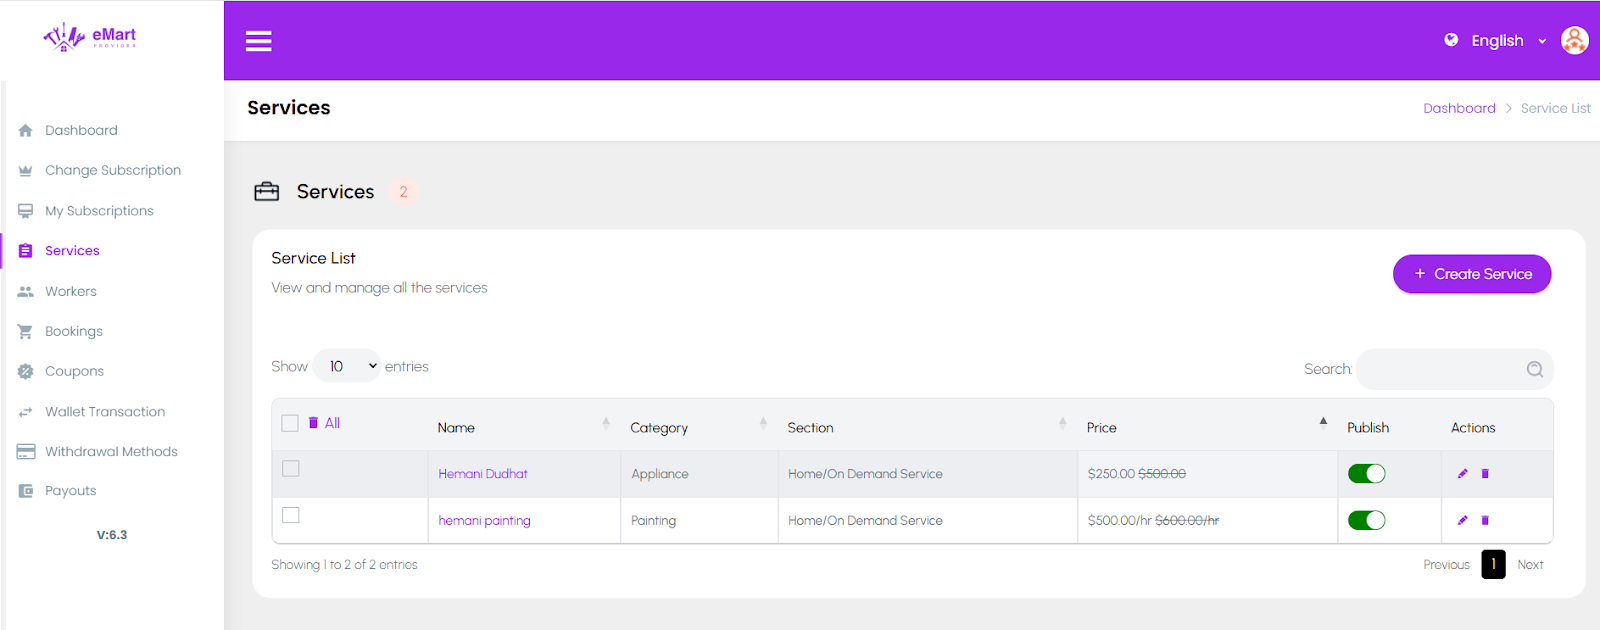
13.4. Services
Used to manage all on-demand services offered by the provider. From this section, providers can add, edit, or remove services, set pricing, availability, and service details, upload media, and monitor performance through ratings and bookings.
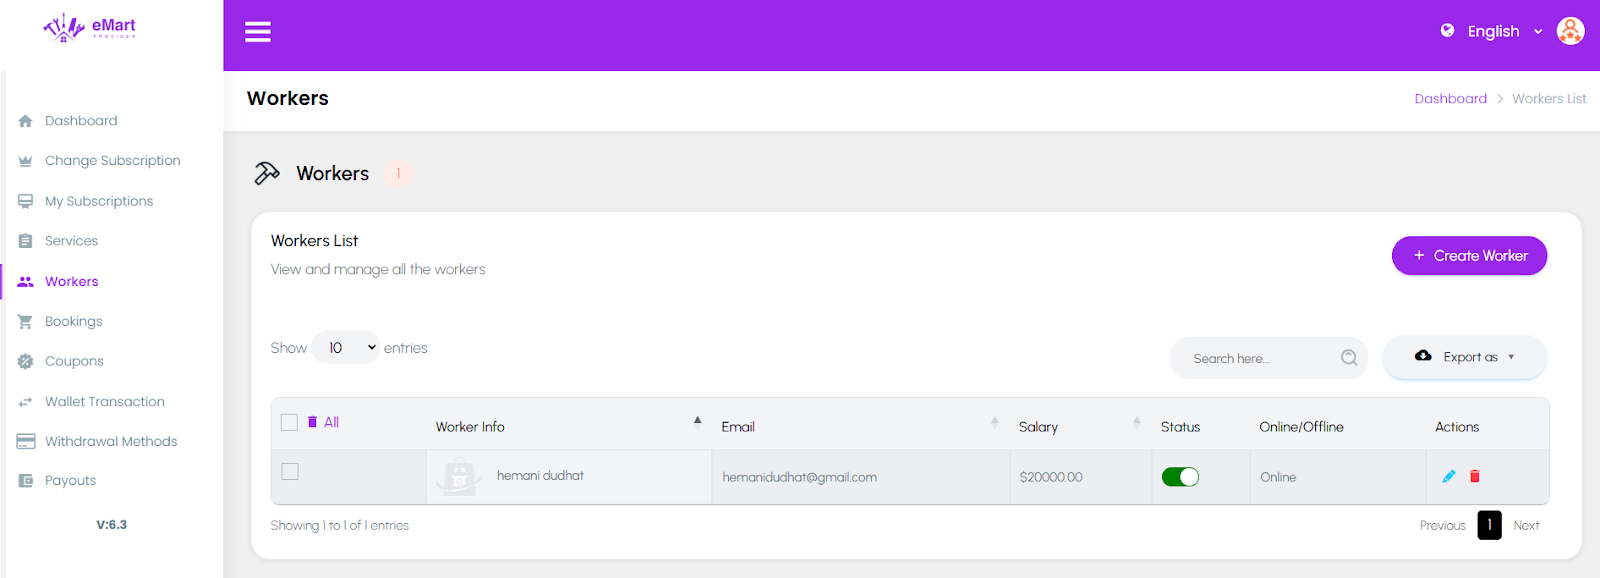
13.5. Workers
Used to manage the provider’s team members who deliver on-demand services. Providers can add new workers, assign them to specific services, track their availability, view performance metrics, and manage their status (active/inactive).
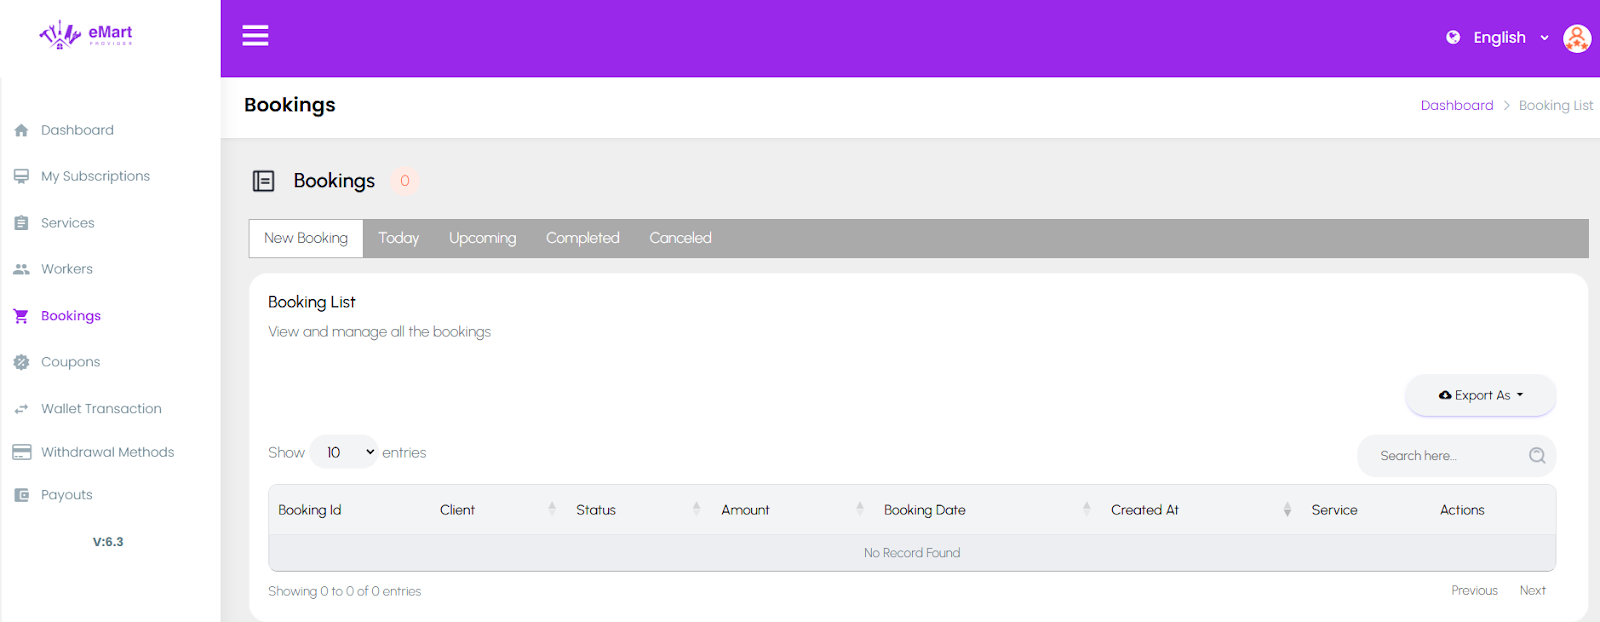
13.6. Bookings
Used to manage all service bookings received by the provider. From this section, providers can view booking details, update statuses (accepted, in-progress, completed, or canceled), track assigned workers, and communicate with customers in real time.
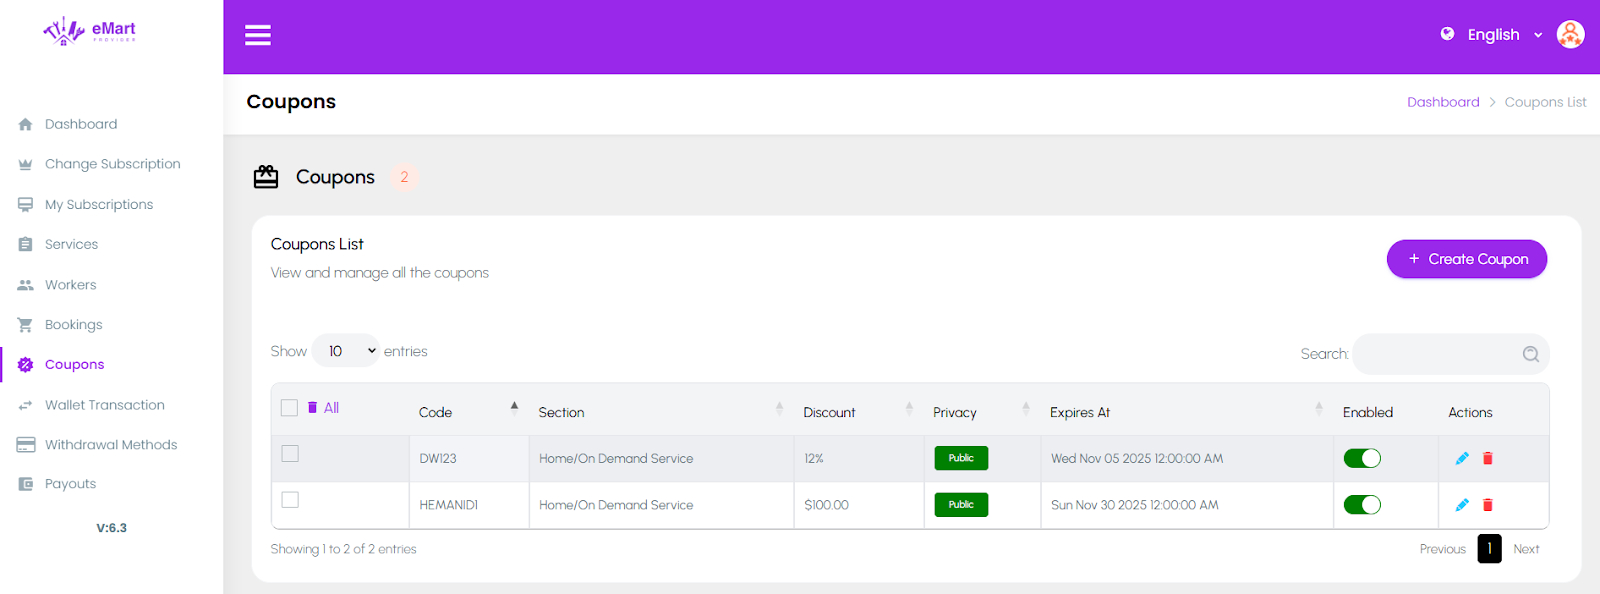
13.7. Coupons
Used to create and manage discount coupons for customers. Providers can set coupon codes, discount types, usage limits, and validity periods to attract more bookings and retain customers.
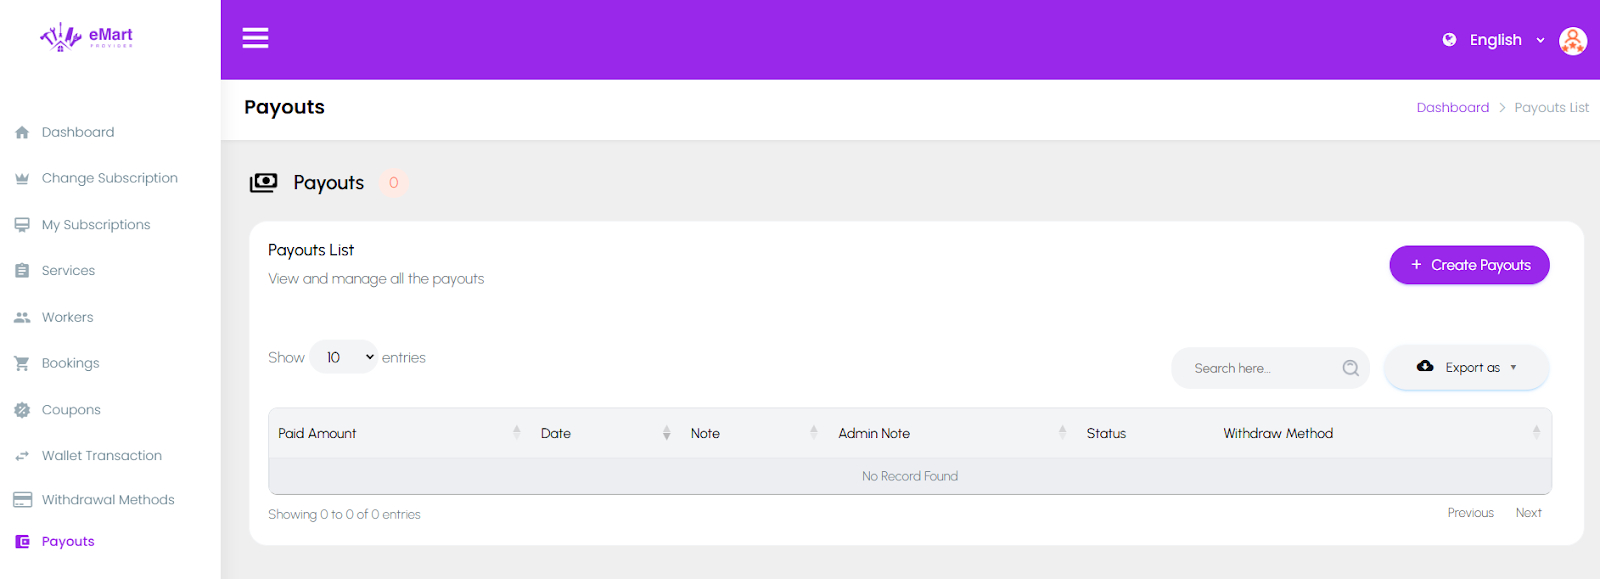
13.8. Payouts
Used to view and manage earnings received from completed service bookings. Providers can track payout history, payment status, and details of each transaction processed by the admin.
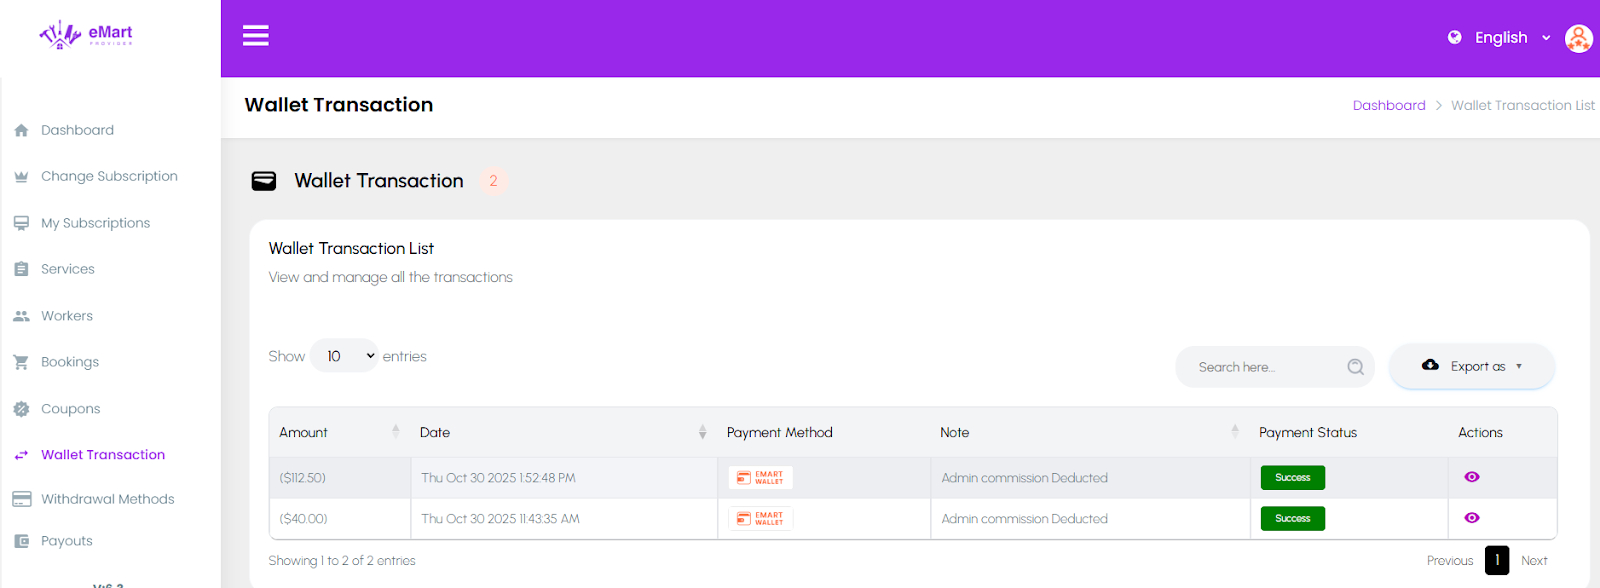
13.9. Wallet Transaction
Used to track all wallet-related activities, including credits, debits, bonuses, and payments for services. Providers can view their wallet balance and detailed transaction history.
13.10. Withdrawal Methods
Used to manage the payment methods available for withdrawing earnings. Providers can add, edit, or remove withdrawal options such as bank transfer, PayPal, or other supported methods.
Version Updates#
Web Panel Update#
14. Admin, Store, User & Service Provider Panel Updates
To update the Admin, Store, User, and Service Provider panels, upload the latest source code ZIP file to your project root directory and extract it.
If you have customized the source code, we recommend updating your project using Git to safely merge your changes with the latest release.
14.1 Update Using Git (Recommended)
Commit and push your current project to a Git branch.
Download the latest source code from CodeCanyon.
Create a new branch using the latest source code.
Merge the latest branch into your existing project branch.
Resolve any merge conflicts caused by your customizations.
Test the application thoroughly before deploying the updated version.
14.2 Replace the Source Code
If you have not modified the source code, simply:
Download the latest source code from CodeCanyon.
Replace your existing project files with the latest version.
Test the application to ensure everything is working correctly.
Mobile Application Update#
15. Mobile Application Update
To update the *Customer App, Store App, Delivery Boy/Driver App, Service Provider App, and Worker App*, replace the existing source code with the latest release and rebuild the applications.
If you have customized the application source code, we strongly recommend using Git to safely merge your custom changes with the latest release.
15.1 Updating via Git (Recommended)
Commit and push your existing application source code to a dedicated Git branch.
Download the latest source code package from CodeCanyon.
Create a new branch using the latest release source code.
Merge the latest branch into your existing project branch.
Resolve any merge conflicts resulting from custom modifications.
Run flutter pub get to install the latest dependencies.
Thoroughly test the *Customer App, Store App, Delivery Boy/Driver App, Service Provider App, and Worker App* to ensure all functionalities are working as expected.
Generate new build files (APK, AAB, or IPA) and deploy the updated applications.
15.2 Replacing the Source Code
If you have not modified the application source code, follow these steps:
Download the latest source code package from CodeCanyon.
Replace the existing application source code with the files from the latest release.
Run flutter pub get to install or update the required dependencies.
Verify the application configuration files and ensure all required credentials are correctly configured.
Test the *Customer App, Store App, Delivery Boy/Driver App, Service Provider App, and Worker App* thoroughly.
Generate new build files (APK, AAB, or IPA) and publish the updated applications to the respective app stores.
Changelog#
Version 6.8 — July 03, 2026
Removed .env files from all Laravel panels and included .env.example files for improved security and deployment.
Fixed a PHP syntax error in resources/views/role/save.blade.php.
Added support for Flutter 3.44.4.
Updated the Driver App to use compileSdk 36 and targetSdk 36.
Added a comprehensive Changelog section to document all new features, improvements, bug fixes, and changes introduced in each release.
Added a detailed Upgrade Guide with step-by-step instructions to help users safely upgrade to the latest version.
Version 6.7 — April 22, 2026
Added an integrated Help & Support system.
Introduced a unified chat system for Drivers, Customers, and Vendors using a single database structure.
Added Auto Verification for Driver and Vendor applications.
Integrated AI features to improve automation and user experience.
Drivers can now register in multiple service sections.
Introduced Platform Fee management.
Added the ability for users to change their password after login.
Added Product Bulk Import in the Admin Panel.
Implemented product-wise tax calculation and management.
Added Packaging Charges for orders.
Applied tax calculation to Delivery Charges.
Added Tax Reports in the Admin Panel.
Introduced a POS (Point of Sale) system in both the Admin and Store Panels.
Added Employee Management to the Store Panel and Store App.
Added manual order assignment in the Admin Panel.
Upgraded Flutter support to version 3.41.4.
Fixed multiple bugs and improved overall performance and stability.
Version 6.6 — December 10, 2025
Fixed blank screen issue while booking Dine-In orders in the Customer App.
Fixed withdrawal methods displaying “Pending Setup” after bank details were added in the Store and Driver Apps.
Fixed advertisement requests not appearing in the Admin Panel.
Fixed eCommerce orders not completing from the Store App.
Fixed document verification issues in the Store Panel.
Fixed the Accept → Complete order flow for eCommerce orders in both the Admin and Store Panels.
Fixed several other minor issues and performance improvements.
Version 6.5 — December 1, 2025
Updated language variables across the Admin Panel and Website.
No changes were made to the Customer, Store, or Driver Apps.
Version 6.4 — November 28, 2025
Added Multi-Order Support for multi-vendor services.
Introduced Self-Delivery for store-managed deliveries.
Added Sponsored Advertisement functionality.
Implemented Zone Management for Service Providers, Stores/Vendors, and Drivers.
Drivers can now register as an Individual or Company.
Added Cab, Parcel, and Rental management to the Owner Panel.
Resolved Google Play 16 KB page size compliance issues across all apps.
Redesigned the Rental booking flow.
Added Rental Package Management.
Refreshed the UI across all applications and panels.
Upgraded all applications to the latest Flutter version.
Integrated GetX architecture for improved scalability.
Redesigned and optimized the Admin Panel.
Added dynamic configuration for parcel radius, rental radius, and other settings.
Added dynamic marker icons for Rental, Cab, and Parcel services.
Introduced Maintenance Mode.
Updated the Service Provider and Worker Apps to Flutter 3.38.3.
Updated project dependencies.
Fixed minor bugs and improved overall performance.
Version 6.3 — March 22, 2025
Upgraded Flutter to version 3.29.0.
Updated PayPal payment gateway dependencies.
Added a Store Subscription module with Subscription and Commission models.
Added store-specific admin commission support.
Added bulk admin commission updates.
Improved the Admin Panel UI.
Added subscription management filters.
Fixed iOS PayPal payment gateway issues.
Fixed multiple bugs and made various improvements.
Version 6.2 — November 22, 2024
Improved application and web panel stability.
Optimized data loading performance.
Added Flutter SDK 3.24.3 compatibility.
Version 6.1 — October 28, 2024
Integrated Firebase Cloud Scheduler with Laravel Scheduler.
Added automatic Firebase Storage image deletion when records are removed.
Version 6.0 — October 15, 2024
Completely redesigned the application UI.
Added OrangeMoney, Xendit, and MidTrans payment gateways.
Integrated OpenStreetMap (OSM).
Added dynamic onboarding screen management.
Automated admin commission calculation.
Added verification documents for Service Providers and Workers.
Added withdrawal payment methods.
Added section-wise admin commission management.
Added Flutter 3.24.3 compatibility.
Updated dependencies.
Fixed minor bugs.
Improved performance.
Version 5.2 — June 20, 2024
Fixed wallet top-up issues.
Fixed chat screen opening issues.
Fixed order assignment issues.
Added Flutter 3.22.2 compatibility.
Improved performance.
Fixed minor bugs.
Version 5.1 — June 13, 2024
Fixed minor bugs.
Updated dependencies.
Added Flutter 3.22.1 compatibility.
Migrated Firebase Cloud Messaging from Legacy API to FCM v1.
Version 5.0 — May 4, 2024
Added section-wise admin commission.
Added On-Demand service support.
Updated application design.
Fixed login issues.
Fixed minor bugs.
Upgraded to Flutter 3.19.6.
Updated project dependencies.
Version 4.1 — January 8, 2024
Added a Location Permission screen.
Fixed location-related issues.
Updated dependencies.
Added Flutter 3.16.5 compatibility.
Fixed minor bugs.
Version 4.0 — December 19, 2023
Upgraded Laravel from version 8 to 10.
Added User Roles and Permissions.
Added support for multiple delivery addresses.
Added multiple Admin roles with permission management.
Added Flutter 3.16.3 compatibility.
Improved the App, Website, and Admin Panel.
Fixed known issues.
Version 3.0 — September 19, 2023
Added delivery tracking notifications.
Added notification management from the Admin Panel.
Fixed Google Maps issues in the Driver App.
Displayed admin commission in vendor wallet transactions.
Added preparation time while accepting orders.
Added scheduled orders for Multi-Vendor services.
Added public and private coupon management.
Added multiple tax support.
Redesigned the order details screen.
Improved notification redirection.
Added email template management.
Added vendor wallet transaction history.
Added sales reports in the Admin Panel.
Added Forgot Password for the Store Panel and User Website.
Updated Firebase functions.
Added several new features and fixed minor bugs.
Improved the App, Website, and Admin Panel.
Version 2.3 — June 6, 2023
Updated Firebase dependencies.
Upgraded Flutter to version 3.10.2.
Added a Referral System for Web and Mobile Apps.
Added Driver Wallet Top-up.
Added minimum order amount settings for Drivers.
Added minimum withdrawal amount settings for Drivers.
Added Admin settings for Driver limits.
Added phone number signup for Users and Stores.
Added Vendor approval before login.
Improved the App, Website, and Admin Panel.
Fixed known issues.
Version 2.2.0 — April 3, 2023
Added Flutter 3.7.8 compatibility.
Added InterCity/OutStation support for Cab Service.
Added Auto Approve Store option.
Added Store Stories for Multi-Vendor services.
Added banner redirection to Stores, Products, or URLs.
Added Driver order Accept/Reject timeout.
Added section selection during Driver registration.
Added Store image gallery on the Website.
Added Store registration from the Store Panel.
Improved security and performance.
Fixed minor issues.
Version 2.1.1 — February 28, 2023
Fixed section dropdown issues.
Improved performance and security.
Fixed minor issues.
No changes to the mobile apps.
Version 2.1 — January 23, 2023
Added banner links for Products and Stores.
Added product review display in the Store App and Store Panel.
Fixed minor payment gateway issues.
Added Dark and Light mode switching.
Improved performance and security.
Version 2.0 — December 30, 2022
Added eCommerce module.
Added Car Rental module.
Added Parcel Delivery module.
Added Cab/Taxi Booking module.
Added Product Attributes and Variants.
Added Review Attributes.
Added CMS Pages.
Added an advanced Admin Dashboard.
Added dynamic theme colors.
Added dynamic Website Footer and Landing Page.
Added Flutter 3.3.10 compatibility.
Completely redesigned the Admin Panel.
Improved overall system performance and fixed numerous issues.