10. Website Panel Setup
10.1 Connect to FTP and Setup
Follow these instructions to connect to your server using FTP and complete the application setup:
10.1.1. Connect to the server using FTP: Use an FTP client like FileZilla to connect to your server. Enter the server’s IP address, username, and password. Use port 21 for FTP or port 22 for SFTP.
10.1.2. Transfer the ZIP file: Upload your web panel’s ZIP file to the server’s local path (e.g., /var/www/html).
10.1.3. Unzip the file: Navigate to the file’s location on the server and run the following command to extract the ZIP file: “sudo unzip your-application.zip” or you can do it from cpanel directly.
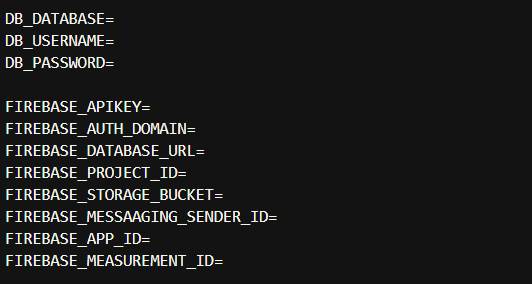
10.1.4. Update the .env file with your configuration: Modify the database and application settings which are mentioned in the .env file. Below is an example configuration:
Important Notes:
Please use the same Firebase credentials for the restaurant setup too that you will also add in the .env file for the admin panel setup.
Steps to find your Google Client ID:
- Go to your Firebase Project in the Firebase Console.
- Navigate to Authentication > Sign-in Method.
- Click on Google under the list of providers.
- Scroll down to Web SDK configuration.
- Copy the Web Client ID.
- Paste this Client ID in the env file of the web panel.
GOOGLE_CLIENT_ID=
Steps to Check/Add Authorized Domains for OAuth 2.0 Client ID
- Go to Google Cloud Console.
- Navigate to APIs & Services > Credentials.
- Open your OAuth 2.0 Client ID (Web application type).
- Ensure the following are added:
Authorized JavaScript Origins e.g.- https://yourwebpanel.com
- https://yourrestaurantpanel.com
Authorized Redirect URIs e.g.
- https://yourwebpanel.com/__/auth/handler
- https://yourrestaurantpanel.com/__/auth/handler
Important Notes:
Please use the same Firebase credentials for the restaurant setup too that you will also add in the .env file for the admin panel setup.
Now you can access your owner panel at your desired domain For ex: https://owner.yourdomain.com/