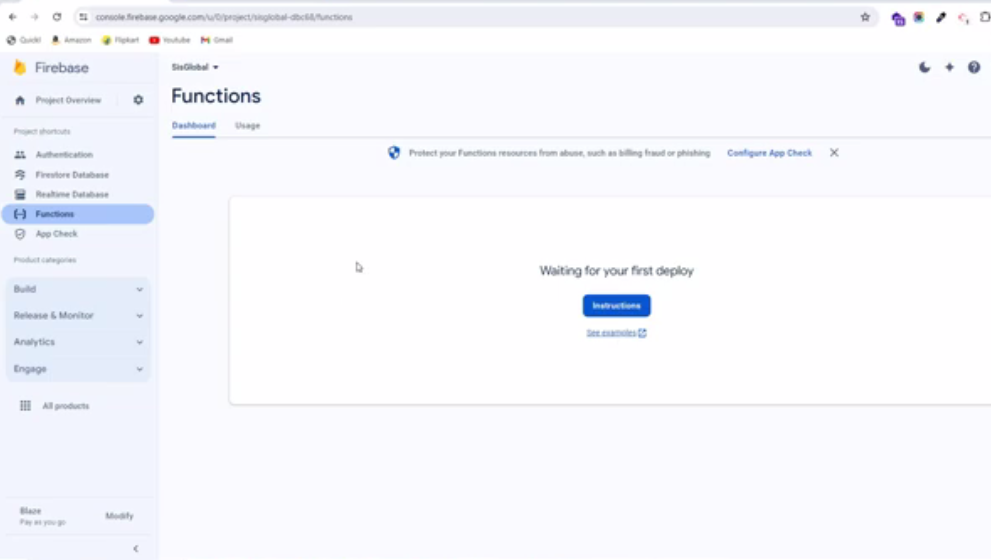
7. Deploy Firebase Cloud Functions
7.1 Order Tracking & Delivery Dispatching
1. The customer initiates a new order
2. The store approves/rejects the new order
3. If the store accepts the order, it is assigned to a nearby available driver.
4. The driver can choose to either accept or decline the order. If the driver accepts the order, they are assigned to pick up and deliver the items.
5. The driver arrives at the store to collect the order. Once picked up, the driver updates the order status in the app for the customer. After delivery, the driver can mark the order as completed in the driver app.
6. If the driver rejects the order, the dispatch process restarts to find another available driver nearby.
7. Customers can track the delivery status of all their orders on their delivery app. The app utilizes Flutter code to handle most order updates. However, the backend system, which manages access to all available nearby drivers and stores, facilitates the delivery process.
All the necessary Firebase Functions have been initially coded by us, you just need to deploy these functions to your own Firebase account. This means that you need to upload the source code inside the Firebase Functions folder to your account. If a Firebase account has been created, find a Firebase project, and 2 apps (iOS and Android)
7.2. Setting up Node.js and the Firebase CLI
For comprehensive guidance, refer to the official Firebase documentation on getting started: “Write, test, and deploy your first functions” in Cloud Functions for Firebase.
You’ll need Node.js and the Firebase CLI to write functions and deploy them to Cloud Functions.
To set up NPM on your computer, download Node.js from the following link: Node.js download. Once Node.js is installed, proceed to install the Firebase CLI.
Use the following command to install the CLI via npm:
npm install -g firebase-tools
If you’ve already set up the Firebase tools, you can simply run the following command:
npm install
These steps will ensure you’re ready to start writing and deploying functions with Firebase. If you encounter any issues, consult the Firebase documentation for troubleshooting assistance.
7.3. Initialize your project
To initialize the project, authenticate the Firebase tool by running the following command. You’ll be prompted to log in to your account via your web browser:
firebase login
7.4. Implementing Cloud Functions
Since we’re providing the complete source code for your Firebase Cloud Functions:
Extract the zip file Order Tracking Firebase Function folder.zip.
Fill in the necessary credentials in the following files located within the zip:
.firebaserc(Add your Firestore Project ID)index.js(Add your Firestore database URL)serviceAccountKey.json(Add your Firebase service account credentials)
With these steps, you’ve successfully set up the required credentials.
7.5. Deploy Firebase Functions
Simply run the following command in the Order Tracking Firebase Function > functions directory.
firebase deploy --only functions
Now you can go to your Firebase Console and check, as the functions have been deployed. It is possible to see the logs for each function, understand the output, and know when it gets called.
7.6 Firebase Scheduled Scripts (Laravel Admin Panel)
Some Firebase scheduled tasks have been moved to the Laravel Admin Panel source code. These scripts are located in the following directory:
root > storage > app > firebase
These scripts handle automated operations such as scheduled services, ride bookings, order cancellations, and notifications.
Available Scripts
- scheduleRide.js – Handles scheduled cab/ride bookings.
- schedule_ondemand_service.js – Handles scheduled on-demand service requests.
- autoCancelOrder.js – Handles automatic cancellation of multi-vendor service orders.
- parcelOrderAutoCancel.js – Handles automatic cancellation of parcel orders.
- rentalOrderAutoCancel.js – Handles automatic cancellation of rental orders.
- scheduleNotification.js – Handles scheduled order notifications.
Important Notes
- These scripts must be executed using Cron Jobs on the server.
- They interact directly with Firebase Firestore.
- Admin panel settings control timing values such as: Auto cancellation duration, Scheduled orders notification timing