4.Flutter IOS setup
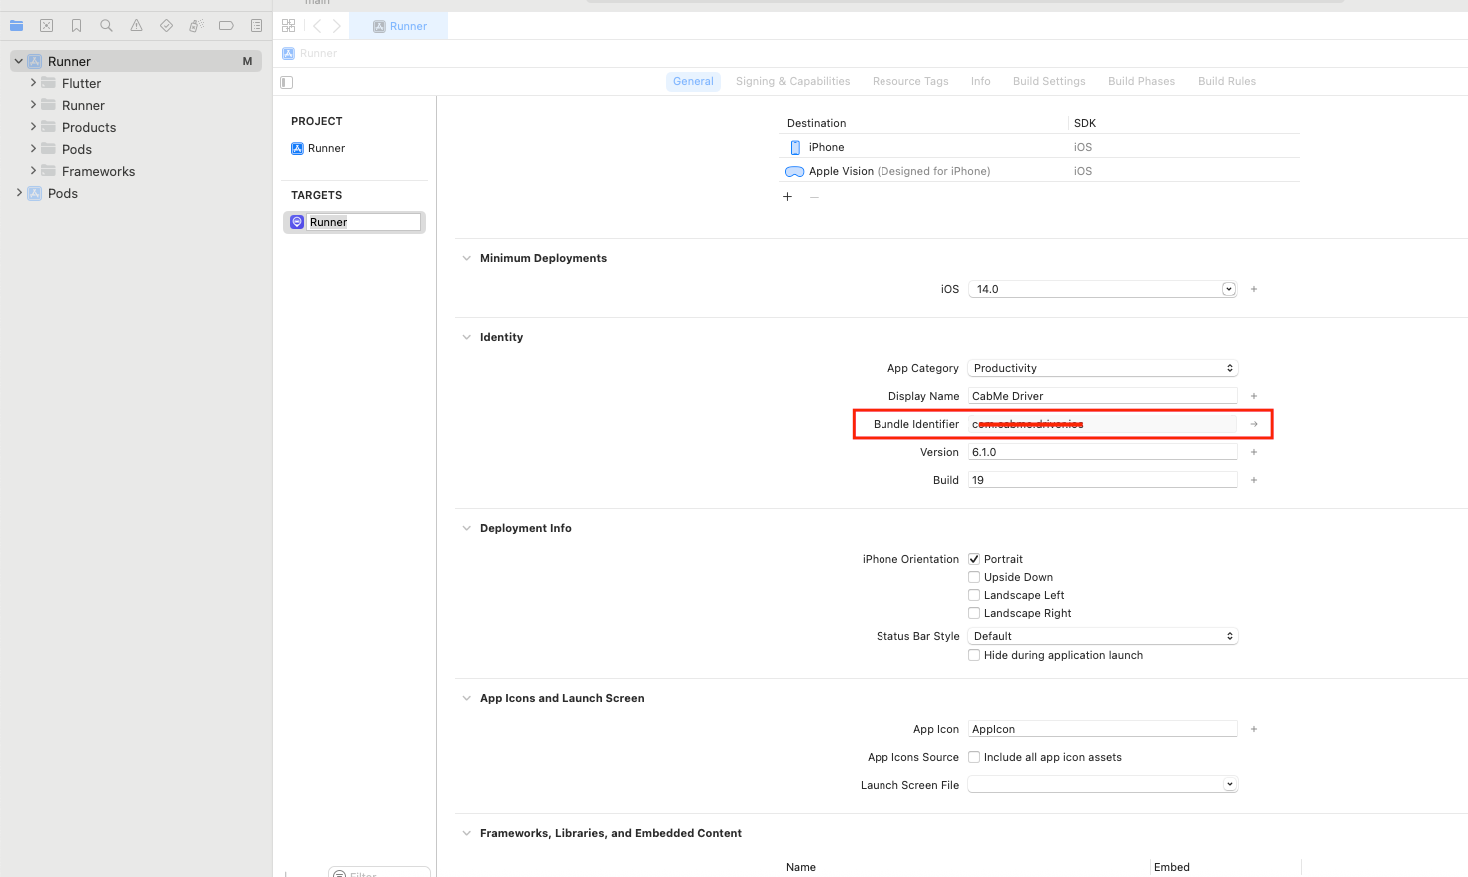
4.1. Change the iOS bundle identifier:
- Navigate to the
iosdirectory within your Flutter project. - Open the
Runner.xcodeprojproject file usingXcode. - In
Xcode, select theRunnerproject from the project navigator. - Go to the
Runnertarget’s settings. - Under the
Generaltab, find theBundle Identifierfield and change it to your desired bundle identifier.
4.2. To change the launcher icon
4.2.1. For iOS, you need to replace the existing icon files with your new ones. The icons for iOS are stored in the Assets.xcassets directory in the ios/Runner directory.
4.2.2. Open your Flutter project in Xcode by navigating to the ios directory and opening the .xcworkspace file with Xcode.
4.2.3. In Xcode, navigate to Runner > Assets.xcassets.
4.2.4. Replace the existing AppIcon with your new icon files. You’ll typically find different sizes labelled for various devices (e.g., iPhone, iPad).
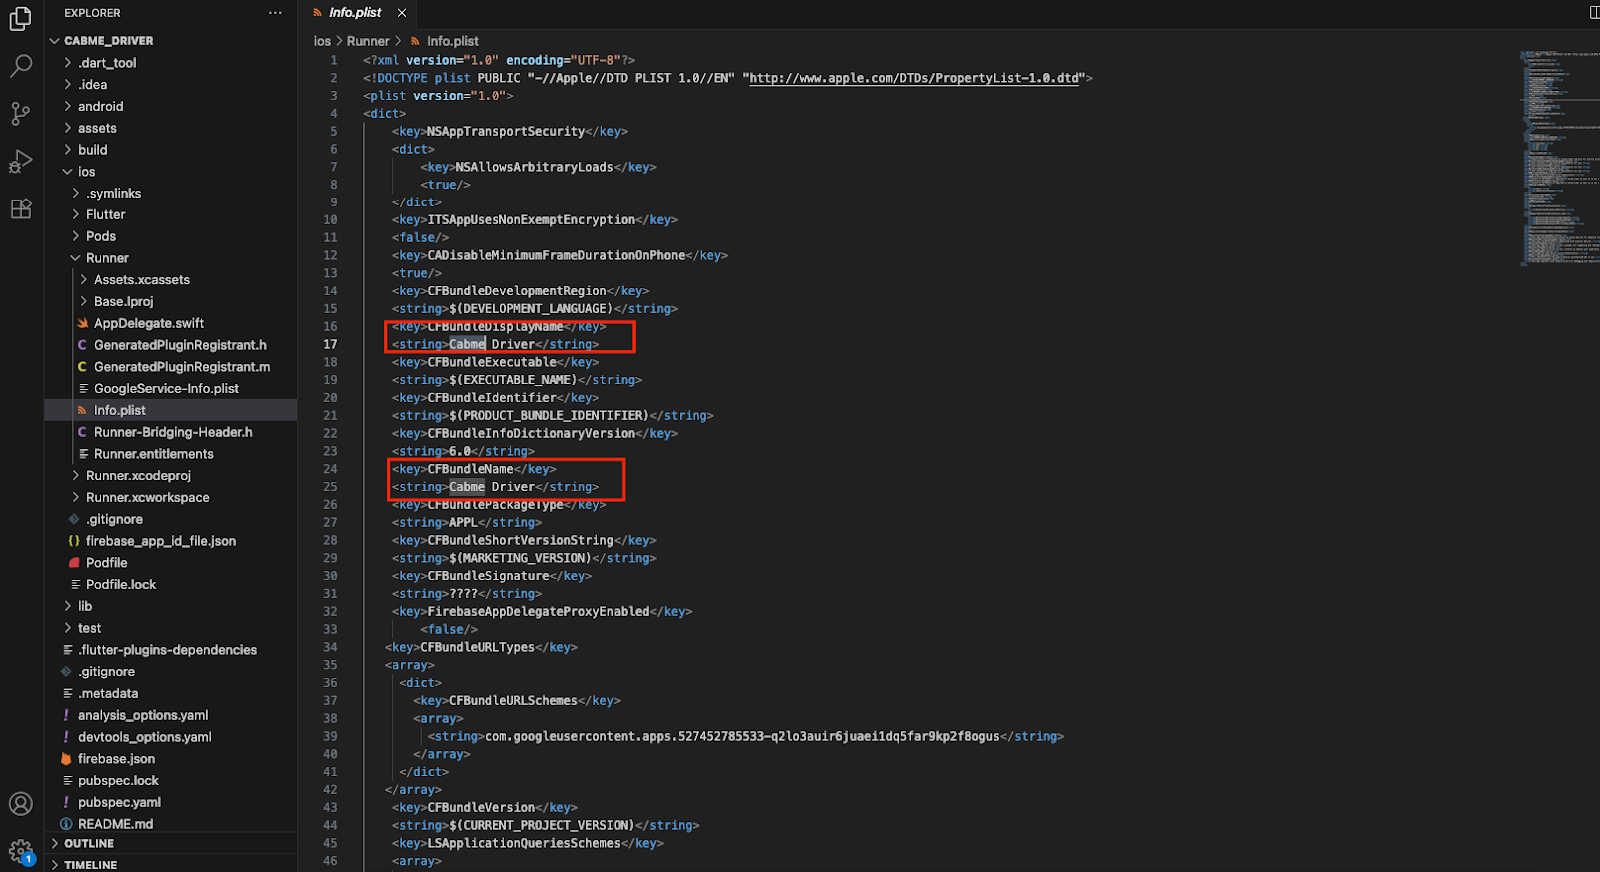
4.3. Change Application Name in IOS.
4.3.1. Open the ios/Runner/Info.plist file.
4.3.2. Locate the CFBundleDisplayName entry.
4.3.3. Change the value associated with to your desired app name.

4.4. To change the Google Maps API key.
4.4.1. Open your Flutter project in a text editor or IDE.
4.4.2. Navigate to the ios/Runner directory within your Flutter project.
4.4.3. Locate the AppDelegate.swift file.
4.4.4. In the didFinishLaunchingWithOptions method, set the Google Maps API key.
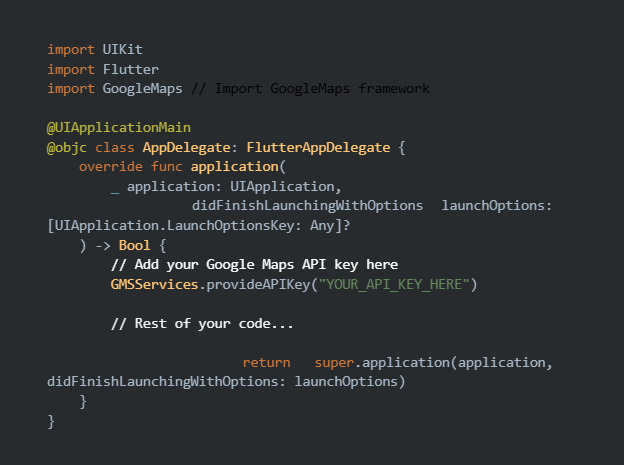
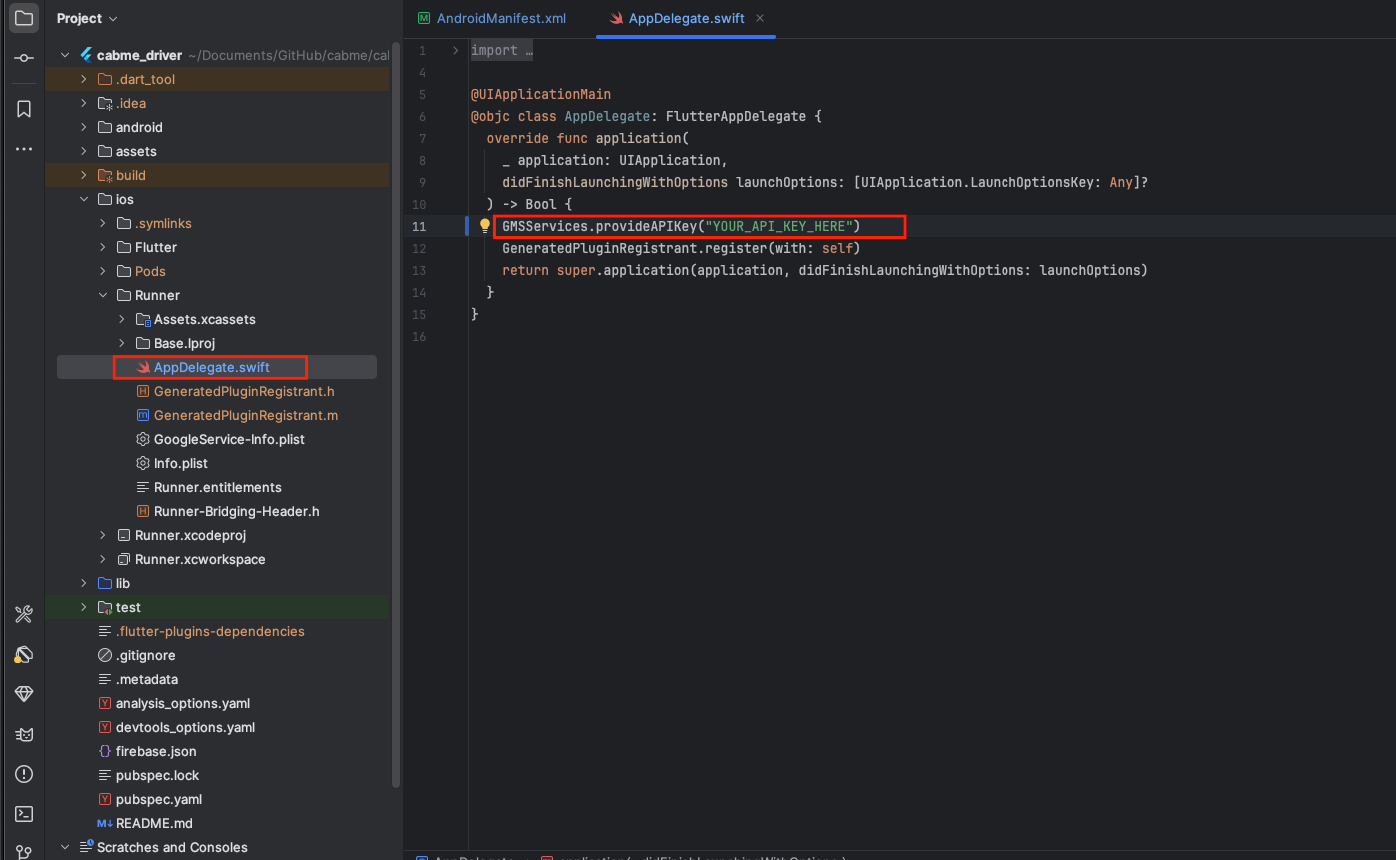
Replace “YOUR_NEW_API_KEY_HERE” with your actual Google Maps API key.
After updating the API key in the AppDelegate.swift file, rebuild your Flutter app for iOS to apply the changes.
By following these steps, your Flutter app will use the new Google Maps API key specifically for iOS. Make sure you’ve also updated the API key in the Android configuration as described earlier if you want to apply changes to both platforms.