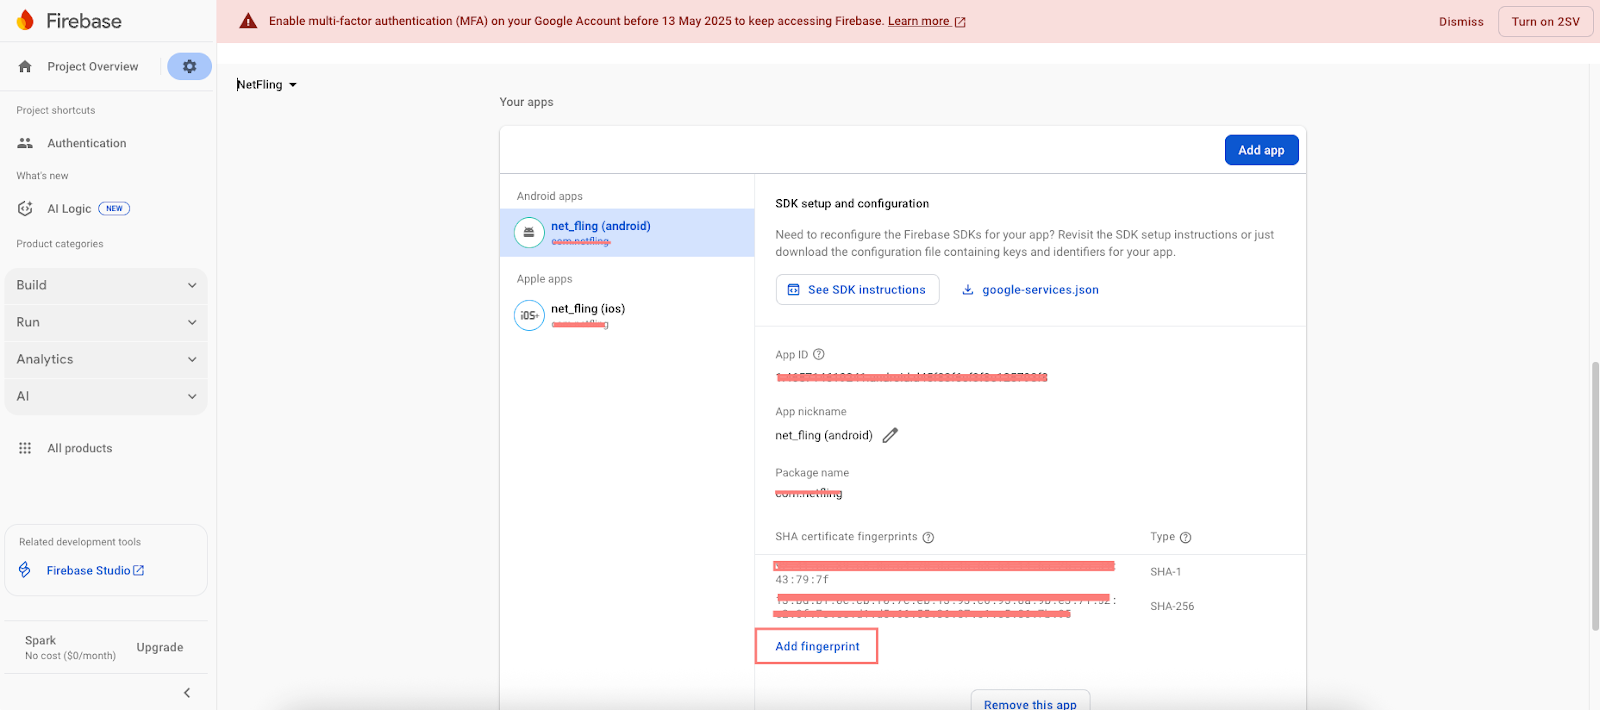
3. Flutter Android Setup
3.1 Changing the package name:
Navigate to the android directory within your Flutter project.
Open the AndroidManifest.xml file located in the app/src/main directory.
File Location: "project/android/app/src/main/AndroidManifest.xml"Find the package attribute in the tag and change its value to your desired package name.
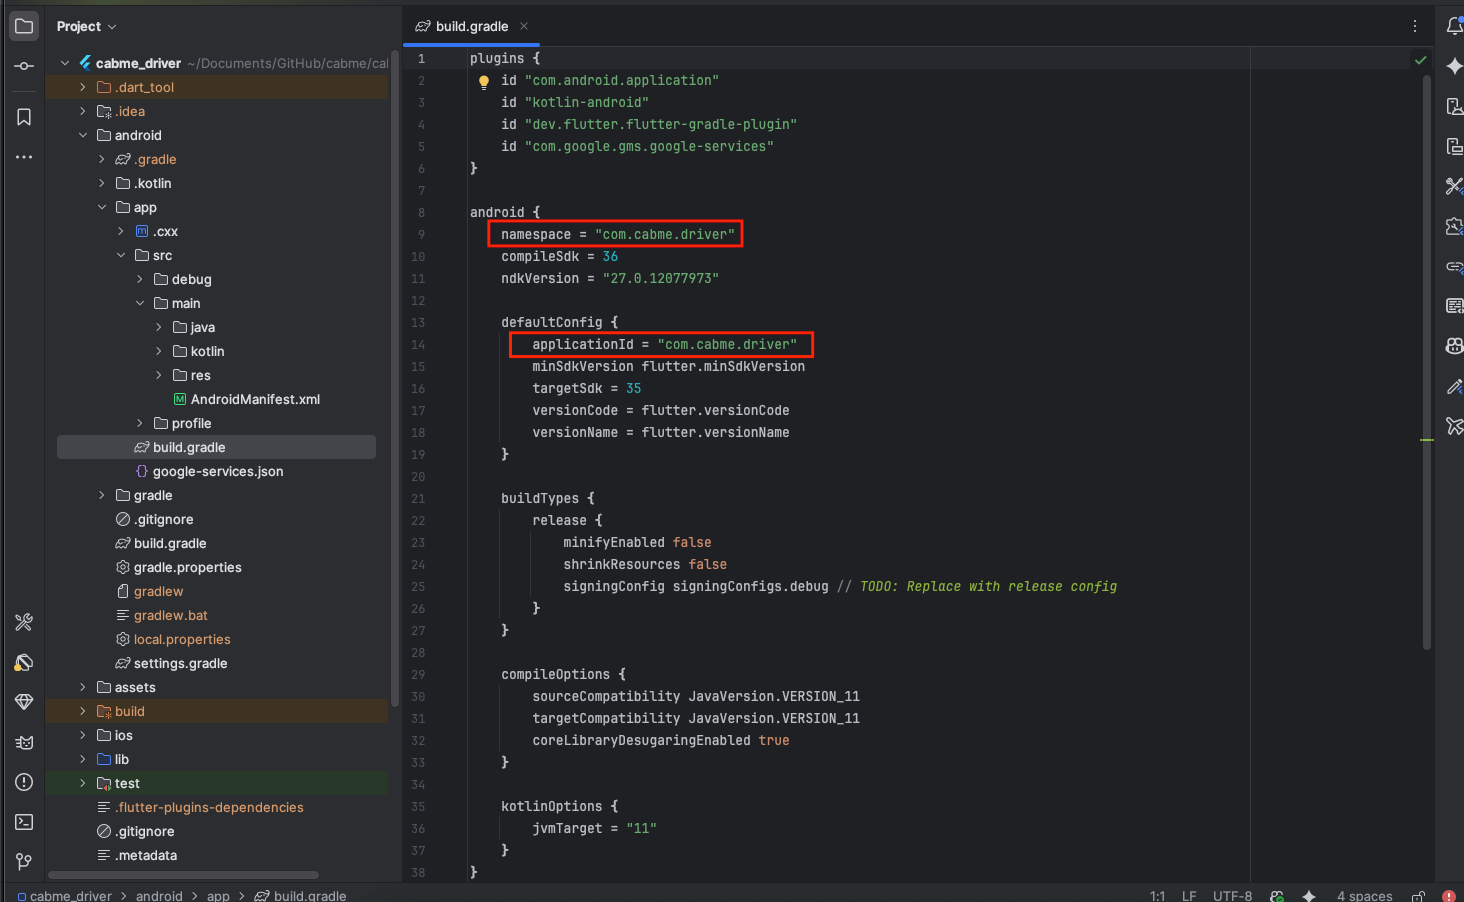
3.2 Update Android source code references:
Open the MainActivity.java file located in android/app/src/main/java/com/your_old_package_name.
Replace occurrences of the old package name with the new package name.
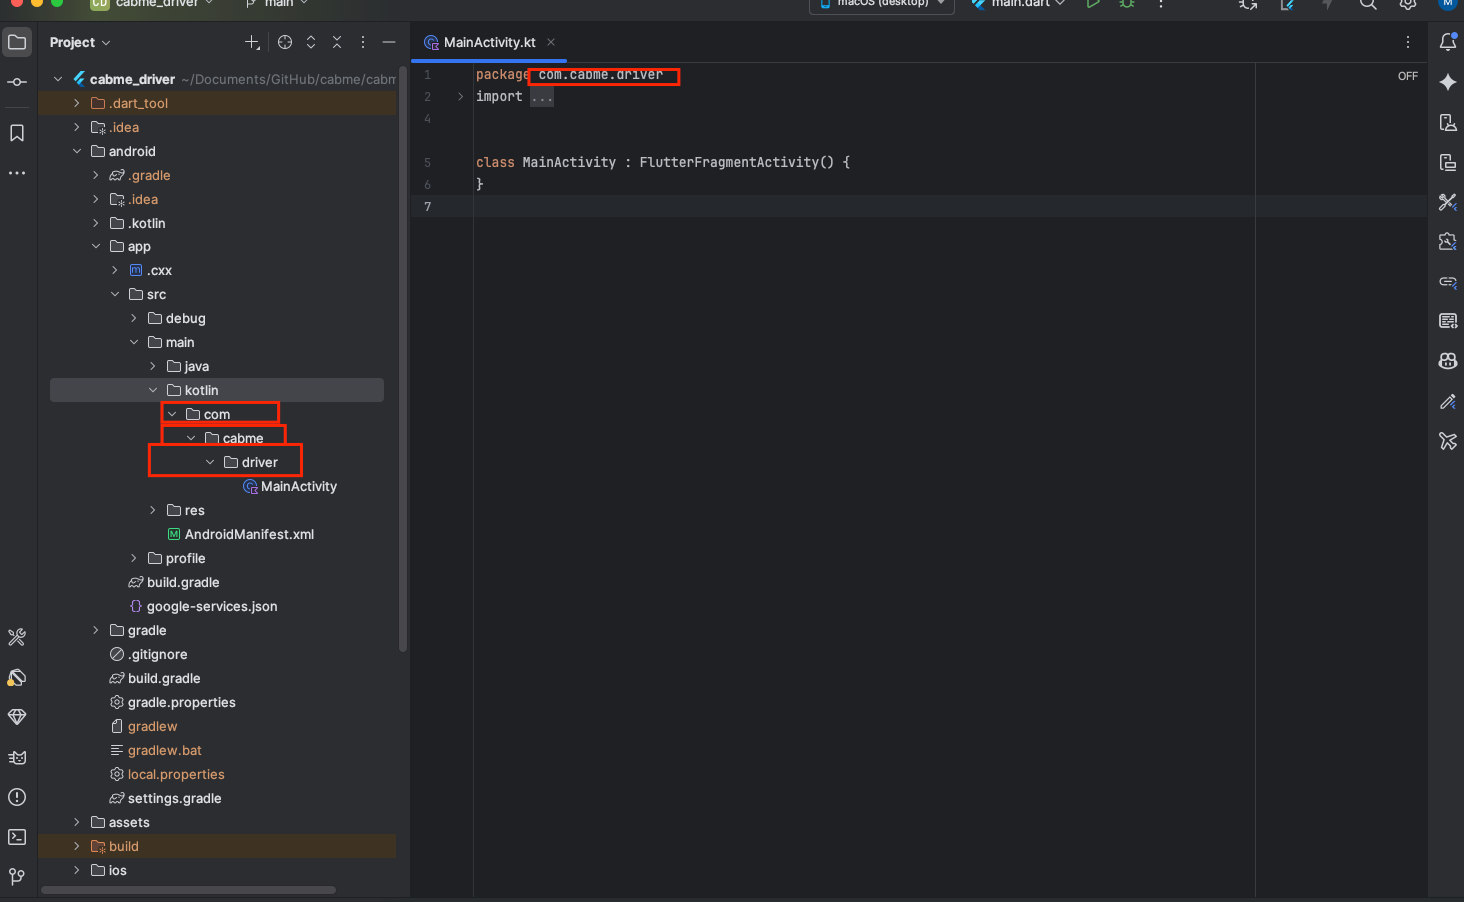
3.3 Change the launcher icon :
3.3.1. Prepare Your New Icons:
First, prepare the new launcher icon images in the required sizes. Android and iOS have different size requirements. You typically need icons in various sizes to support different screen densities.
For Android, you need to replace the existing launcher icon files with your new ones. The launcher icons for Android are stored in the mipmap folders inside the android/app/src/main/res directory.
Replace the existing icon files (ic_launcher.png) in the mipmap folders with your new icon files. Make sure to maintain the same file names and sizes.
You may need to replace icons in various drawable folders for different screen densities (e.g., mipmap-hdpi, mipmap-mdpi, mipmap-xhdpi, mipmap-xxhdpi, mipmap-xxxhdpi).
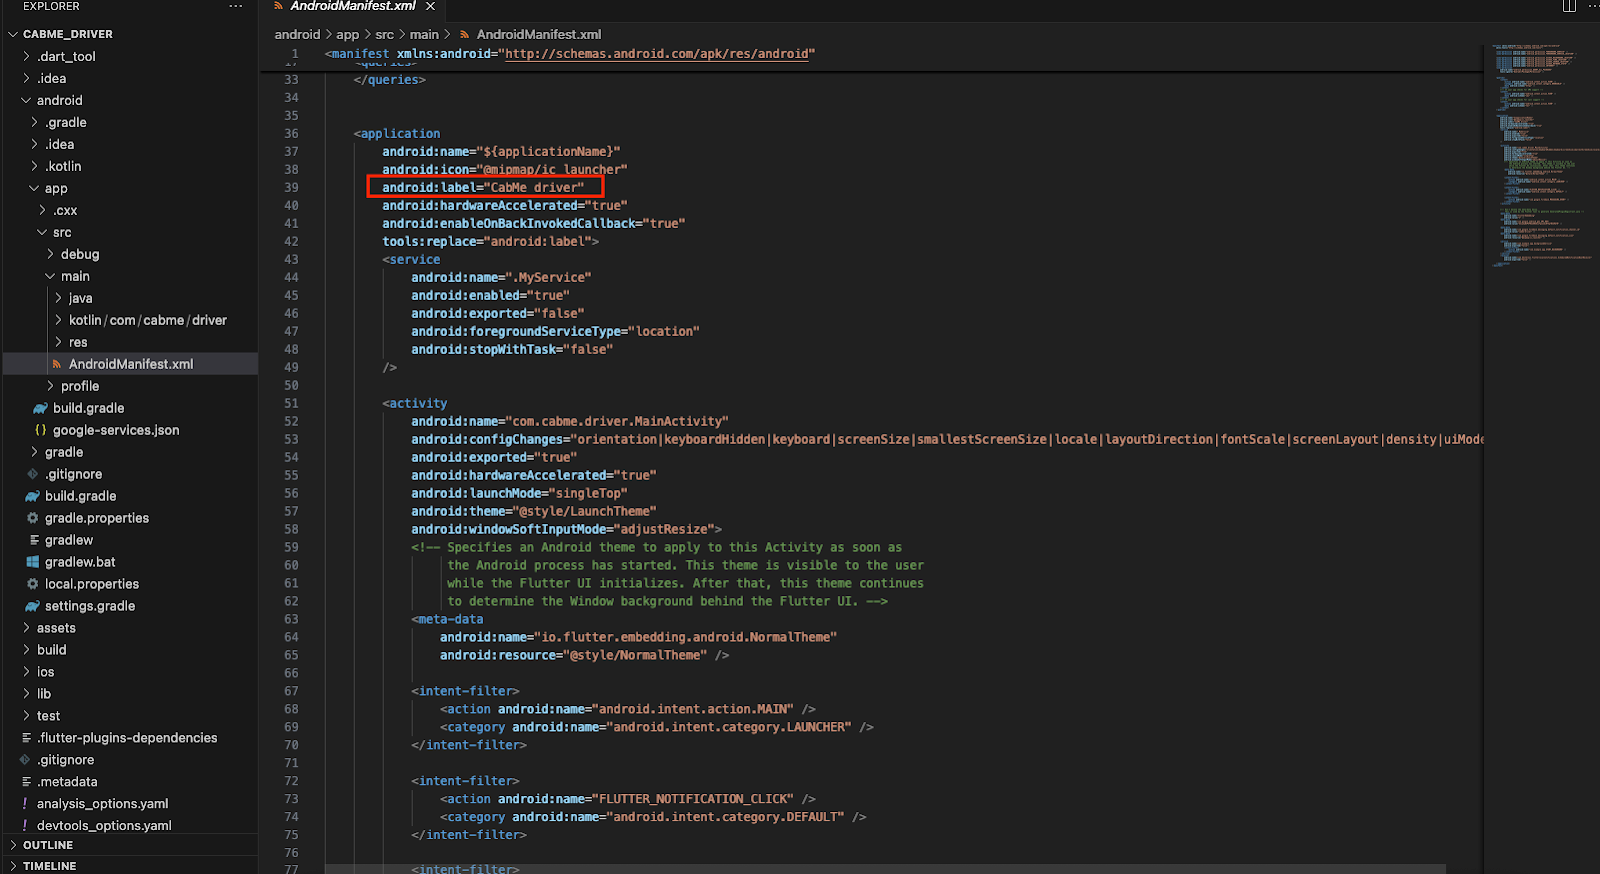
3.4. Change the app name
3.4.1. For Open the android/app/src/main/AndroidManifest.xml file.
3.4.2. Locate the tag.
3.4.3. Change the value of the android:label attribute to your desired app name.
3.5. Change the Google Maps API key :
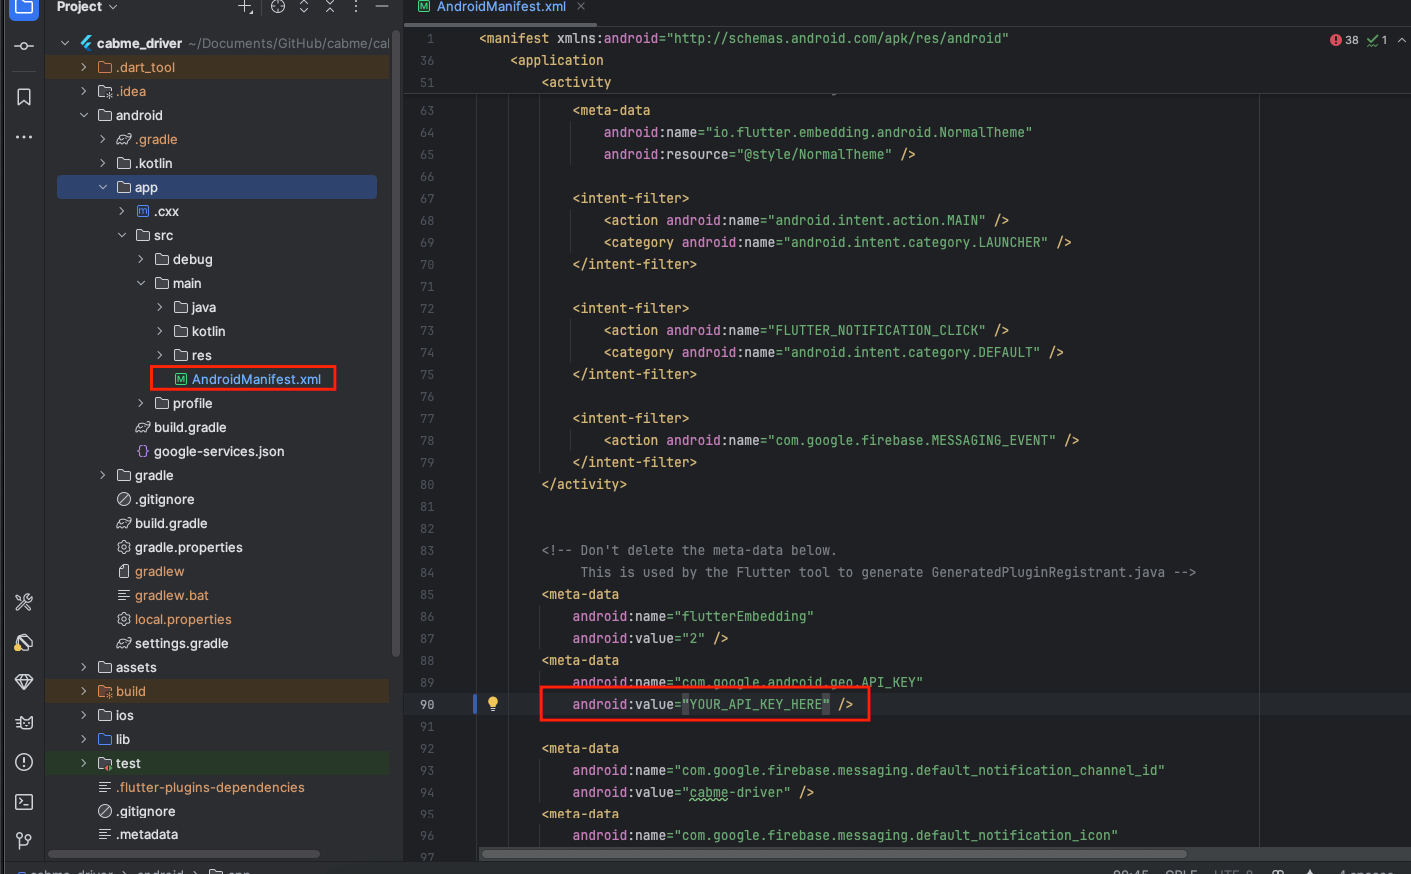
3.5.1. Navigate to your Flutter project’s android/app/src/main/AndroidManifest.xml file.
3.5.2. Inside the element, locate the tag with the name com.google.android.geo.API_KEY.
3.5.3. Replace the android:value attribute with your new Google Maps API key.
<meta-data android:name="com.google.android.geo.API_KEY"android:value="YOUR_API_KEY_HERE"/>
3.6. Create .jks for application live.
3.6.1. Open Terminal / Command Prompt
keytool -genkey -v -keystore ~/my-release-key.jks -keyalg RSA -keysize 2048 -validity 10000 -alias my-key-alias
3.6.2. Explanation
3.6.2.1. -keystore: The path where the .jks file will be created (~/my-release-key.jks for Unix/macOS, C:\Users\YourName\my-release-key.jks for Windows).
3.6.2.2. -keyalg RSA: Algorithm used.
3.6.2.3. -keysize 2048: Key length.
3.6.2.4. -validity 10000: Validity in days (~27 years).
3.6.2.5. -alias my-key-alias: Name of the key within the keystore.
3.6.3. Enter Required Info
3.6.3.1. Keystore password
3.6.3.2. Key password
3.6.3.3 Your name, organization, city, state, and country code
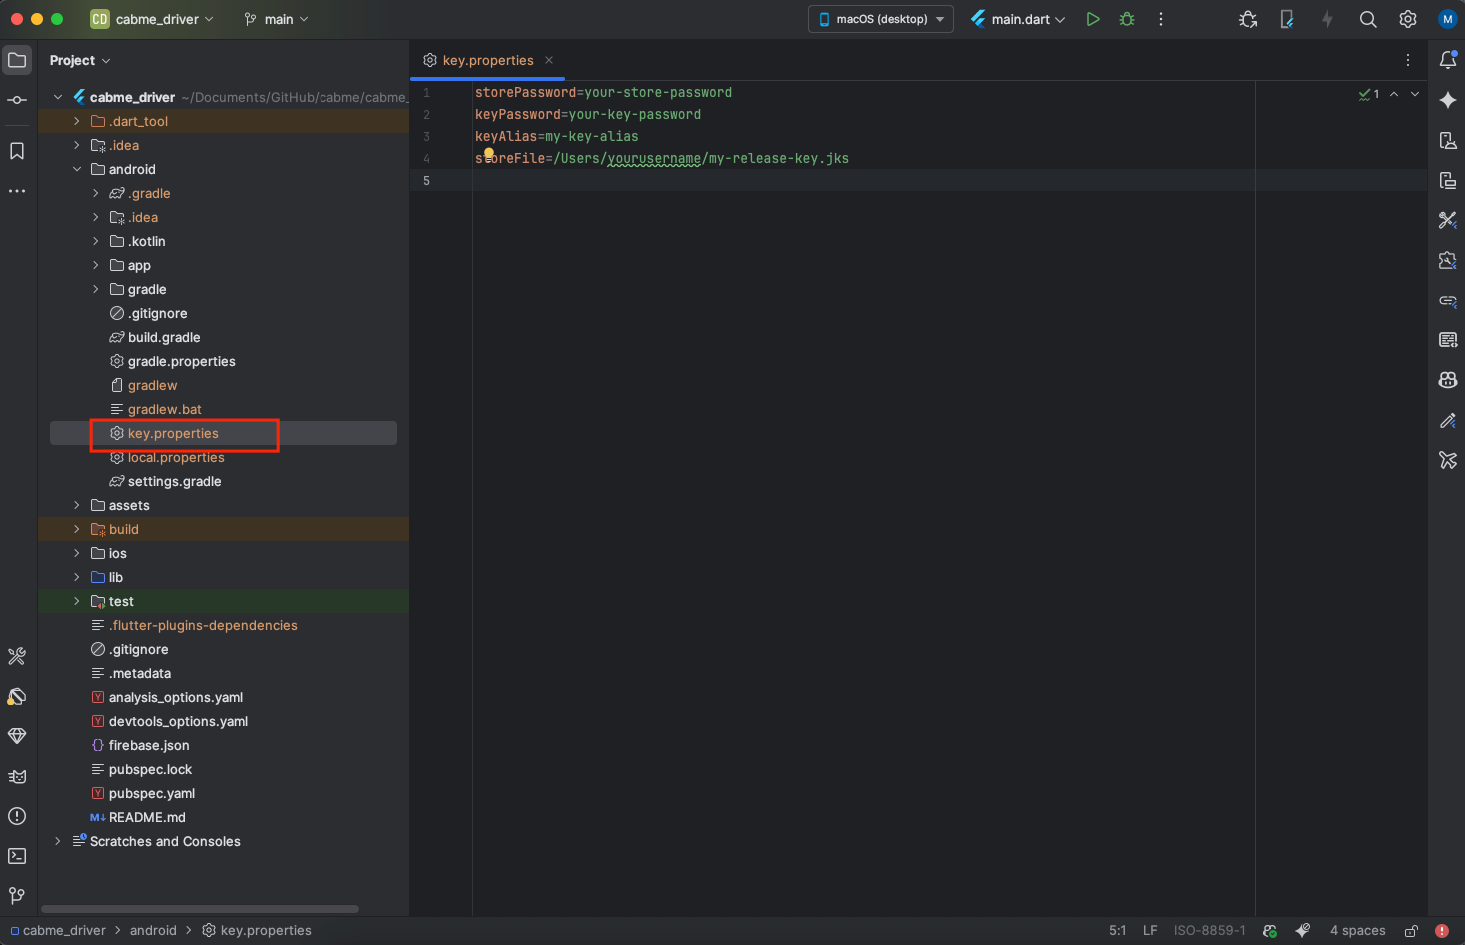
3.6.4. Configure key.properties in Flutter Project
3.6.4.1. Create a file: android/key.properties
storePassword=your-store-password
keyPassword=your-key-password
keyAlias=my-key-alias
storeFile=/Users/yourusername/my-release-key.jks
3.7. To generate SHA-1 and SHA-256 keys :
Important Notes:
This important for Phone Auth, Google Sign-In
3.7.1. Using Keytool:
3.7.1.1. Navigate to your JDK’s bin directory in the command line.
3.7.1.2. Execute the following command to generate the SHA-1 key:
keytool -list -v -keystore path-to-your-keystore-file -alias your-alias-name3.7.1.3. Replace path-to-your-keystore-file with the path to your keystore file (usually debug.keystore for debug builds and a custom keystore for release builds) and your-alias-name with the alias name used to generate the keystore.
3.7.1.4. Similarly, execute the following command to generate the SHA-256 key:
keytool -list -v -keystore path-to-your-keystore-file -alias your-alias-name -storetype PKCS12 -keyalg RSA
3.7.2. Using Gradle (Android Studio):
3.7.2.1. Open your Flutter project in Android Studio.
3.7.2.2. In the Android view, navigate to app -> Gradle Scripts -> build.gradle (Module: app).
3.7.2.3. Add the following lines to the android block
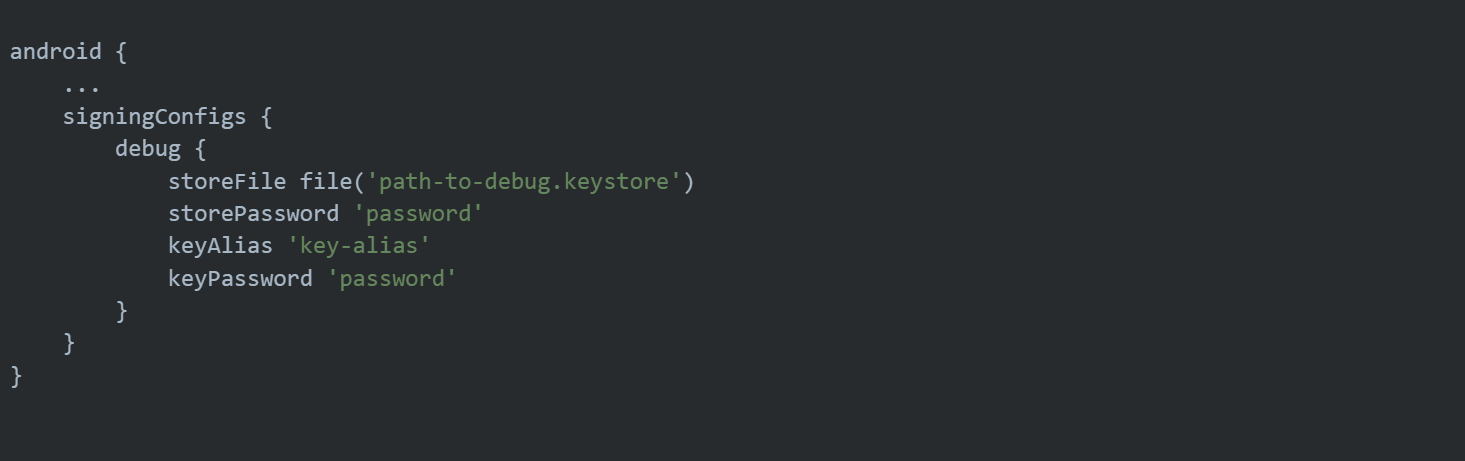
3.7.2.4. Replace path-to-debug.keystore, password, and key-alias with your keystore file path, password, and key alias respectively.
3.7.2.5. Sync your project to apply changes.
3.7.2.6. Run the following Gradle task in the terminal to get the SHA-1 and SHA-256 keys

3.7.3. Adding Keys to Firebase Console:
3.7.3.1. Go to the Firebase Console.
3.7.3.2. Select your project.
3.7.3.3. For Android:
Click on the Android icon to add an Android app.
Follow the setup instructions, including adding the google-services.json file to your Flutter project’s android/app directory.
During setup, you’ll be asked for your SHA-1 key. Paste the SHA-1 key you generated earlier.
After setup is complete, you’ll have the option to download the google-services.json file again. Replace the existing file in your project if needed.
3.7.3.4. For IOS:
Click on the iOS icon to add an iOS app.
Follow the setup instructions, including downloading the GoogleService-Info.plist file.
There’s no need to add SHA-1 or SHA-256 keys for iOS.
Add the downloaded GoogleService-Info.plist file to your Flutter project’s ios/Runner directory.