3. Admin Panel Setup (Laravel)
Ensure that your server meets the requirements outlined in the documentation’s Server Requirement section. Upon downloading the code, upload the admin zip file to your server and extract it. The admin panel can be installed on either a domain or a subdomain.
3.1 Connect to FTP and Setup
Follow these instructions to connect to your server using FTP and complete the application setup:
3.1.1: Connect to the server using FTP: Use an FTP client like FileZilla to connect to your server. Enter the server’s IP address, username, and password. Use port 21 for FTP or port 22 for SFTP.
3.1.2: Transfer the ZIP file: Upload your admin panel’s ZIP file to the server’s local path (e.g., /var/www/html).
3.1.3: Unzip the file: Navigate to the file’s location on the server and run the following command to extract the ZIP file: “sudo unzip your-application.zip” or you can do it from cpanel directly.
3.1.4: Update the .env file with your configuration: Modify the database and application settings which are mentioned in the .env file. Below is an example configuration:
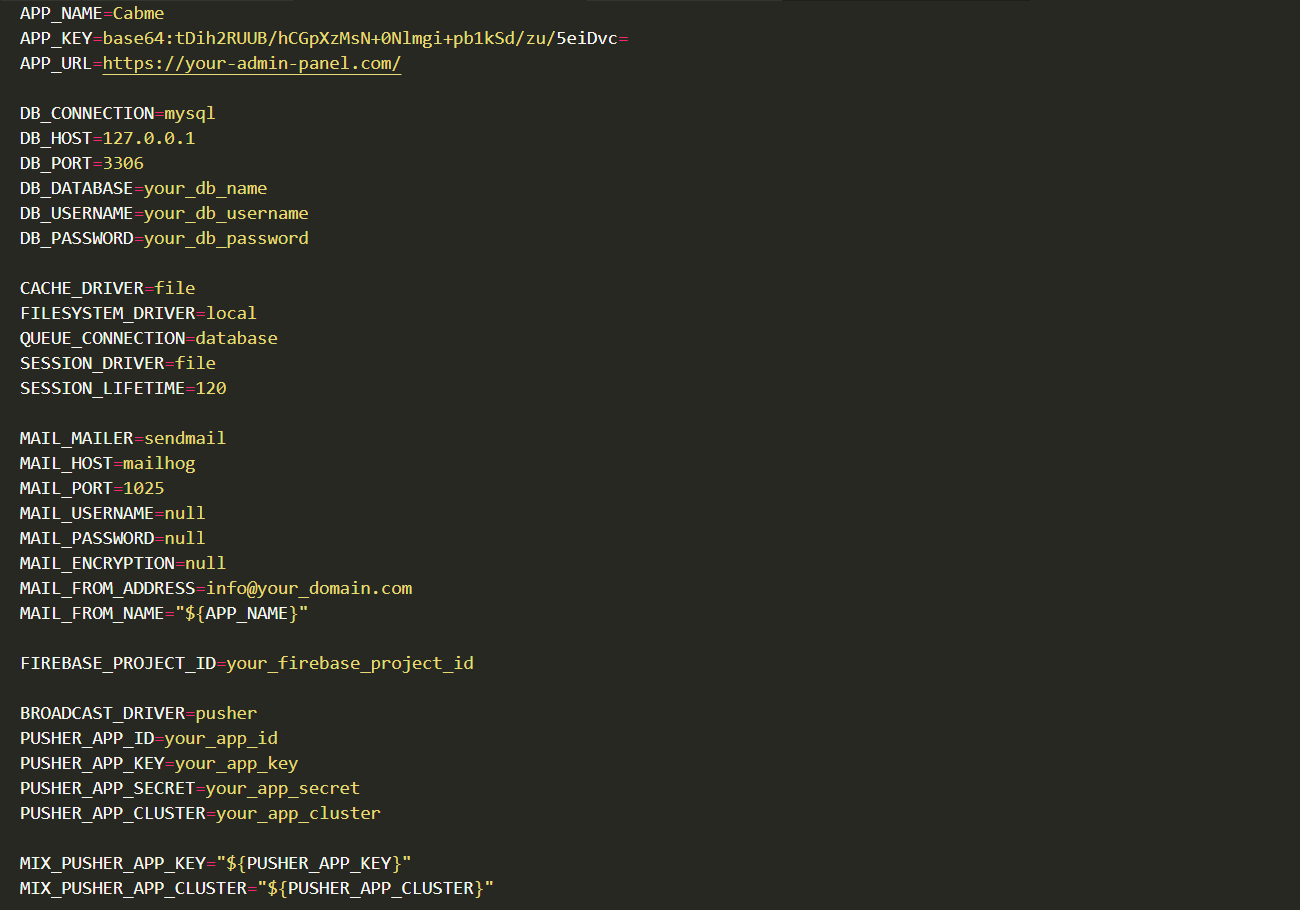
3.1.5: Run the following command one by one.

If you encounter any errors while creating a key, please run the following command to update all system packages.

Now you can find the generated application key in the .env file located at the root path of the admin panel.
3.2 Pusher Setup
Please ensure to update your pusher credentials in the .env file. To use realtime updates in the application.
Steps to Get Pusher Credentials
3.2.1. Create a Pusher Account
- Go to https://pusher.com
- Click Sign Up (or log in if you already have an account)
- Verify your email and log in to the Pusher Dashboard
3.2.2. Create a New App
- In the dashboard, click Create New App
- Enter your App Name (e.g., CabMe)
- Choose the Cluster/Region closest to your server (e.g.,
ap2for Asia,us2for US East, etc.) - Select Laravel as the backend technology (frontend can be anything)
- Click Create App
3.2.3. Copy Your Credentials
After creating, you will get these values:
- App ID
- Key
- Secret
- Cluster
3.3 CRON Job Setup
A cron job is a scheduled task in Unix-based operating systems that runs scripts or commands at specified intervals. Here’s how to set up a cron job on a server:
Steps to Set Up a Cron Job:
3.3.1: Log in to cPanel or in your web server
3.3.2: Navigate to the “Cron Jobs” Section
3.3.3: Add a New Cron Job
In the command field, enter the command or the path to the script you want to run.
For example: Run a script every minutes:
* * * * * /usr/local/bin/php /home/username/public_html/artisan schedule:run >> /dev/null 2>&1
For example: Run a script every day at midnight:
0 0 * * * /usr/local/bin/php /home/username/public_html/artisan schedule:run >> /dev/null 2>&1
3.3.4: Save the Cron Job
Please Note:
Ensure the script you’re running has the correct permissions and is executable. You need to specify the correct PHP path (/usr/local/bin/php is common but may vary depending on your server setup) and please use your admin panel path in the CRON JOB command.
3.4 Map Configuration
Please choose your preferred map by navigating to the Admin Panel > General Settings > Map Tracking Options.
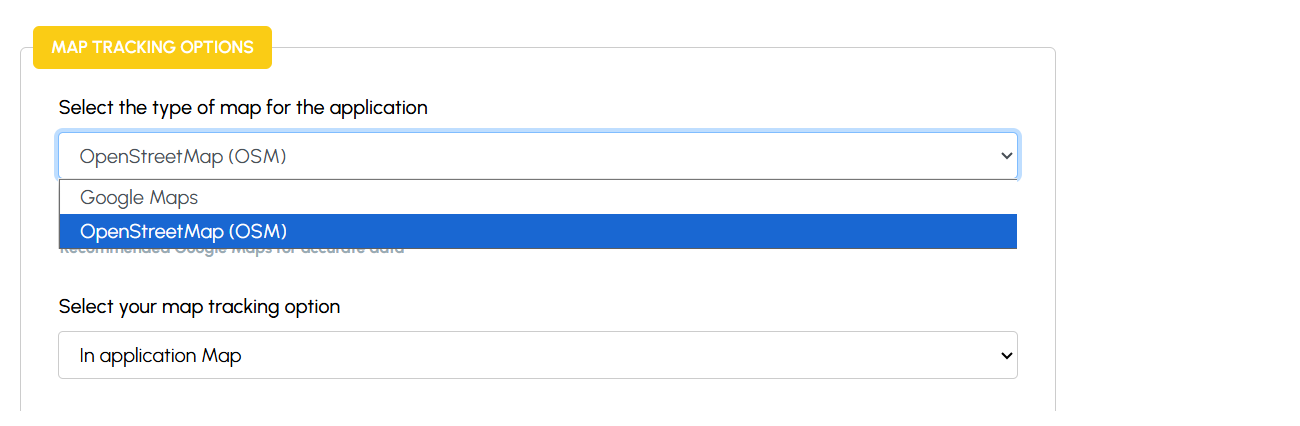
Please Note:
Recommended Google Map for accurate location and mapping results.
3.5 Firebase Project Setup
3.5.1: Go to firebase console through this link: https://firebase.google.com/
3.5.2: Click on “Go to console” in the top right corner.

3.5.3: Click on “Add project”, it will redirect you to the new project creation page Enter your project name and click on “Continue” again click on “Continue” after that select “Default Account fo firebase” and then click on “Create Project”
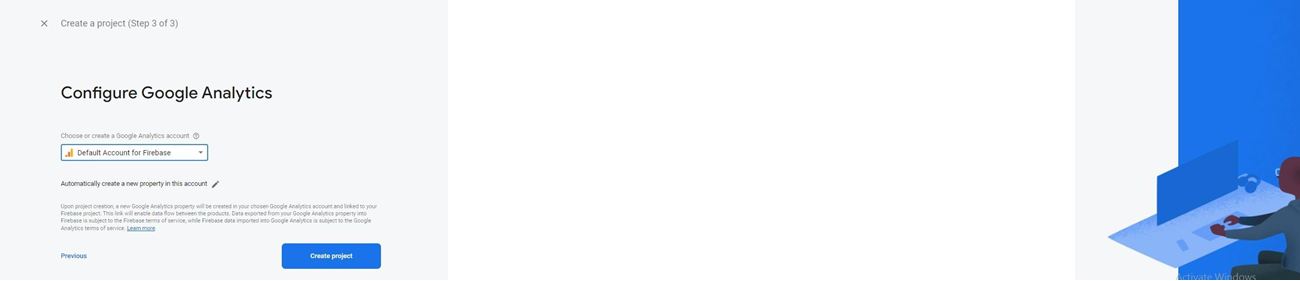
3.5.4: After successfully creating a new project, you will be directed to the overview page. From there, simply navigate to the icons link to proceed further.
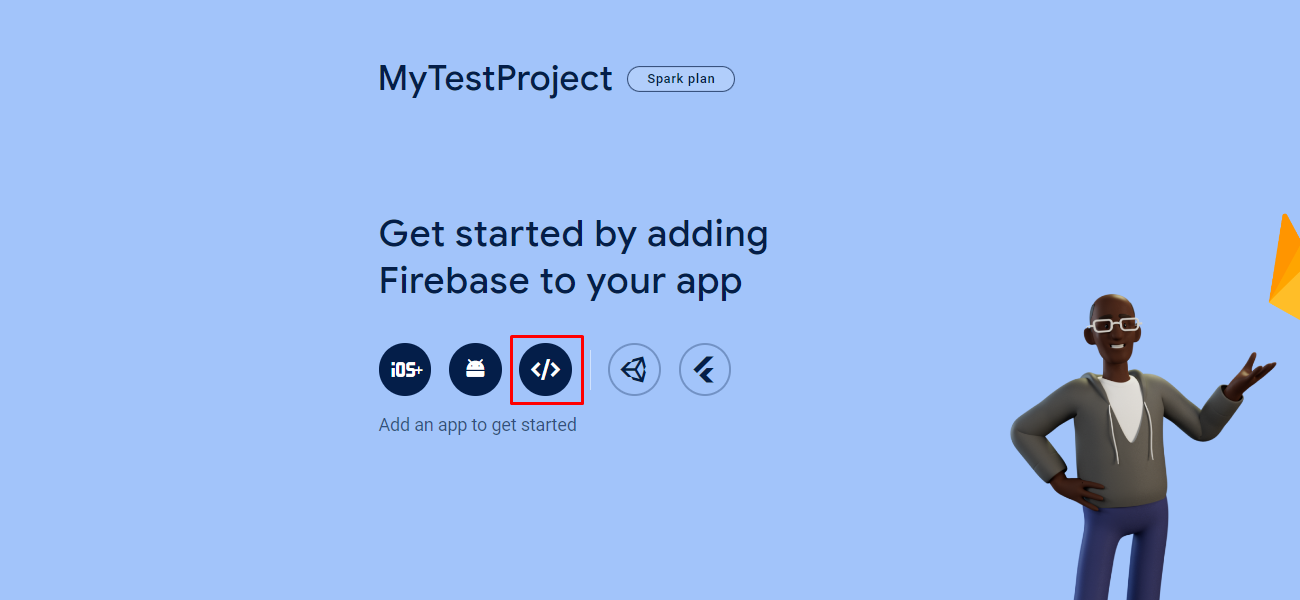
Upon redirection, you’ll land on the ‘Add Firebase to your web app’ page. Here, input your app’s nickname and proceed by clicking ‘Register app’.
3.5.5: Next, navigate to ‘Firestore Database’ in the left sidebar. Select your project name from the drop-down menu, and then proceed by clicking on ‘Create database’.
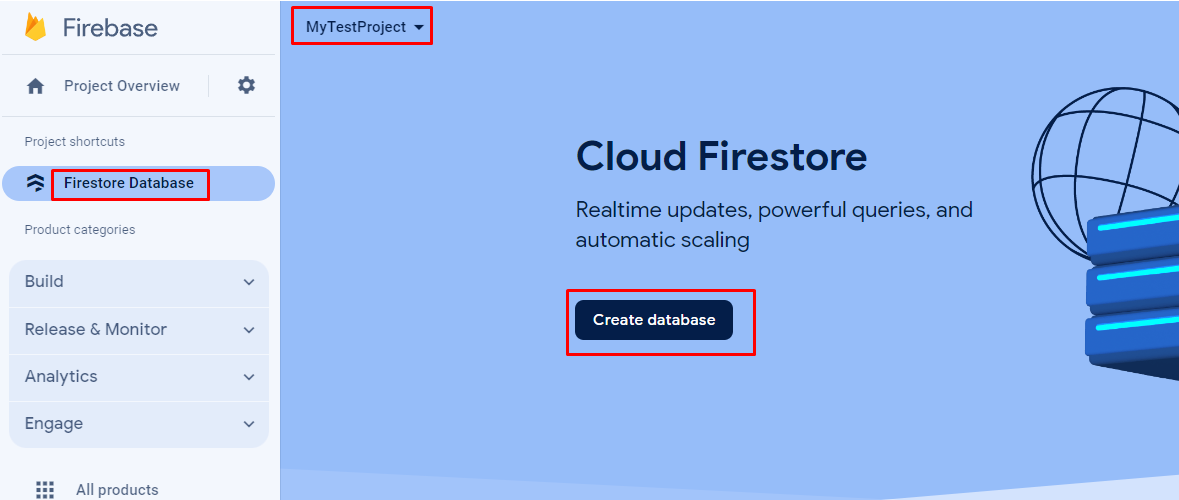
3.5.6: Choose your preferred option and click on the ‘Next’ button. Subsequently, proceed by clicking on “Enable”
3.5.7: Following that, locate “Realtime Database” in the left sidebar. Select your project name from the drop-down menu, and proceed by clicking on “Create Database”
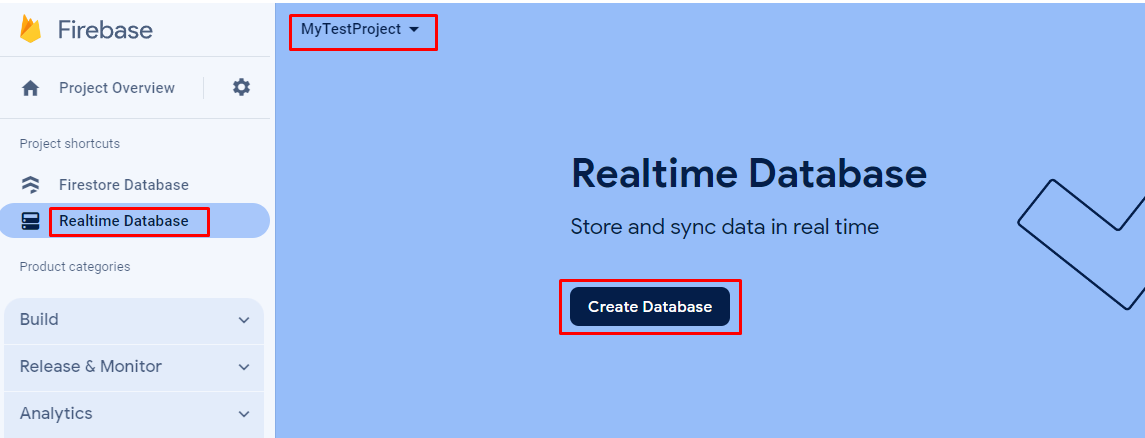
3.5.8: Choose your preferred option and proceed by clicking the “Next” button, then click on “Enable” to activate the selected feature.
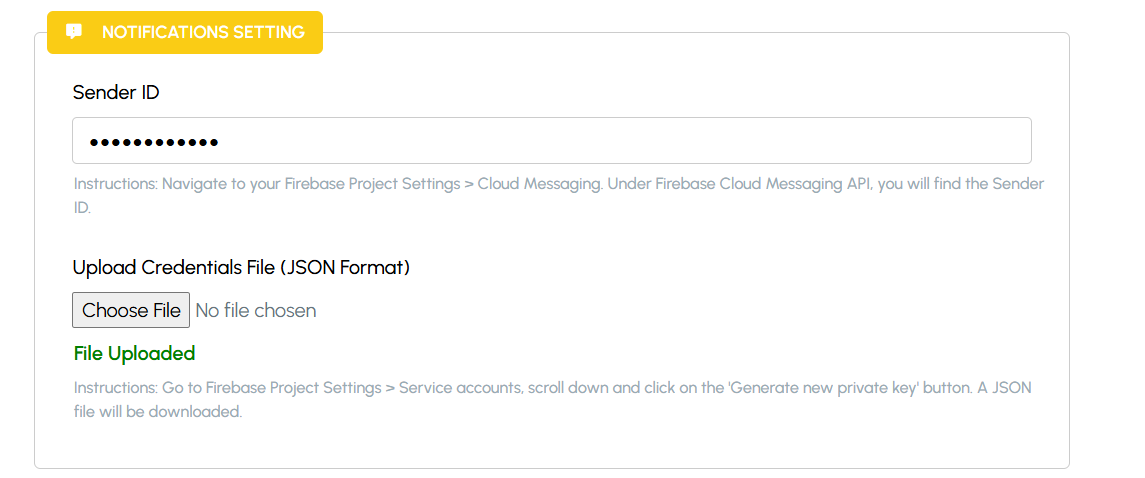
3.5.9: Navigate to your Firebase Project Settings > Cloud Messaging. Under Firebase Cloud Messaging API, you will find the Sender ID.
3.5.10: Go to Firebase Project Settings > Service accounts, scroll down and click on the ‘Generate new private key’ button. A JSON file will be downloaded.
3.6 Notifications Settings
To work firebase push notification feature functions correctly, please upload your Firebase credentials file in the Admin Panel by navigating to General Settings > Notifications Settings.
3.7 Accessing the Admin Panel
Default Admin User Credentials
URL: Your desired URL where the admin panel is set up.
Email: admin@cabme.com
Password: 12345678